2-part Honeycomb generic steel sheet holder
by Fluid · via Printables
| Format | STL |
| Category | Organisation |
| License | Public Domain (CC0) |
| Triangles | 626 |
| Uploaded | Apr 29, 2023 |
⬇ 295 downloads
❤ 86 likes
👁 1.3k views
Description
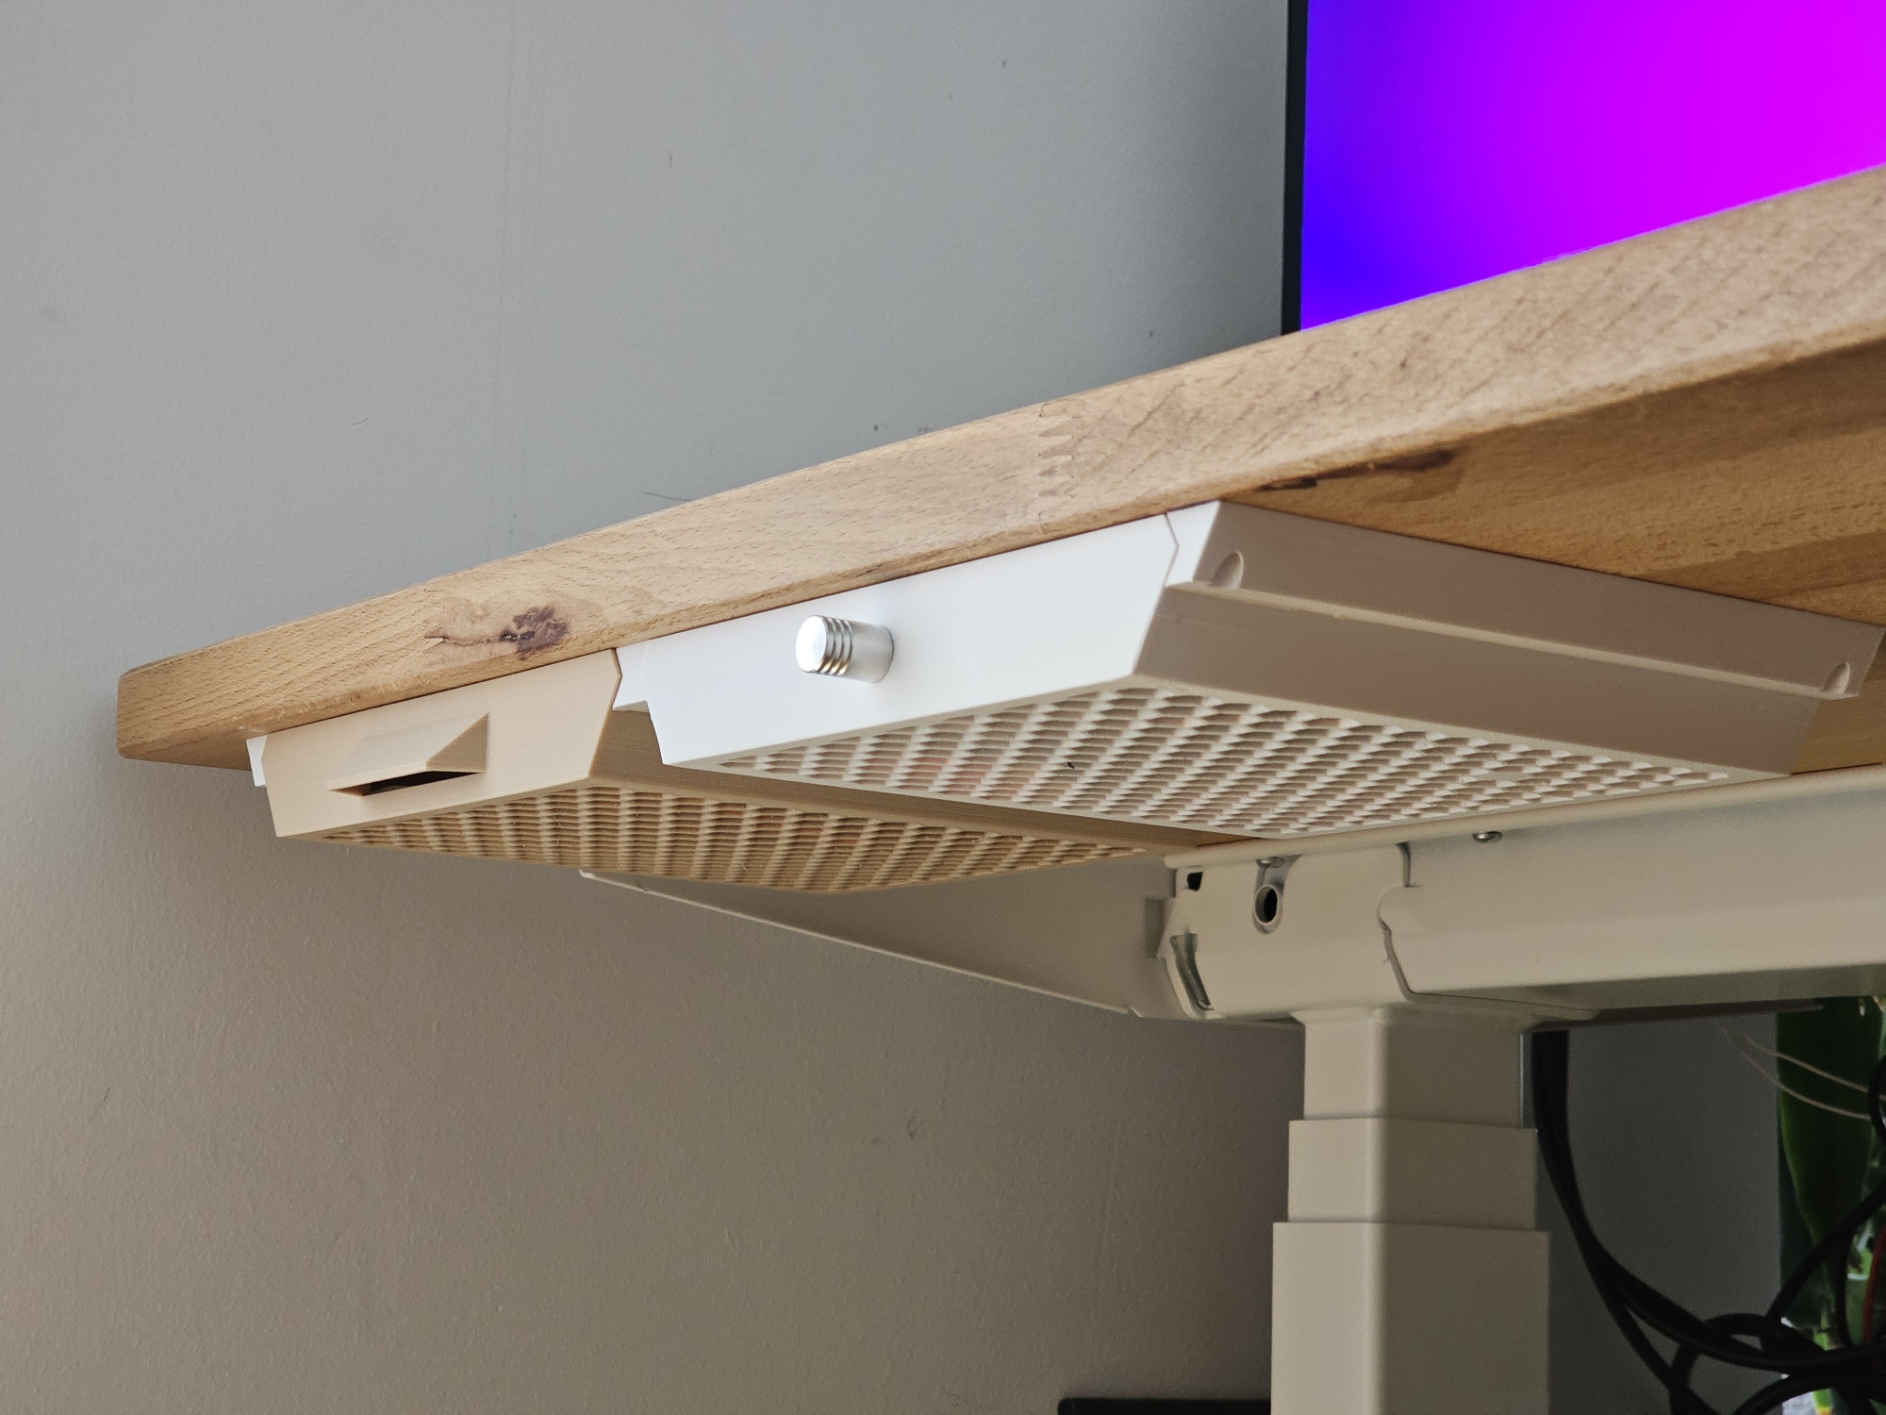
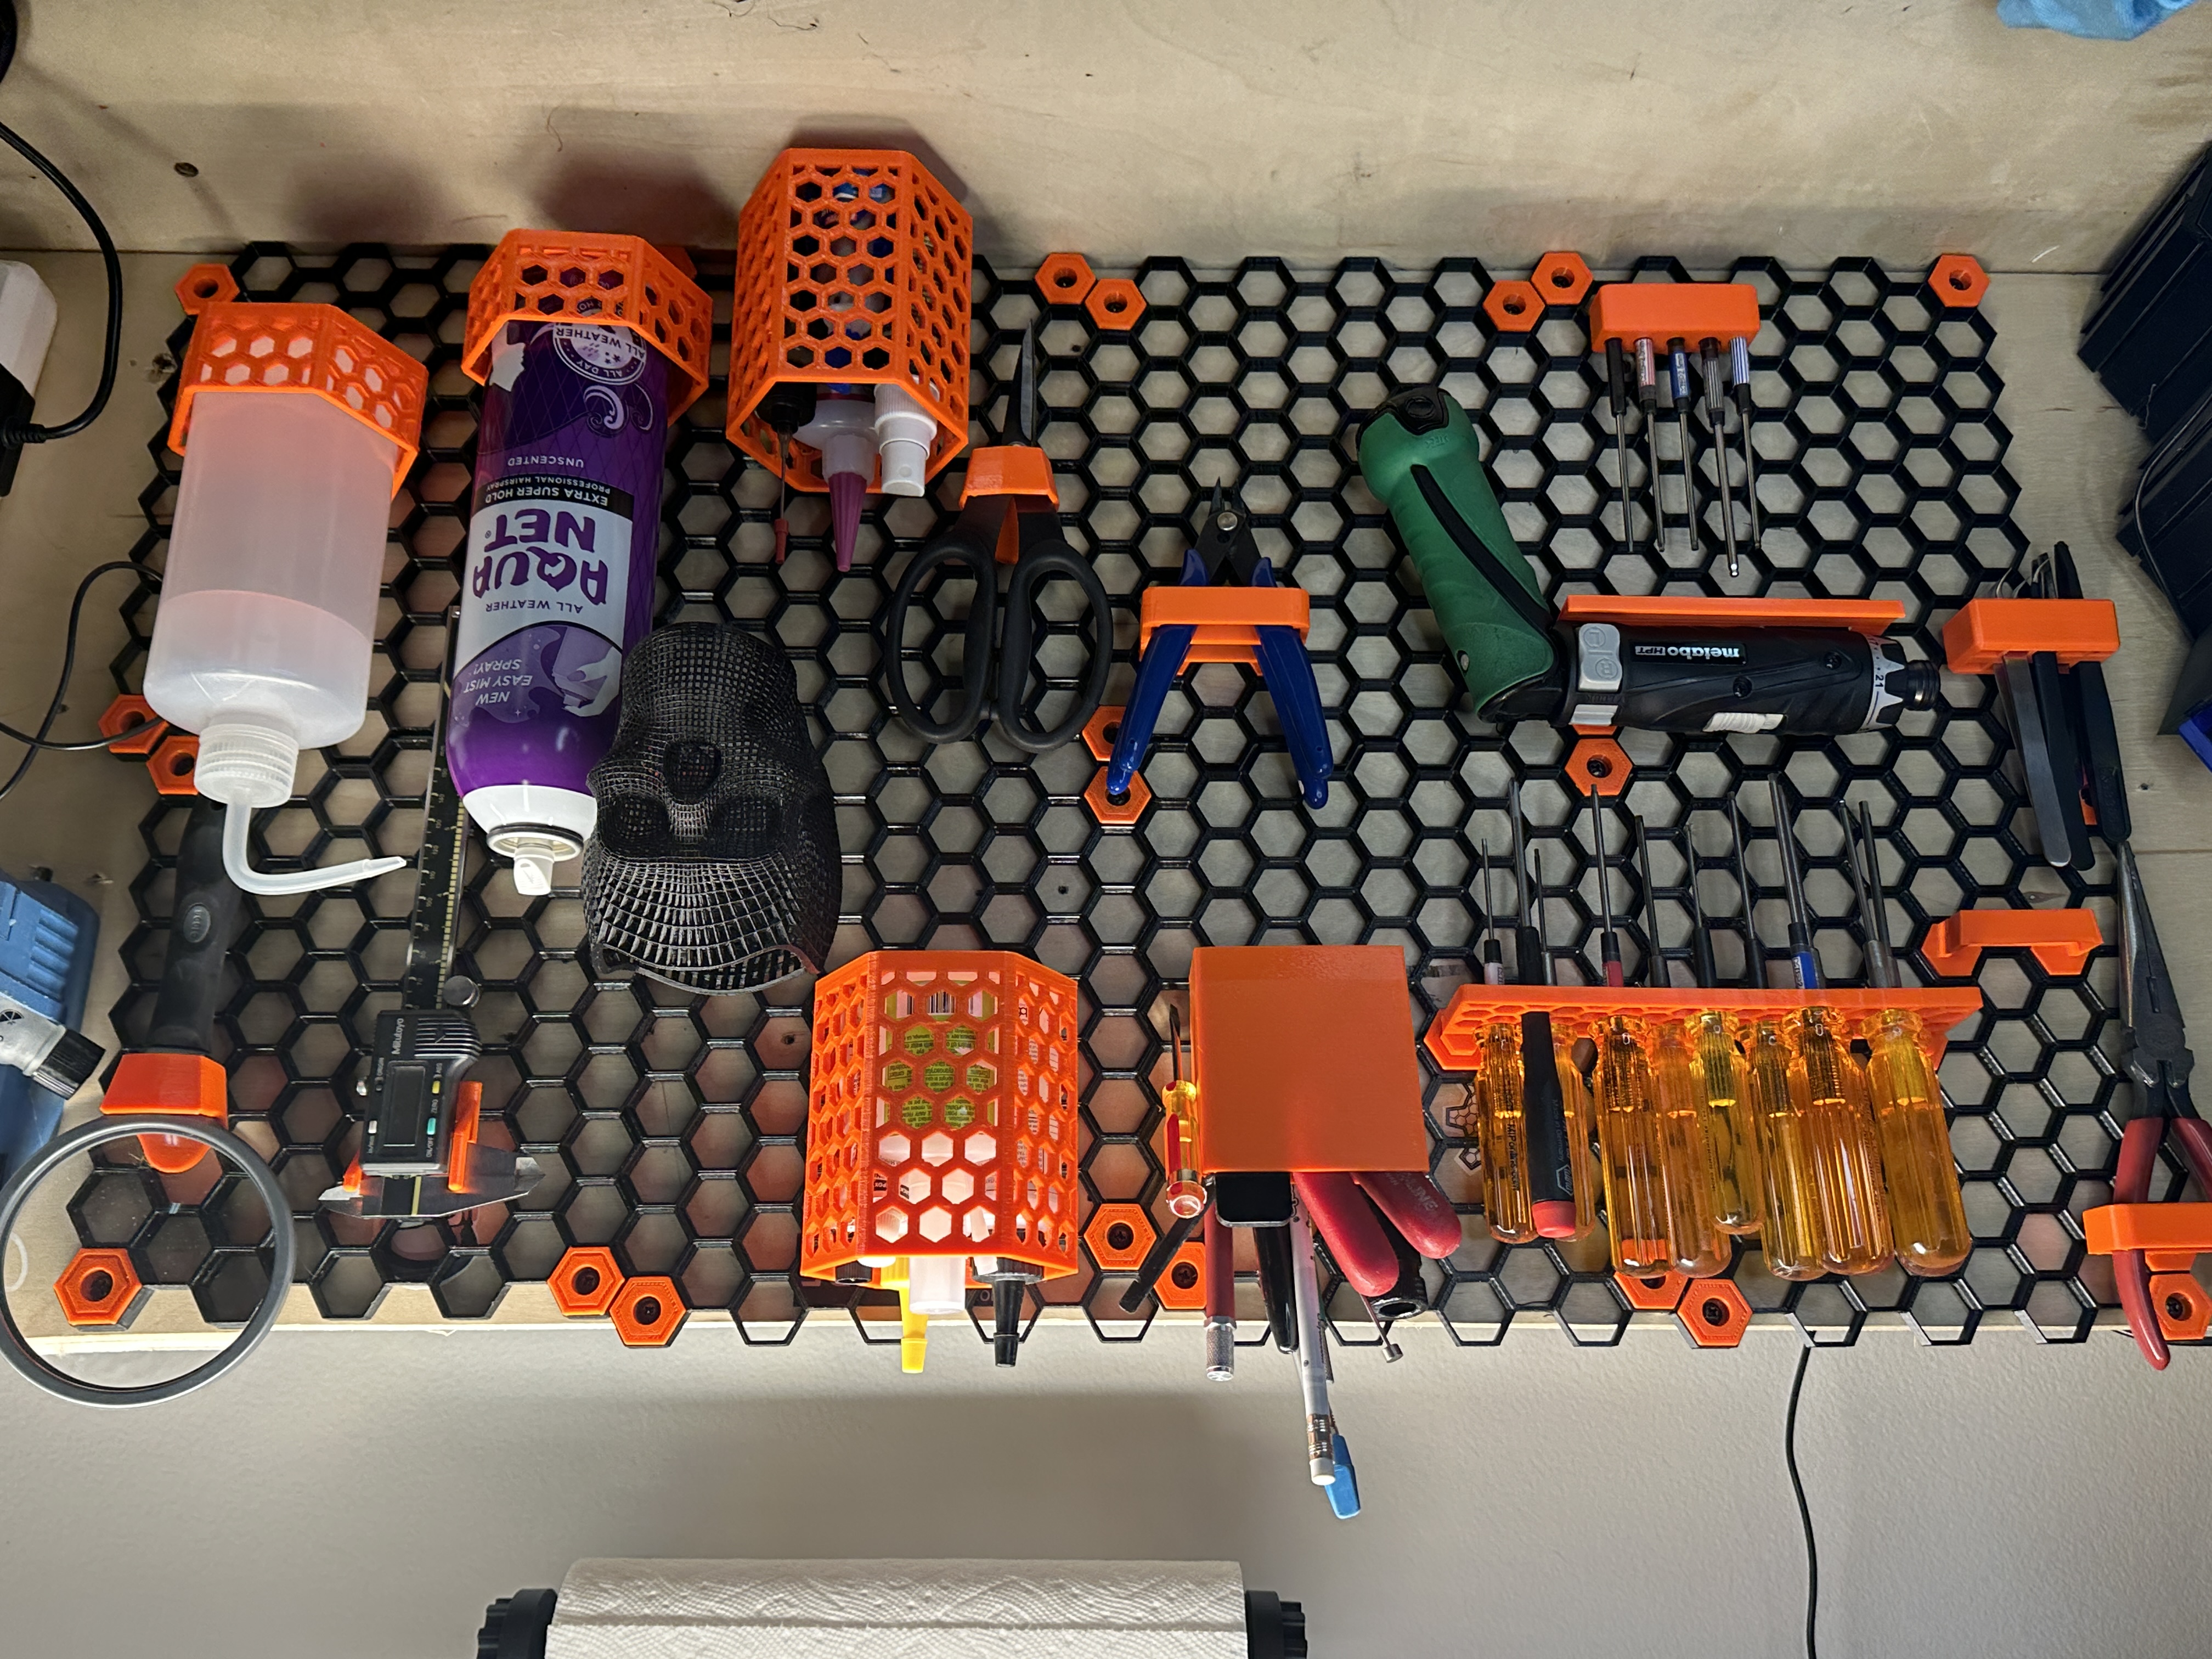
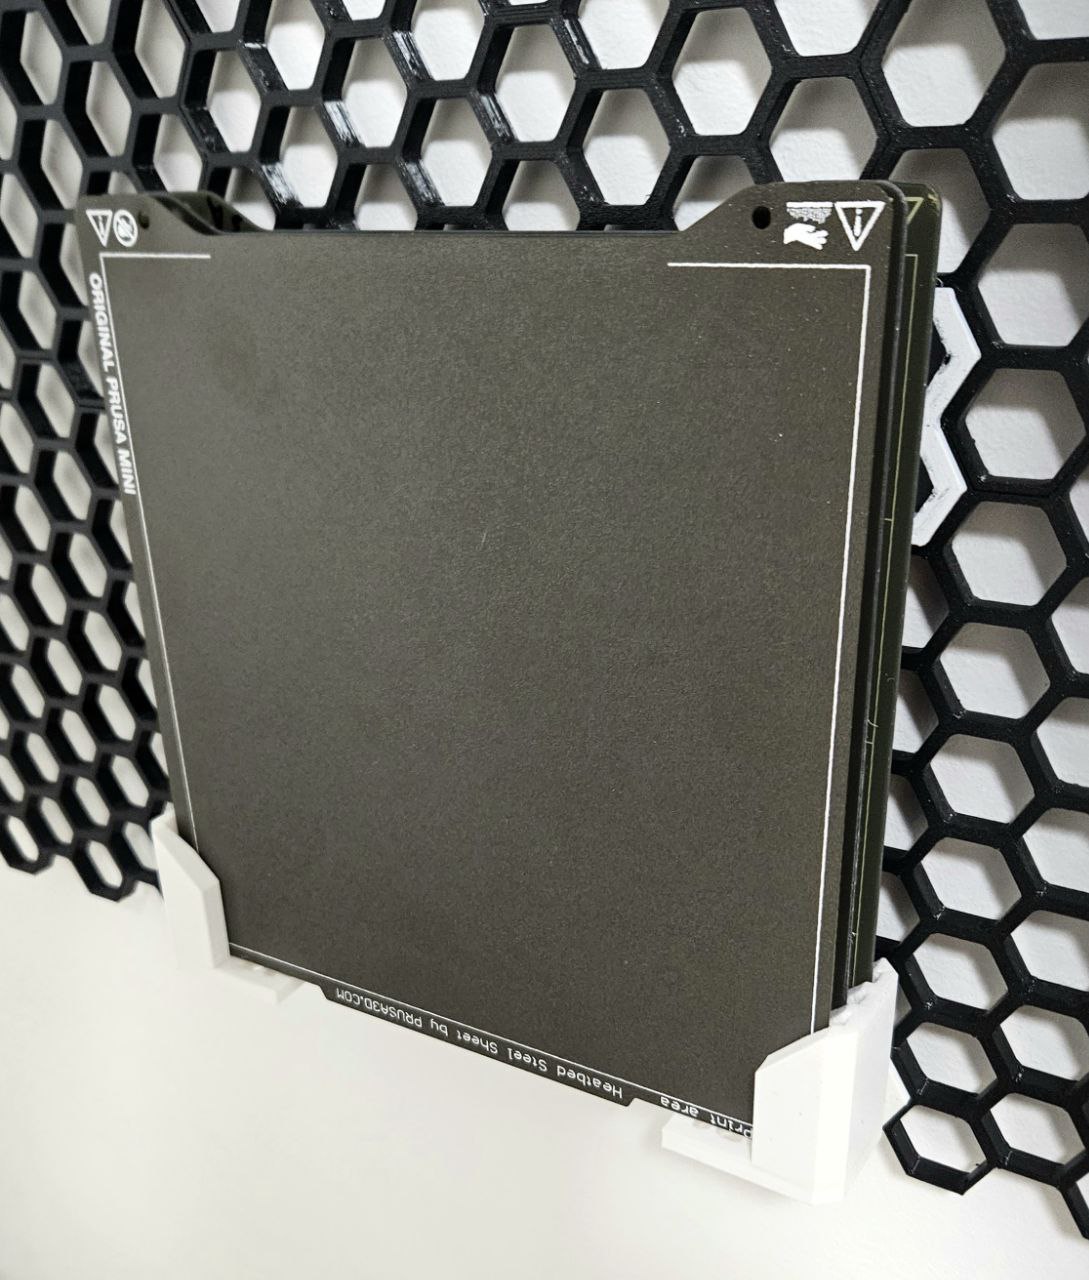
This is a simple remix of the Honeycomb Prusa Steel Sheet holder made to be printable on smaller printers (like the MINI+) and usable for various sheet sizes. I've realized that by attaching the holder to the wall the middle section becomes pretty much redundant, so I arbitrarily cut off a significant portion of it (though I left a bit because I like the design). Now the holder is printed as two separate pieces, where each attaches to the wall individually. The steel sheets are fairly light, so the loss of structural stability should be negligible. I've also added a version with an offset wall attachment point so you can finely adjust the distance between the two ends of the holder (needs supports to print). Make sure to measure the optimal distance (using your own steel sheets) before choosing which files to print. When fully inserted into the holder, the edge of the steel sheet aligns with the end of the tallest part of the hexagons, at the two points where the sides start to come together towards the edge point (left point for left holder, right point for right holder). Align your steel sheet with one vertical line that crosses these points, then look for the last such line the steel sheet crosses over on the other side. The first column of hexagons after that line is where your other holder will be. If the number of hexagon columns between your holders is odd, you'll want to pick holders with attachment points which are on the same level, otherwise choose different levels for the left and the right holder. I've found that for the MINI/MINI+ sheets the ideal distance between the holders is 8 columns of hexagons. However, you don't necessarily need to reprint a part if you accidentally chose the wrong type. The hexagonal attachment points aren't too difficult to cut off using a heated knife, and can be easily glued on with superglue. Just glue it 11.75mm away from where it was (higher or lower, depending on which part you printed wrong) and you're set!
Originally published on Printables