3-Point Bending Test
by JanTec · via Printables
| Format | STL |
| Category | Other |
| License | CC BY-NC |
| Triangles | 3.9k |
| Uploaded | Jul 28, 2024 |
⬇ 166 downloads
❤ 48 likes
👁 2.4k views
Description
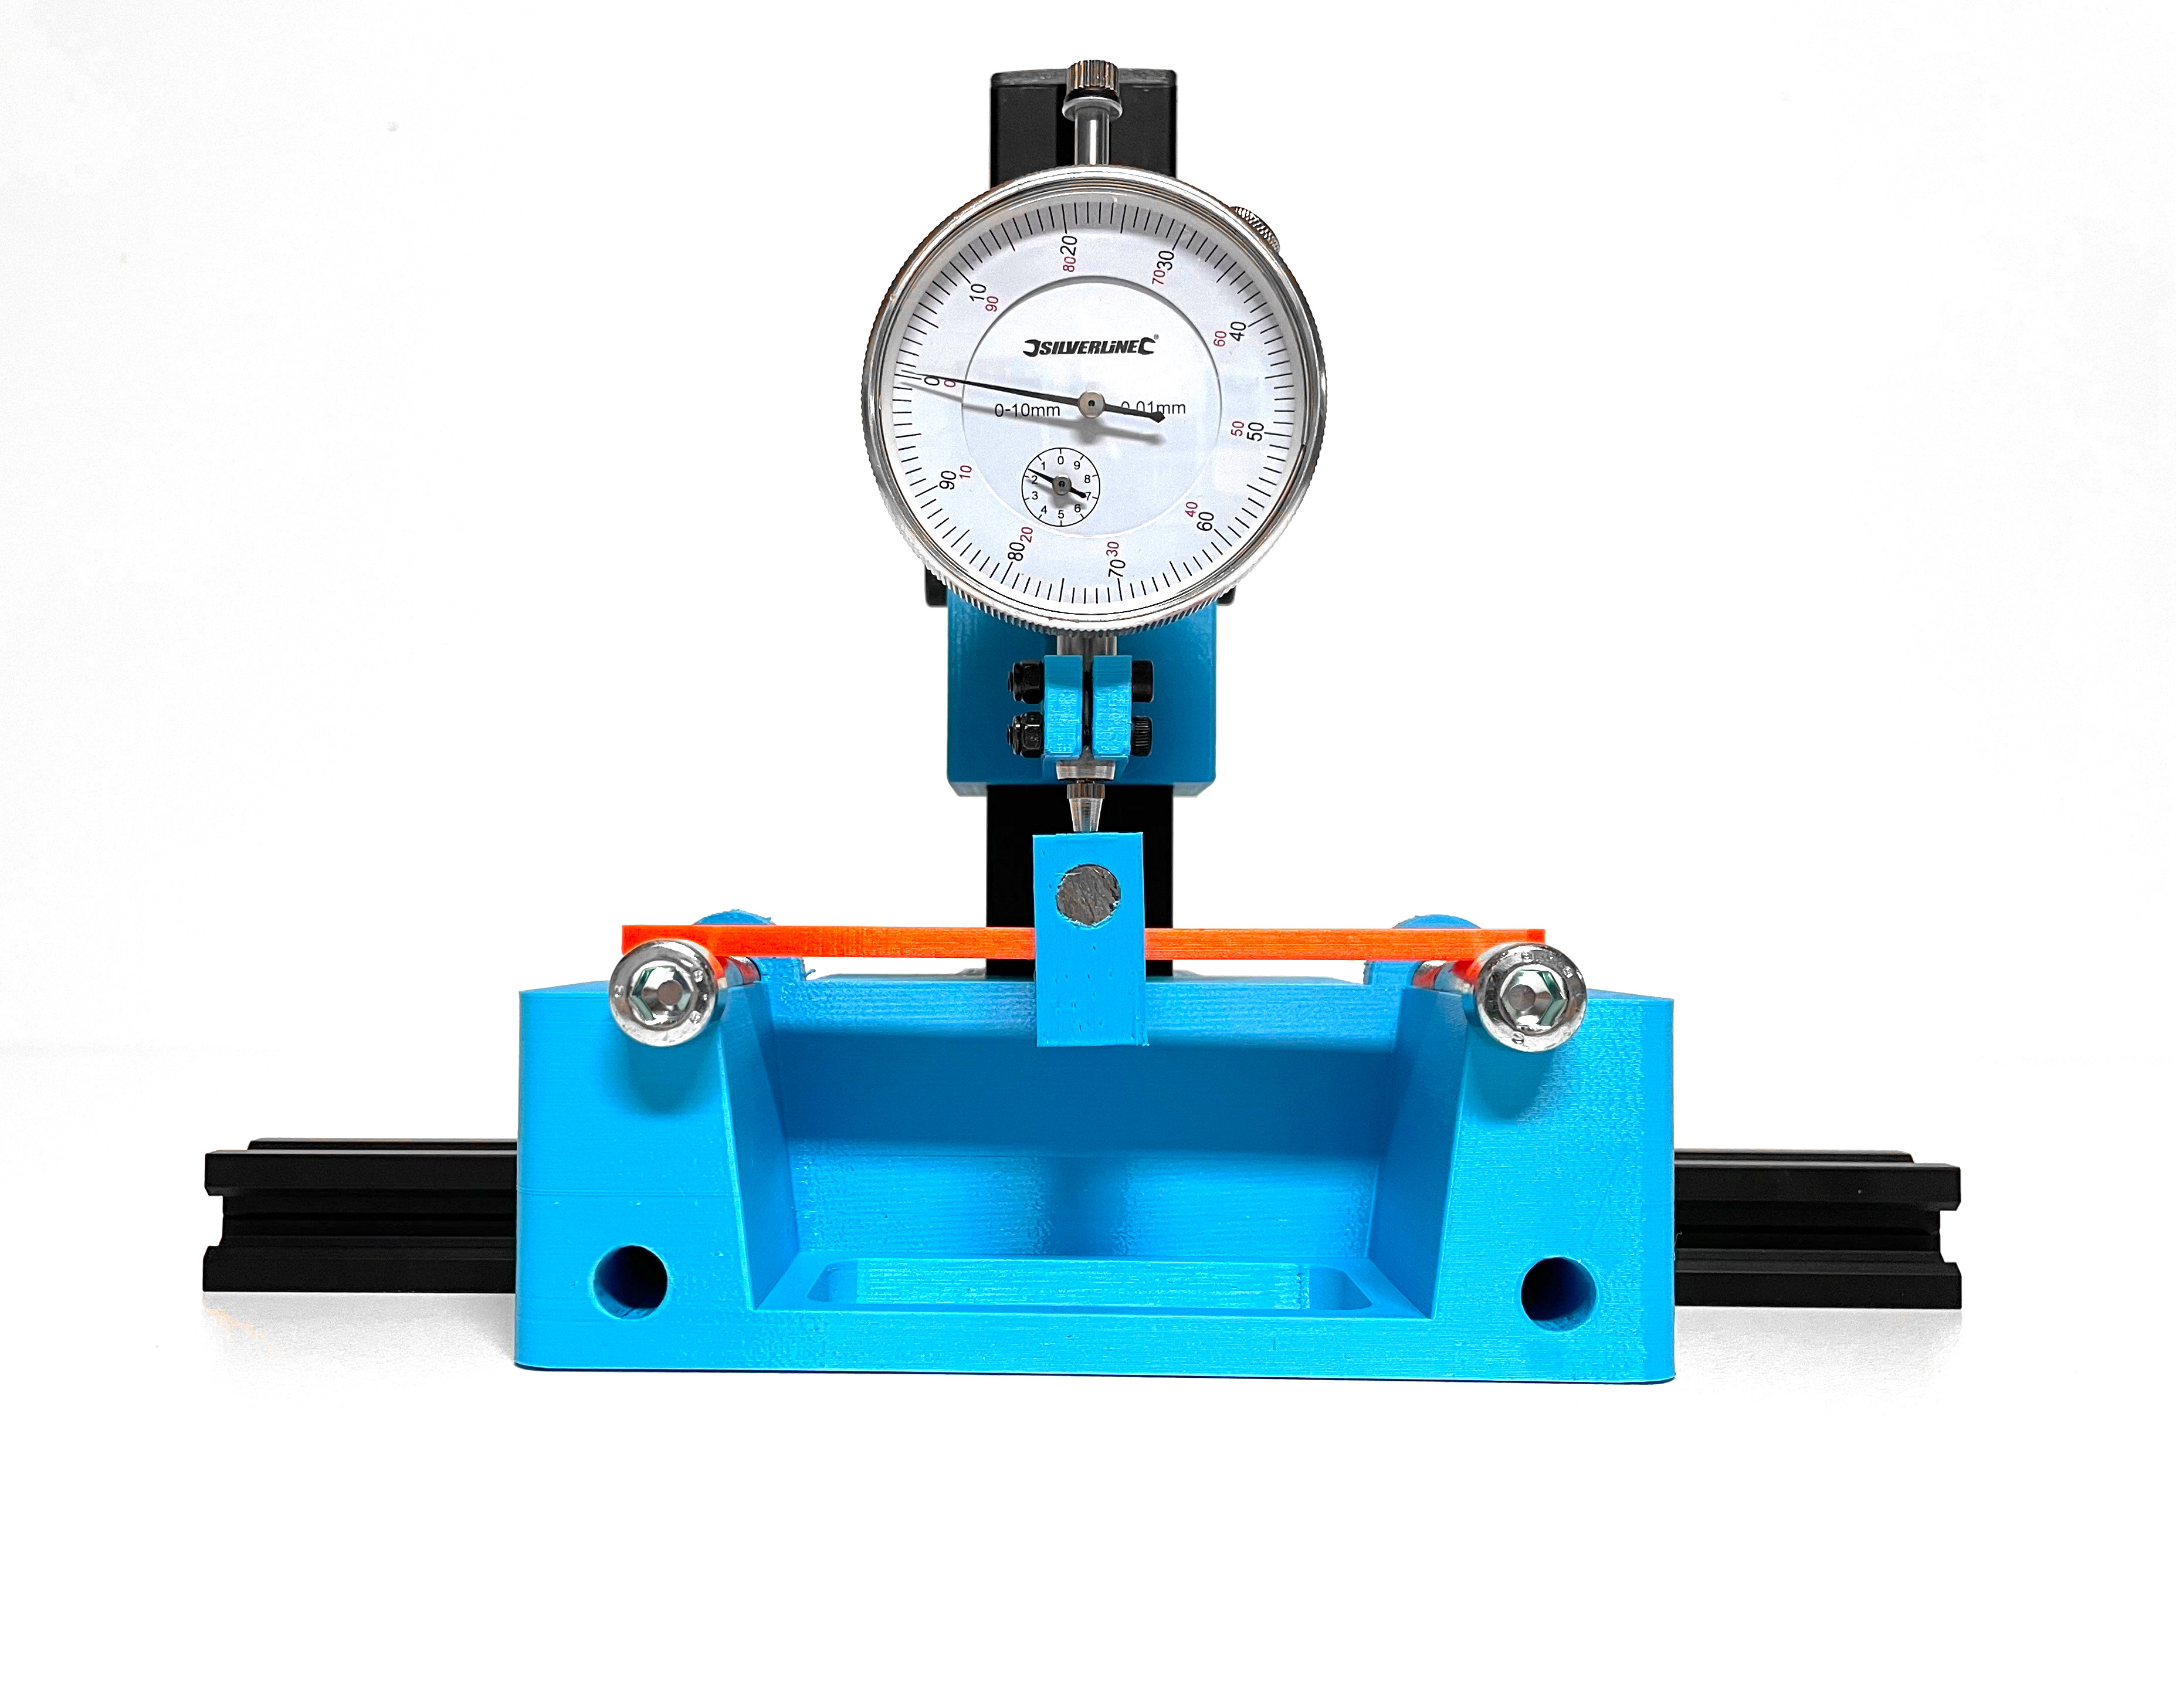
Introduction If you have ever seen a video from CNC Kitchen or are interested in materials testing, you have probably heard of a 3-point bending test (see Wikipedia ). It can be used to analyse the stiffness of materials. For this, a sample is placed between two points. If you now apply a force to the sample in the middle (i.e. at the third point), it deforms elastically. The goal is now to measure this bending as accurately as possible. For example: how far does a sample made of PETG bend with a force of 12 N? With this design, the force can be applied to the specimen by attaching weights or pulling by hand. The deformation is measured by a precision dial indicator that can be adjusted in height on the 3030 T-Slot profile. Want to see it in action? Check out one of my videos: BOM In the following list you will find everything that is additionally required in terms of screws and profiles. Parts Quantity Cap Head Screws M3 x 16 mm 2M5 x 20 mm3M6 x 12 mm3M8 x 50 mm2 (T-) Nuts M3 self securing nut2M5 T-Nut for 2020 T-Slot3M6 T-Nut for 3030 T-Slot3M8 nut2 Aluminium profiles 2020 T-Slot 250 mm (can also be longer)13030 T-Slot 160 mm (min 100 mm)1 Others 8 mm thick rod x 18 mm 1 Optional 2020 Endcap23030 Endcap1 A precision dial indicator and weights are also needed. For the weights, a bucket and beverage cans, sand, etc. can be used. Assembly Print the parts “base.stl”, “dial-Indicator-holder.stl” and “sample-hook.stl” Slide the 2020 profile into the lower opening and the 3030 into the upper holder Add matching T-nuts to the locations of the holes Fasten the 2020 profile with three M5 x 20 mm screws Fasten the 3030 profile with an M6 x 12 mm screw Screw the two M8 x 50 mm screws into the base and secure them at the end with two M8 nuts Slide the dial indicator into the holder and tighten it with the two M3 x 16 mm screws and self-locking nuts. Make sure that the gauge is firmly in place. Do not overtighten them! Slide the holder into the 3030 profile with two M6 x 12 mm screws and T-nuts and tighten the screws lightly (Optional) Add end caps to the ends of the profiles Press the 16 mm piece of the 8 mm shaft into the sample hook Done! Printing the samples Use 15 Perimeters. Running a test To be continued soon
AI Analysis: This is a mechanical testing device used for evaluating the structural integrity of materials. It features a blue base with a mounting structure and an orange alignment bar, designed to apply precise bending forces to test samples. The device includes a dial gauge for measuring the resulting deformation, making it suitable for industrial quality control and material testing applications.
Originally published on Printables


