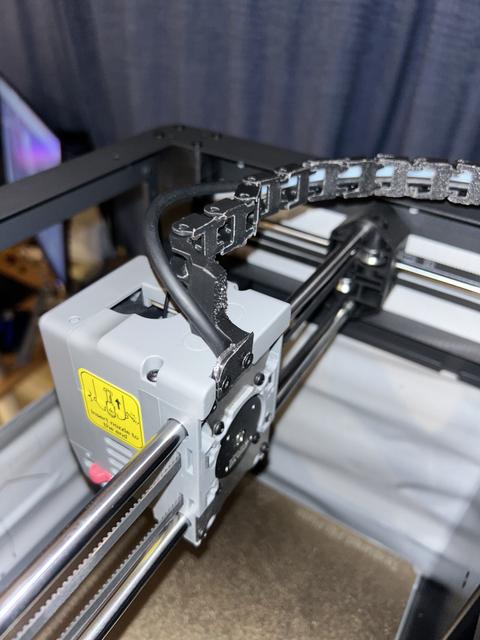
AD5M Drag Chain (NO EXTRA SCREWS / FITTINGS REQUIRED)
by Kubamelon · via Printables
| Format | STL |
| Category | Art |
| License | CC BY-NC-SA |
| Triangles | 28.7k |
| Uploaded | Feb 13, 2026 |
⬇ 18 downloads
❤ 3 likes
👁 143 views
Description
After frustratingly searching and failing to find a complete package for a drag chain, I have put one together! It requires no additional screws and only uses the ones on the AD5M. It uses parts from other creators, those of which are mentioned and credited. Instructions Print out all files Filament sensor mount Unscrew the two bolts at the back of the sensor. These will be used for Step 3 Gently pull out the cable attached to the sensor. Pull out the filament guide tubing from both sides This is a bit tricky. First push the tube in and then pull DO NOT UNDER ANY CIRCUMSTANCE TAKE APART THE SENSOR ITSELF There is a tiny spring inside and getting it back in place is a nightmare Place the sensor inside the mount. It will be loose inside however this doesn't cause any issues Unscrew two of the bolts They are parallel to the power cable coming out of the printer. Screw down the adapter. Re-Attach Sensor cable Filament Guide Tubing Chain Mount Use the screws you got from Step 2 to screw down the mount. It may help to enlarge the holes in the printed part slightly to help the screw fit through easier. Chain Termination Unscrew the 2 screws at the back of the print head, the ones holding the power cable. Use those screws to mount the Chain Termination Assemble the chain Attach the end of the chains to the Mount and Termination. NOTES The chain can be printed using a lower infill with no supports All other parts to be printed with at least 40% infill. I cut down my filament guide tube a bit, the most important part is that the power cable remains within the chain. There should be some play in the power cable at the end close to the print head.
Originally published on Printables


