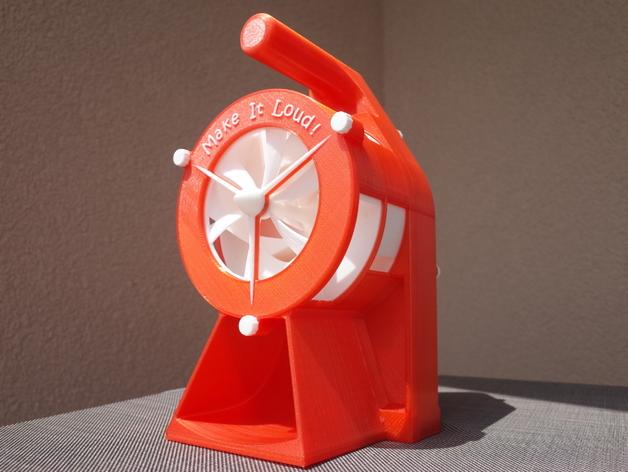
Air Raid Siren - hand crank version 2
by MlePh · via Printables
| Format | STL |
| Category | Other |
| License | CC BY-NC-SA |
| Triangles | 46.8k |
| Uploaded | Apr 17, 2025 |
⬇ 2.5k downloads
❤ 440 likes
👁 26.7k views
Description
NOTE 2025: This design is OLD! I made this back in 2016 for my Makerbot Replicator 2. So the design might not fit on your print area. And you have to print it at the original size to use the metal bearings. Also the printers back then had different tolerances. I have seen a few users complaining about the design because it did not work for them. So please be aware of that. This is not as simple as most other prints. And I don't want you to waste your time and filament. I may redesign the hole thing one day to better fit modern printers and slicers. But it's not on top of my ToDo-List. BTW: Angus from Maker's Muse made a detailed video on how to set up the parts in prusaslicer: That said, here is the original description: Remix of my own design. I had a lot of positive response so i desided to redesign it and use metal bearings to avoid friction problems i had with the 100% 3D printed version. Runs much smoother now! To build this you need these metric [mm] bearings: (amount x outer diameter / inner diameter / height - link) *1 x 47/25/12 - SKF 6005-2Z *4 x 16/5/5 - SKF 625-2Z I also tried to design it with 3d printed bearings - But did not work that well. I could get these bearing in an industrial store in my town for around 35 €. The bearing are standard sizes - so you should get them easy. Videos: I uploaded two clips to youtube. Printing Timelapse Assembly and Test Slicer note: I used Simplify3D to slice all parts. If you print it with MakerWare the parts might not fit together - i found out that MakerWare does not care for the nozzle size. Thats why i had some space between every part on my preview version that was featered on thingiverse. I don't now how cura and other slicers work. You should test it with some small parts like GetrRad2A and GetrRad2B before you print bigger parts - they should fit together very tight. In case you own a Makerbot Replicator but don't have Simplify3D - i added a .zip-archive that contains all sliced .x3g-files ready to print. There is also a README.txt if you have problems getting the bigger parts printed on your R2. Designing: I use basic AutoCAD to draw my 3D stuff because i use it a lot on my work. It took me about 200 hours to design this siren. I added the drawing file if you want to make changes. Print instructions Licence: Creative Commons - Attribution - Non-Commercial Category: Mechanical Toys Print Settings Printer Brand: MakerBot Printer: MakerBot Replicator 2 Rafts: No Supports: No Resolution: 0.2 Notes: Most parts can be printed with standard settings - No Raft, No Support. Except of following changes: *Gehause3 - change filament color while printing to get the text highlighted *GetrRad2A+B - print it solid, needs to be strong *GetrRad4A+B - print it solid, needs to be strong *Kurbel1 - use brim to prevent warping *Kurbel2 - print the top layers solid *Rotor3 - print it with high resolution (0.1 mm) and raft to get clean props *Schraube1 - print it 3 times *Schraube2 - print it 6 times *Schraube3 - use brim Post-Printing If not every part fits after printing you may have to use some sandpaper. Parts like the rotor should be glued together.
Originally published on Printables


