Calibration Kit
by Mj27 · via Printables
| Format | STL |
| Category | Electronics |
| License | CC BY-SA |
| Triangles | 4.6k |
| Uploaded | Oct 9, 2024 |
⬇ 117 downloads
❤ 9 likes
👁 466 views
Description
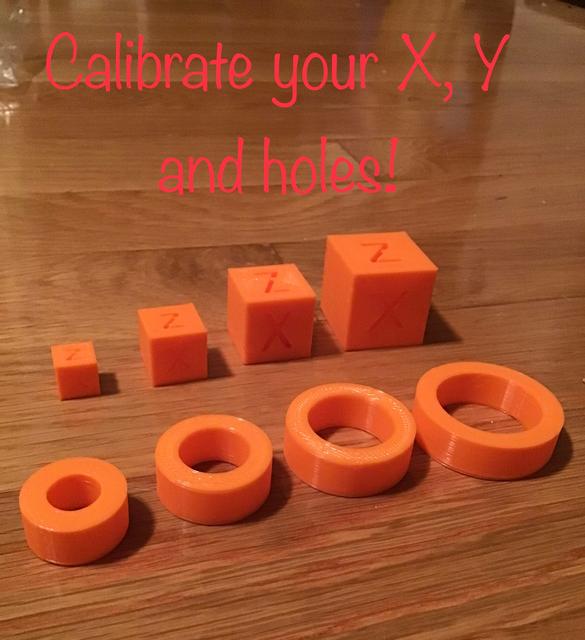
Hey I just calibrated my printer and it has done wonders so I wanted to share it with you! I would recommend to do the cube calibration first so the rings come out better. After you print all of them you should measure the x and y sides and add them together then divide them by 2. You are finding the average of x and y. do that for all of them so you will have 4 numbers you can add them together and divide by 4. 📷 Image redacted — claim this model to add your own media So you will have 1 number left and you going to find the difference between it and what it supposed to be. Exp: it is supposed to be 10mm but it is 10.34 the difference is -0.34. Or 9.56 so it would be 0.44. That number is what you will put in your slicer. It is called something different in every one but cura it is horizontal expansion and orca slicer it is x y compensation. But you get the point. You can do the hole one now. After you print all the rings, you should 📷 Image redacted — claim this model to add your own media measure the inside of every one. You find the average of them all and this is a little different. After you add them up and divide by 4 you then divide by 2 and that is what you put in your slicer. It is called hole expansion or something like that. If you like this be sure to love and post a comment if you have any questions! Happy printing.
Originally published on Printables


