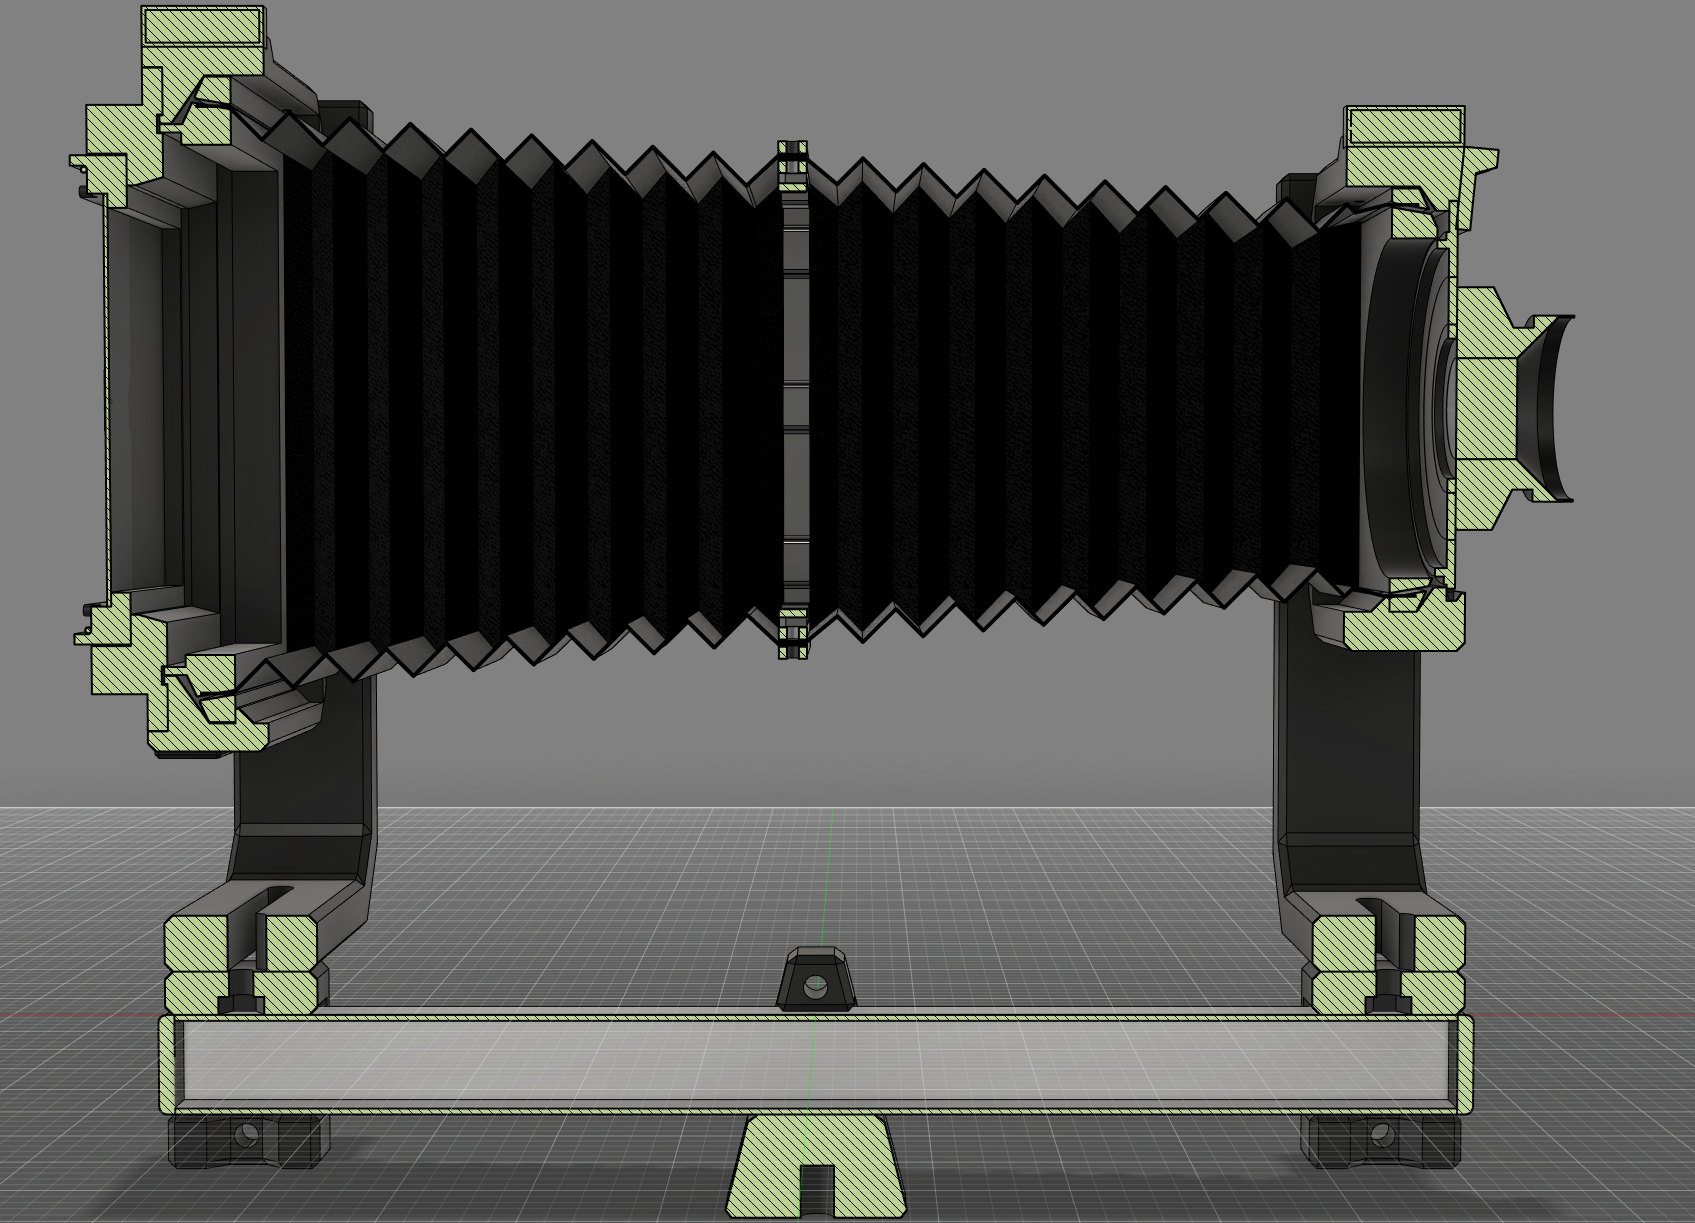
Camera Bellows in two parts with Modified Vega Frame
by Kiwi Tinkerer · via Printables
| Format | STL |
| Category | Gadgets |
| License | CC BY-NC |
| Triangles | 7.9k |
| Uploaded | Jul 29, 2022 |
⬇ 485 downloads
❤ 79 likes
👁 3.3k views
Description
Made To Fit The Vega 4x5 Camera . I have Performed a light lest by printing the Light test model in Black TPU and 0.8 mm, it has the same thickness as the Bellows. I can Confirm no light leak in the test model (at least to the eye), have a try for yourself. I have also test printed all the connections with the test print models and they have a good tight fit. This Printable really benefits from the PrusaSlicer 2.5 release due to the vast improvements in generating perimeters All Test prints are done and confirmed. I'm Uploading pictures as I print the final make in black. Though I am still experimenting with what is the best wall Thickness. The Original internal Bellows frames have been modified with tolerances for these Bellows to fit for Maximum Camera Extension! You may use the original Bellows frame External Models. Bellows are Printed in two parts, I recommend you do Not Print them together, tempting as it may be. Print Bellows in Black TPU. Print Brackets in Black PLA. You could print the brackets in TPU if you wanted to, just quicker and cheaper in PLA. I chose not to include holes in the Bellows for the middle connection bracket to make sure they print well. You will need to drill the holes (3 mm) by using the brackets a drill hole guides. Bellows Models are 0.8 mm thick. Print in Vase mode with a 0.8 mm Nozzle and 0.2 mm layer height OR print Normally with a 0.4 mm Nozzle which will result in 2 perimeters printed each layer. If you Bellows are too Stiff (Depends on the hardness of the TPU you have) at 0.8 mm thickness, try printing the Light test model in Vase mode (0.6mm Nozzle or even 0.4 mm if needed) with Black TPU. From my testing all model tolerances should allow it as the 0.8 mm version is nice and tight. The Test Fit Models have been modified to use as little filament and print as quick as possible while keeping true to the required dimensions, for testing tolerances between parts and functionality. I have also included reduced Exterior frames from the original for quick test printing. Print with Brims and disable Skirt. You can easily remove Brims with scissors or a craft knife. You can stick something sharp through the bottom of the nut traps on the bracket to get the M3 Nuts back out. M3x10 mm Bolts and Nuts x 12 Notes; I used my fully Customizable Camera Bellows Fusion 360 .f3d File to make the right size bellows for this camera.
Originally published on Printables


