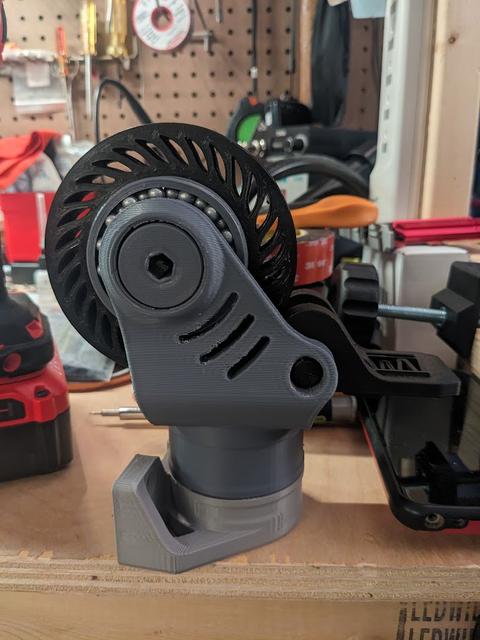
Caster with airsoft ball bearings
by Daniel ScotsRoss · via Printables
| Format | STL |
| Category | Art |
| License | CC BY-NC |
| Triangles | 55.4k |
| Uploaded | Sep 18, 2025 |
⬇ 10 downloads
❤ 4 likes
👁 197 views
Description
IMPORTANT: This is based on a downscaled version of the original caster design, shrunk to 94.5%. Slice all other caster parts scaled to 94.5% or else the bearing won't fit. I did this to accommodate using airsoft bb's for the swivel bearings as well. -The bearings are inserted mid-print and get trapped inside. This requires you to print the inner part of the bearing and the outer part of the bearing at the same time - just center them on the build plate. This will require no stringing obviously, so dehydrate your filament and tune-out stringing. -You must slice the model with a pause set at these three heights: 7.16mm, 19.88mm, and 32.59mm. At each of these pauses, insert enough bearings to fill the race as much as you can, then resume the print. I used Cura 5.10.1, which has a “Pause at Height” feature. This is found under Extensions>Post Processing>Modify G-code. -Within the “Pause at height” menu you will want a “Park Print” location set so that the extruder moves out of the way for you to insert the bearings. I had trouble with layer bonding after the pause so I also turned on “Redo Layer”. I did not use retraction during the pause, and set the standby temperature as the printing temp I was using. I purged and cleaned the nozzle with flush cutters right before resuming the print each time -At the middle bearing race, squirt in some thick lubricant/grease between the bb's (I used petroleum jelly in a syringe), since you won't be able to reach the middle race once the print is complete (be careful not to get any lubricant on the current layer of the print, this may affect bonding of the next layer). The outer two races can be lubed from the side once completed. -Depending on your printer, filament, and other variables, you may need to adjust your pause settings and obviously tune your print settings as needed. This may take some experimentation. I included a “test print” so you can print just one section of the bearing (with one ring of bb's) to see how it turns out. This model worked perfect for me, but your mileage may vary. My printer isn't tuned up all the way and I believe it over-extrudes, so my prints come out not-quite dimensionally accurate. Therefore on a properly tuned printer that prints with dimensional accuracy this bearing may come out a little loose for the bb's. So you may need to compensate with more flow (or modify the model) for a better fit. Mine turned out just tight enough but not too tight. -Any z-seam will interfere with the bearings ability to roll. I created “no z-seam” Cura profile (included here as a .txt file, just remove the .txt extension), but if you have experience minimizing z-seams, use your best judgement and try the test print. The important parts were: randomizing seam location, using scarfing (15mm), alternate layer directions, negative extra prime amount… there may be more, take a look at the Cura profile if you want to check, or just try it. Linear advance tuning is probably a good idea too but I don't have it set up yet. -Because the bearing race had to be wide enough to let the bearings drop in below the top layer when paused (so the nozzle doesn't crash into them), the race ends up being too wide. I compensated for this by (once the print is completed) pushing the inner part of the bearing to the side and shoving in more bearings into each outer race, while using a poker to move the bearings around so that they are staggered (this kind of happens naturally once you start rolling the bearing, you'll notice - which opens up a significant gap between the bearings at the top as they all shift down to the bottom of the race). This will require deforming a small part of the bearing body when you shove the extra bearings in since even with the inner part shifted over they don't quite fit in - just shove them all in from the same spot so you only end up with one deformed/dented point, this small dent didn't seem to affect the performance of the bearing because it doesn't quite interfere with the bearings when rolling. Note: Due to resizing the print, the bolts that connect the bearing to the caster body no longer fit a 8mm allen key (I think that was the size it was intended for?). I should have fixed this in the model but I just ended up heating my allen key with a torch and pushing it through… you may find an imperial size that fits - how you approach that is up to you… Additional Note: I had trouble printing the TPU tire since I have a bowden tube and an all metal hot end (E3D v6 on an Ender 3 Pro). I've included my TPU profile (as a .txt file, just remove the .txt extension) that worked for me as well but again, your mileage my vary.
Originally published on Printables


