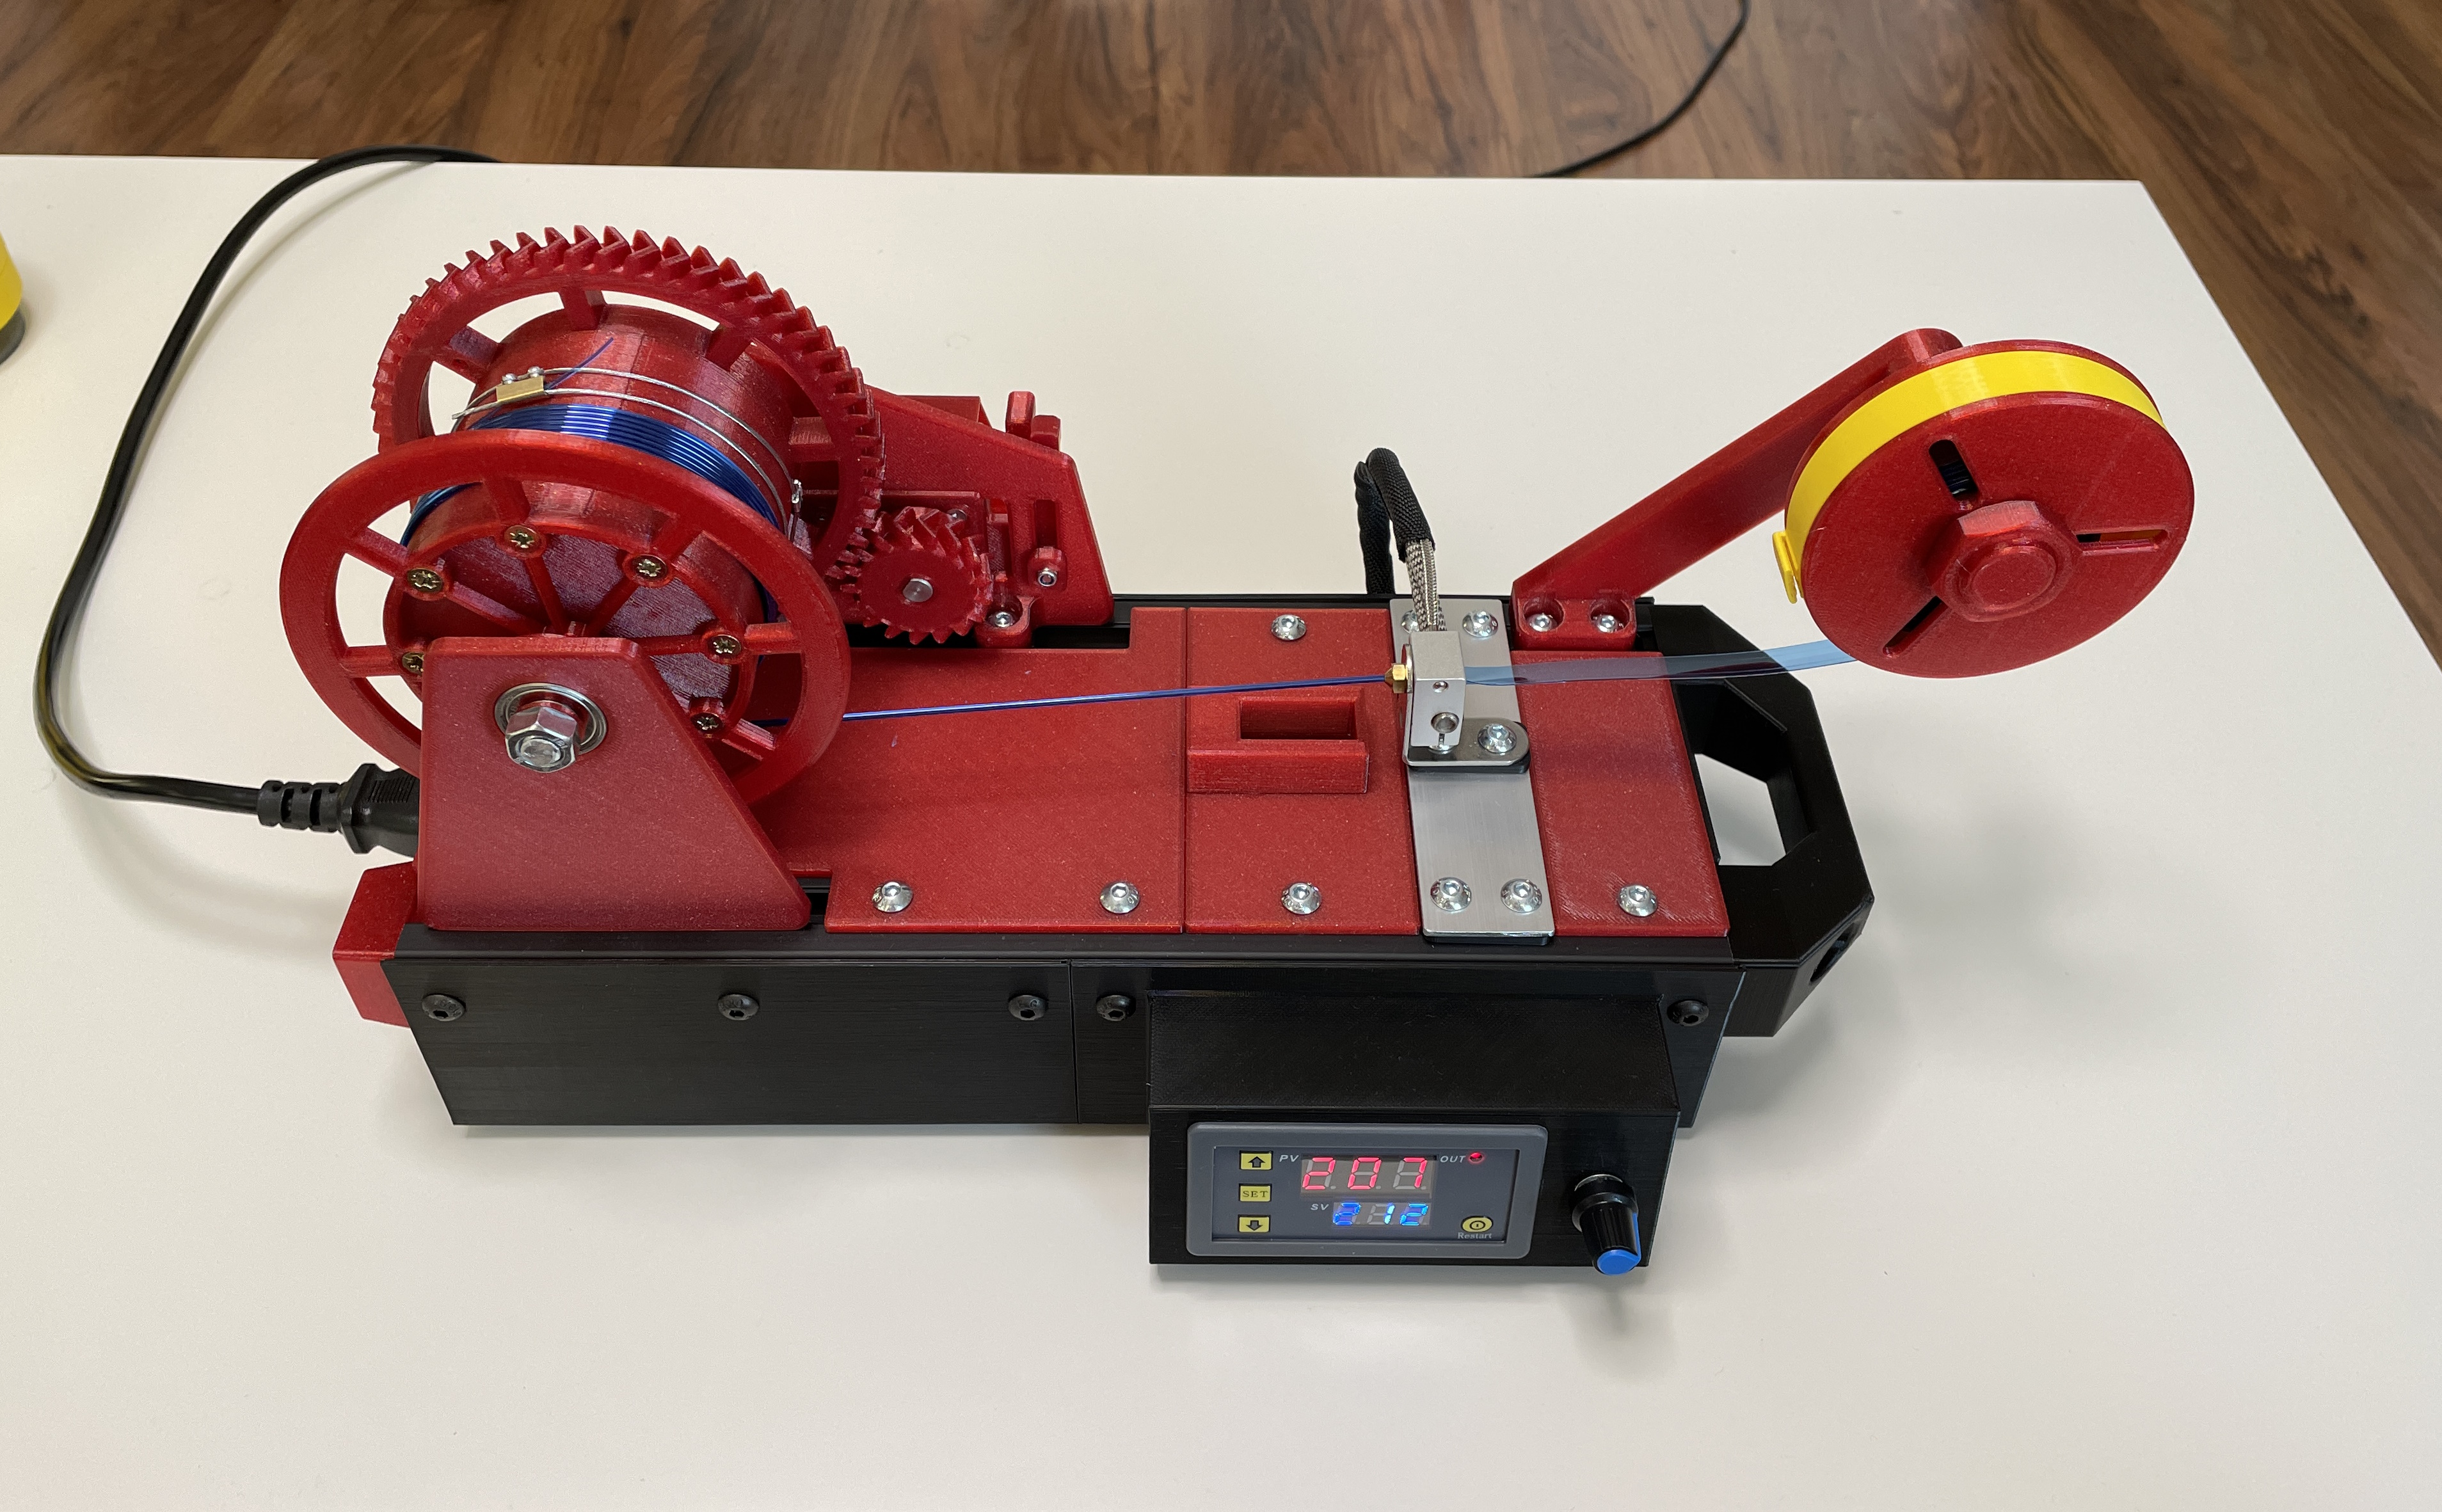
Compact PET Filament Machine
by mirabatek · via Printables
| Format | STL |
| Category | Other |
| License | CC BY-NC |
| Triangles | 179.6k |
| Uploaded | Aug 10, 2025 |
⬇ 9.1k downloads
❤ 3.7k likes
👁 80.6k views
Description
Overview: After success of my firts PET Filament Machine I decided to build new one which will be more compact and neat. 📷 Image redacted — claim this model to add your own media Here you can see the new machine in operation: Assembly Instructions: You can find an instruction video with assemby here: Part 1 , Part 2 . Bottom: Print and cleanup all printable parts Install rubber feet to the bottom case 4x Rubber Foot 4x M3 Nut 4x M3x8mm Screw Joint the left and right bottom case together 2x M3 Nut 2x M3x8mm Screw 2x M3 Washer Install power supply 2x M3x6mm Screw 2x Washer Prepare main socket and power switch module Length of the wires should be about 18cm Two additional ground wires will be connected to the Al profiles Install main socket and power switch module 2x M3x10 Countersink Screw 2x M3 Nut 2x M3 Washer Prepare wired for motor speed controller and thermostat (+)/(-) wires … power supply → motor speed controller … 45cm, AWG18 (+)/(-) wires … power supply → terminal block … 35cm, AWG18 (+)/(-) wires … motor speed controller → motor … 55cm, AWG18 (+)/(-) wires … thermostat → terminal block … 14cm, AWG18 2x (+) wires … thermostat → terminal block … 18cm, AWG18 Connect cables to power supply Cover terminal block on power supply with terminal cover Connect cables to motor speed controller Mount the motor speed controller to the base body Glue the terminal holder with terminal blocks (5-port, 5-port, 2-port) to the base body with double side tape Connect +/- cables from power supply to terminal block Exchange K type thermocouple by smaller version (3x15mm) Modify the back of thermostat case to connect thermocouple wires without tension Connect cables to thermostat Push the thermostat to the base body Connect cables from thermostat to the terminal block Install 40mm side panel fan and connect it to the terminal block 4x M3x30mm Countersink Screw 4x M3 Nut 4x M3 Washer Connect cartridge heater to the terminal block Organize all cables Cut threads into the Al profiles from side (if you want to mound side feet and handle) Clear the paint/anodized surface to have good contact for ground wires Mount the Al profiles into the body 10x M5x12mm Screw 10x M5 Nut + TNut_3030_M5 Connect ground wires to the Al profiles 2x M5x10mm Screw 2x M5 Nut + TNut_3030_M5 2x M5 Big Washer Mound side holders 2x M5x12mm Screw 2x M5 Nut + TNut_3030_M5 2x M3x10mm Countersink Screw 2x M3 Nut Top: Screw big gear and spool side to the spool cylinder 16x 3.5x20mm Screw Install Cover Plate 1 2x M5x12mm Screw 2x M5 Nut + TNut_3030_M5 Push the bearings into Motor and Bearing Plates 2x Bearing 608ZZ Mount Motor and Bearing Plate (don't tight the screws) 5x M5x12mm Screw 5x M5 Nut + TNut_3030_M5 Mount motor 4x M3x10mm Countersink Screw Mount motor lock mechanism 1x M3x15mm Screw 1x M3 Nylon Lock Nut 1x M3 Washer Mount small gear to the motor 1x M3x10mm set screw 1x M3 Nylon Lock Nut Install the spool 1x 125mm M8 threaded rod 2xM8 Nut Glue together two parts of the fan mount Screw the 4020 fan to the fan mount 3x Nut M3 3x Screw M3x25mm 3x Washer M3 Install the fan mount to the body and connect the fan to the terminal block 2x M5x12mm Screw 2x M5 Nut + TNut_3030_M5 Assemble heater block holder and install heater block 1x V6 Nozzle drilled 1.7mm 1x V6 Heater block 1x L-shape holder 30x30mm 1x Al plate 110x30 mm 6x M5x12mm Screw 4x M5 Nut + TNut_3030_M5 2x M5 Nylon Lock Nut 2x M5 Washer Install cartridge heater and thermocouple into the heater block Assemble and install strip holder 2x M5x12mm Screw 2x M5 Nut + TNut_3030_M5 Install Cover Plate 2 2x M5x12mm Screw 2x M5 Nut + TNut_3030_M5 Connect motor to the speed controller In my case the polarity is opposite than indicated on the motor to have correct rotation direction. In case the direction is not as you want switch the polarity. Mount motor cover 4x M3x6mm Screw Mount handle and feet 4x M8x20mm Screw Add steal cord 1x Approximately 40 cm steel cord 1mm in diameter 1x Screw terminal 1x Clip for steel cord (can be substituted with screw terminal) Wrap wires to motor and heater block (optional) 2x Approximately 20cm of woven wire wrap 5mm diameter Electronics: Here is the schematic of the electronics: 📷 Image redacted — claim this model to add your own media Bill of Material: Base 1x Bottom_Case_Right_EdgeCircles.stl (115g) 1x Bottom_Case_Left_EdgeCircles.stl (93g) 1x Side_Holder.stl (6g) 2x Foot.stl (2x6g) 1x Handle.stl (25g) 4x rubber foot 14x M3 Nut 10x M3 Washer 6x M3x8mm Screw 4x M3x10 Countersink Screw 4x M3x30mm Screw 2m AWG18 red wire red 2m AWG18 black wire black 20cm of brown, blue, yelow/green wire 2x ground connection 2x Al profile 3030, length 300mm ( Black 3030 Al profile or Silver 3030 Al profile ) 12x M5x12 Screw 2x M5x10 Screw 14x M5 Nut 4x M8x20mm Screw 2x M5 Big Washer 14x TNut_3030_M5.stl Spooler Body 1x Motor_Plate.stl (25g) 1x Bearing_Plate.stl (40g) 1x Distance_Ring_1.stl (<1g) 1x Distance_Ring_2.stl (<1g) 2x Washer.stl (<1g) 2x Bearing 608ZZ (i.e. Bearing 608ZZ ) 5x M5x12mm Screw 5x M5 Nut 5x TNut_3030_M5.stl Motor 1x Gear Reduction Motor with 8mm diameter and 25mm length D-shape shaft , 6 or 10 rpm, (i.e Gear Reduction Motor JGY-370 ) 1x Gear_17_Teeth.stl (8g) 1x Set screw M3x10mm 2x Nylon Lock Nut M3 1x Motor_Mount_Front.stl (6g) 1x Motor_Mount_Back.stl (6g) 4x Screw M3x10mm (flat head) 1x Motor_Mount_Lock_1.stl (<1g) 1x Motor_Mount_Lock_2.stl (<1g) 1x Motor_Cover.stl (28g) 1x M3x15mm Screw 4x M3x6mm Screw 1x M3 Washer Spool 1x Gear_55_Teeth.stl (44g) 1x Spool_Cylinder.stl (105g) 1x Spool_Side.stl (20g) 16x Screw 3.5x20mm Cooler 1x Fan_Mount.stl (28g) 3x Nut M3 3x Screw M3x25mm 3x Washer M3 2x M5x12mm Screw 2x M5 Nut 2x TNut_3030_M5.stl Heater Block 1x V6 Heater Block (i.e. V6 Heater Block ) 1x V6 Nozzle drilled to 1.7mm diameter (i.e. Brass Nozzle ) 1x L-shape Holder 30x30mm (i.e. L-shape Holder ) 1x Al plate 110x30 mm based on Heater_Block_Holder_Template.stl 1x Heater_Block_Holder_Distance_1.stl 2x Heater_Block_Holder_Distance_2.stl 6x M5x12mm Screw 4x M5 Nut 2x M5 Nylon Lock Nut 2x M5 Washer 4x TNut_3030_M5.stl Strip Holder 1x Strip_Holder.stl (28g) 1x Strip_Holder_Washer_1.stl (12g) 1x Strip_Holder_Washer_2.stl (10g) 1x Strip_Holder_Nut.stl (3g) 2x M5x12mm Screw 2x M5 Nut 2x TNut_3030_M5.stl Covers 1x Cover_Plate_1.stl (40g) 1x Cover_Plate_2.stl (12g) 3x M5x12mm Screw 3x M5 Nut 3x TNut_3030_M5.stl Electronics 1x Power Supply Mean Well LRS-100-24 (24V, 100W) 1x Power Socket with Switch (i.e Power Socket with Switch AC-01A ) 1x DC Motor Speed Controller (i.e. Speed Controler 5A ) 1x Thermostat for K type thermocouple (i.e. Thermostat ). 1x K type Thermocouple 3x15mm (i.e. Thermocouple ) 1x Fan 4020 24V (i.e. 4020 Cooling Fan ) 1x Blower Fan 4020 24V(i.e 4020 Blower Fan ) 1x 50W Cartridge Heater (i.e Cartridge Heater ) 2x 5-Port Terminal (i.e Terminal Set ) 1x 2-Port Terminal (i.e Terminal Set ) Other 1x Power_Connector_Cover.stl (6g) 1x Terminal_Cover.stl (6g) 1x Terminal_Holder.stl (3g) 50cm Woven Wire Wrap 5mm diameter (i.e Woven Wire Wrap ) About 680g of filament is needed in total. The total cost is about 100 USD. Accessories: For cutting the PET strips from bottles you can use my Simple PET Bottle Cutter . For storing PET strips you can use my PET Strip Spooler And Spool Holder .
Originally published on Printables


