Core One L roof rack
by sjugge · via Printables
| Format | STL |
| Category | Art |
| License | CC BY-NC-SA |
| Triangles | 6.2k |
| Uploaded | Apr 17, 2026 |
👁 9 views
Description
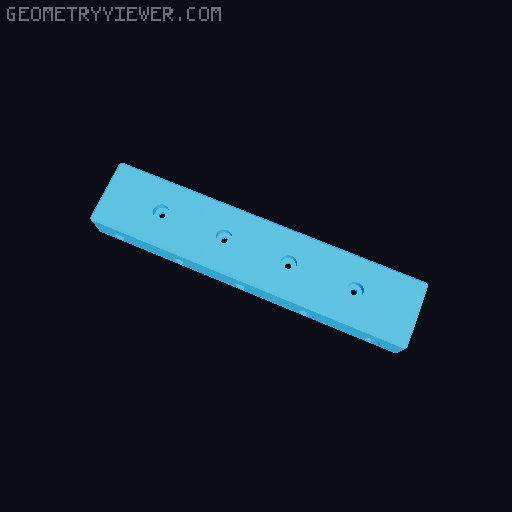
The Core One L roof has lots of room for activities. But I did not like the idea of placing a lot of weight on it or obstructing the vents. So I figured why not slap a roof rack on it so I can strap a surfboard filament dryer and other stuff on it? I designed this model to not stress the unsupported roof panel itself, rather use the frame to bear the load. There's quite a bit of distance to cover so I opted for a dovetail design that should offer plenty of rigidity. Printing Material : PC recommended Nozzle : 0.4mm Layer height : 0.2mm structural Infill : 15% gyroid Perimeters : 3 Solid layers : 5 top, 4 bottom Brim : 8mm wide with default 0.1 separation gap. Without brim the will likely significant warping. Supports : recommended but not required for HSW roof and bottom-facing screw holes Print the test parts first, this allows you to test the dovetail fit, check if screws actually hold and if the corner fits the Core One L frame properly. If they do not, adapt as needed by scaling properly in the slicer. Once you verified the dovetails, corner and screws fit, proceed with printing the 5 required parts as listed in the bill of materials. Bill of materials Printed parts for a single roof rack: 2x COL-roof-rack--joint-dovetail.stl from the Common parts folder. 1x COL-roof-rack--rack-mid.stl from the Common parts folder. 2x COL-roof-rack--rack-corner--*.stl from the 16mm variants or 40mm variants folder. Choose the 16mm or 40mm variant of the corner. When unsure, use the 16mm variant. The 40mm variant will allow cross-racking. I.e.: use 16mm in one direction and stack the 40mm in the other direction so the 16mm can provided additional support to the 40mm height rack. The size (16mm / 40mm) refers to the lip that rests on the roof. hsw-magnet : contains a HSW insert and 10x3mm magnet hole hsw : contains only a HSW insert hole magnet : contains only a 10x3mm magnet hole or variant without HSW or magnet hole. Non-printed parts for a single roof rack: 2x 10x3mm magnets per rack if printing the magnet variant. 13x M3x25mm socket screws for the horizontal screw holes. 10x M3x12mm socket screws for the vertical screw holes. 23 M3 washers. Note that you can alter the length of the M3 screws if so desired. For instance; Use shorter screws for the horizontal screw holes to use 2 instead of 1 per screw hole. Use M3x30mm screws for the horizontal screw holes if you want to thread all the way through and use nuts. Use longer screws to attach stuff to the rack, e.g.: a wider base to support things. Assembly This should be straightforward enough, remove brims and supports. For assembly, just make sure to orient the male dovetail pieces properly before inserting, ensuring the screw holes line up once pieced together. Use the STL in the Assembly reference folder if you need a visual reference. Before screwing everything together, ensure that the assembly fits as expected. If not, either brute force things a bit (using caution obviously), or make the necessary scaling adjustments in the slicer and reprint. Hopefully that won't be needed Once you made sure everything fits, get to screwing (don't forget to add a washer). Be aware that screws might heat up due to friction, and there should be quite a bit of friction. If you opted for the magnet variant, glue it in place and allow to dry. Consider placing a piece of masking tape where the magnet would be placed on the printer frame just to avoid any damage or a chemical reaction and damage to the printer frame caused by the glue. When fully assembled, place the rack and gently stress it by placing some weight, keep en eye and ear out for any structural issues. Once you're confident it will hold the weight you plan to place on it, go for it. Now is perhaps a good time to do a small test print that causes a lot of rapid X/Y motion to ensure the roof rack stays in place. When all is done, I'd love to see you roof rack. Consider leaving a make and sharing your roof rack adventures. A like is appreciated if you got some use out of this model. Accessories Creality Space Pi X4 stand . HSW lock nut . HSW panel (WiP) FAQ (not really frequently asked, but questions you may have nonetheless) Can I use other screw types or sizes? Any M3 of reasonable size will be fine, e.g.: you could use M3x10 for the vertical screw holes and double up on them. You can use slightly shorter screws, or in case of the vertical even slightly longer screws and secure them with nuts. Non-socket head screws should be fine M2 will not screw in securely and M4 will probably encounter too much resistance. Why not use inserts? Honestly? Laziness mostly, but from testing I was quite satisfied without inserts so I did not bother pursuing it. Will this fit the Core One? Nope. I don't have one so I can't reliably model and test, but feel free to reach out to get me one. Or provide measurements, if I have the time and motivation I might create a variant for it... Will this fit with INDX? At time of writing I don't have INDX for Core One L, but feel free to reach out to get me one. In all seriousness, from images that I have seen it is not likely. Maybe it'll be possible, maybe it would be taunting gravity too much. Will need to wait until I can get my hands on it. Do I need all those screws? Probably not, three per connecting piece is probably plenty but the cost of a screw is not astronomical so I err on the side of caution. Can I use any other material to print? I can't stop you, but considering PLA might be exposed to heat it's probably pushing the limit of it. ASA or PTEG tends to be less stiff so PC blend seems like the right choice. PCCF is probably another good choice for this, but I try to stay clear of carbon filled filaments. Obligatory material guide ref . I don't like gyroid infill. Sure, I get it. I opted for it as it seemed the most appropriate for this model and application. Some tests I did used adaptive cubed and it held up quite well. You do you, just don't skimp on infill if you plan to put quite some weight on the roof rack. The prints in the model images look like $&!) Not a question, and not very nice. But yeah... you're not wrong. These are my first PC prints and I hadn't really dialed it in yet. While printing my own roof rack I have been tinkering with settings and listed those here and applied them to the available gcode. I was quite pleased with those results despite there being room for improvement. I haven't had the Core One L for that long so it probably more a reflection of my familiarity with it & PC and less a reflection of the Core One L's capabilities. I want to remix, where's the CAD files? The model was designed in OpenSCAD, and frankly the code is a tad bit messy. I might clean it up and make it available soon ™. Changelog 2026-04-17: initial version
Originally published on Printables


