Customizable Honeycomb Wall (size, layout, thickness, solid sections, border, ...) and connectors
by RarePrinter · via Printables
| Format | STL |
| Category | Organisation |
| License | CC BY-NC |
| Triangles | 11.9k |
| Uploaded | Nov 19, 2025 |
⬇ 77 downloads
❤ 13 likes
👁 555 views
Description
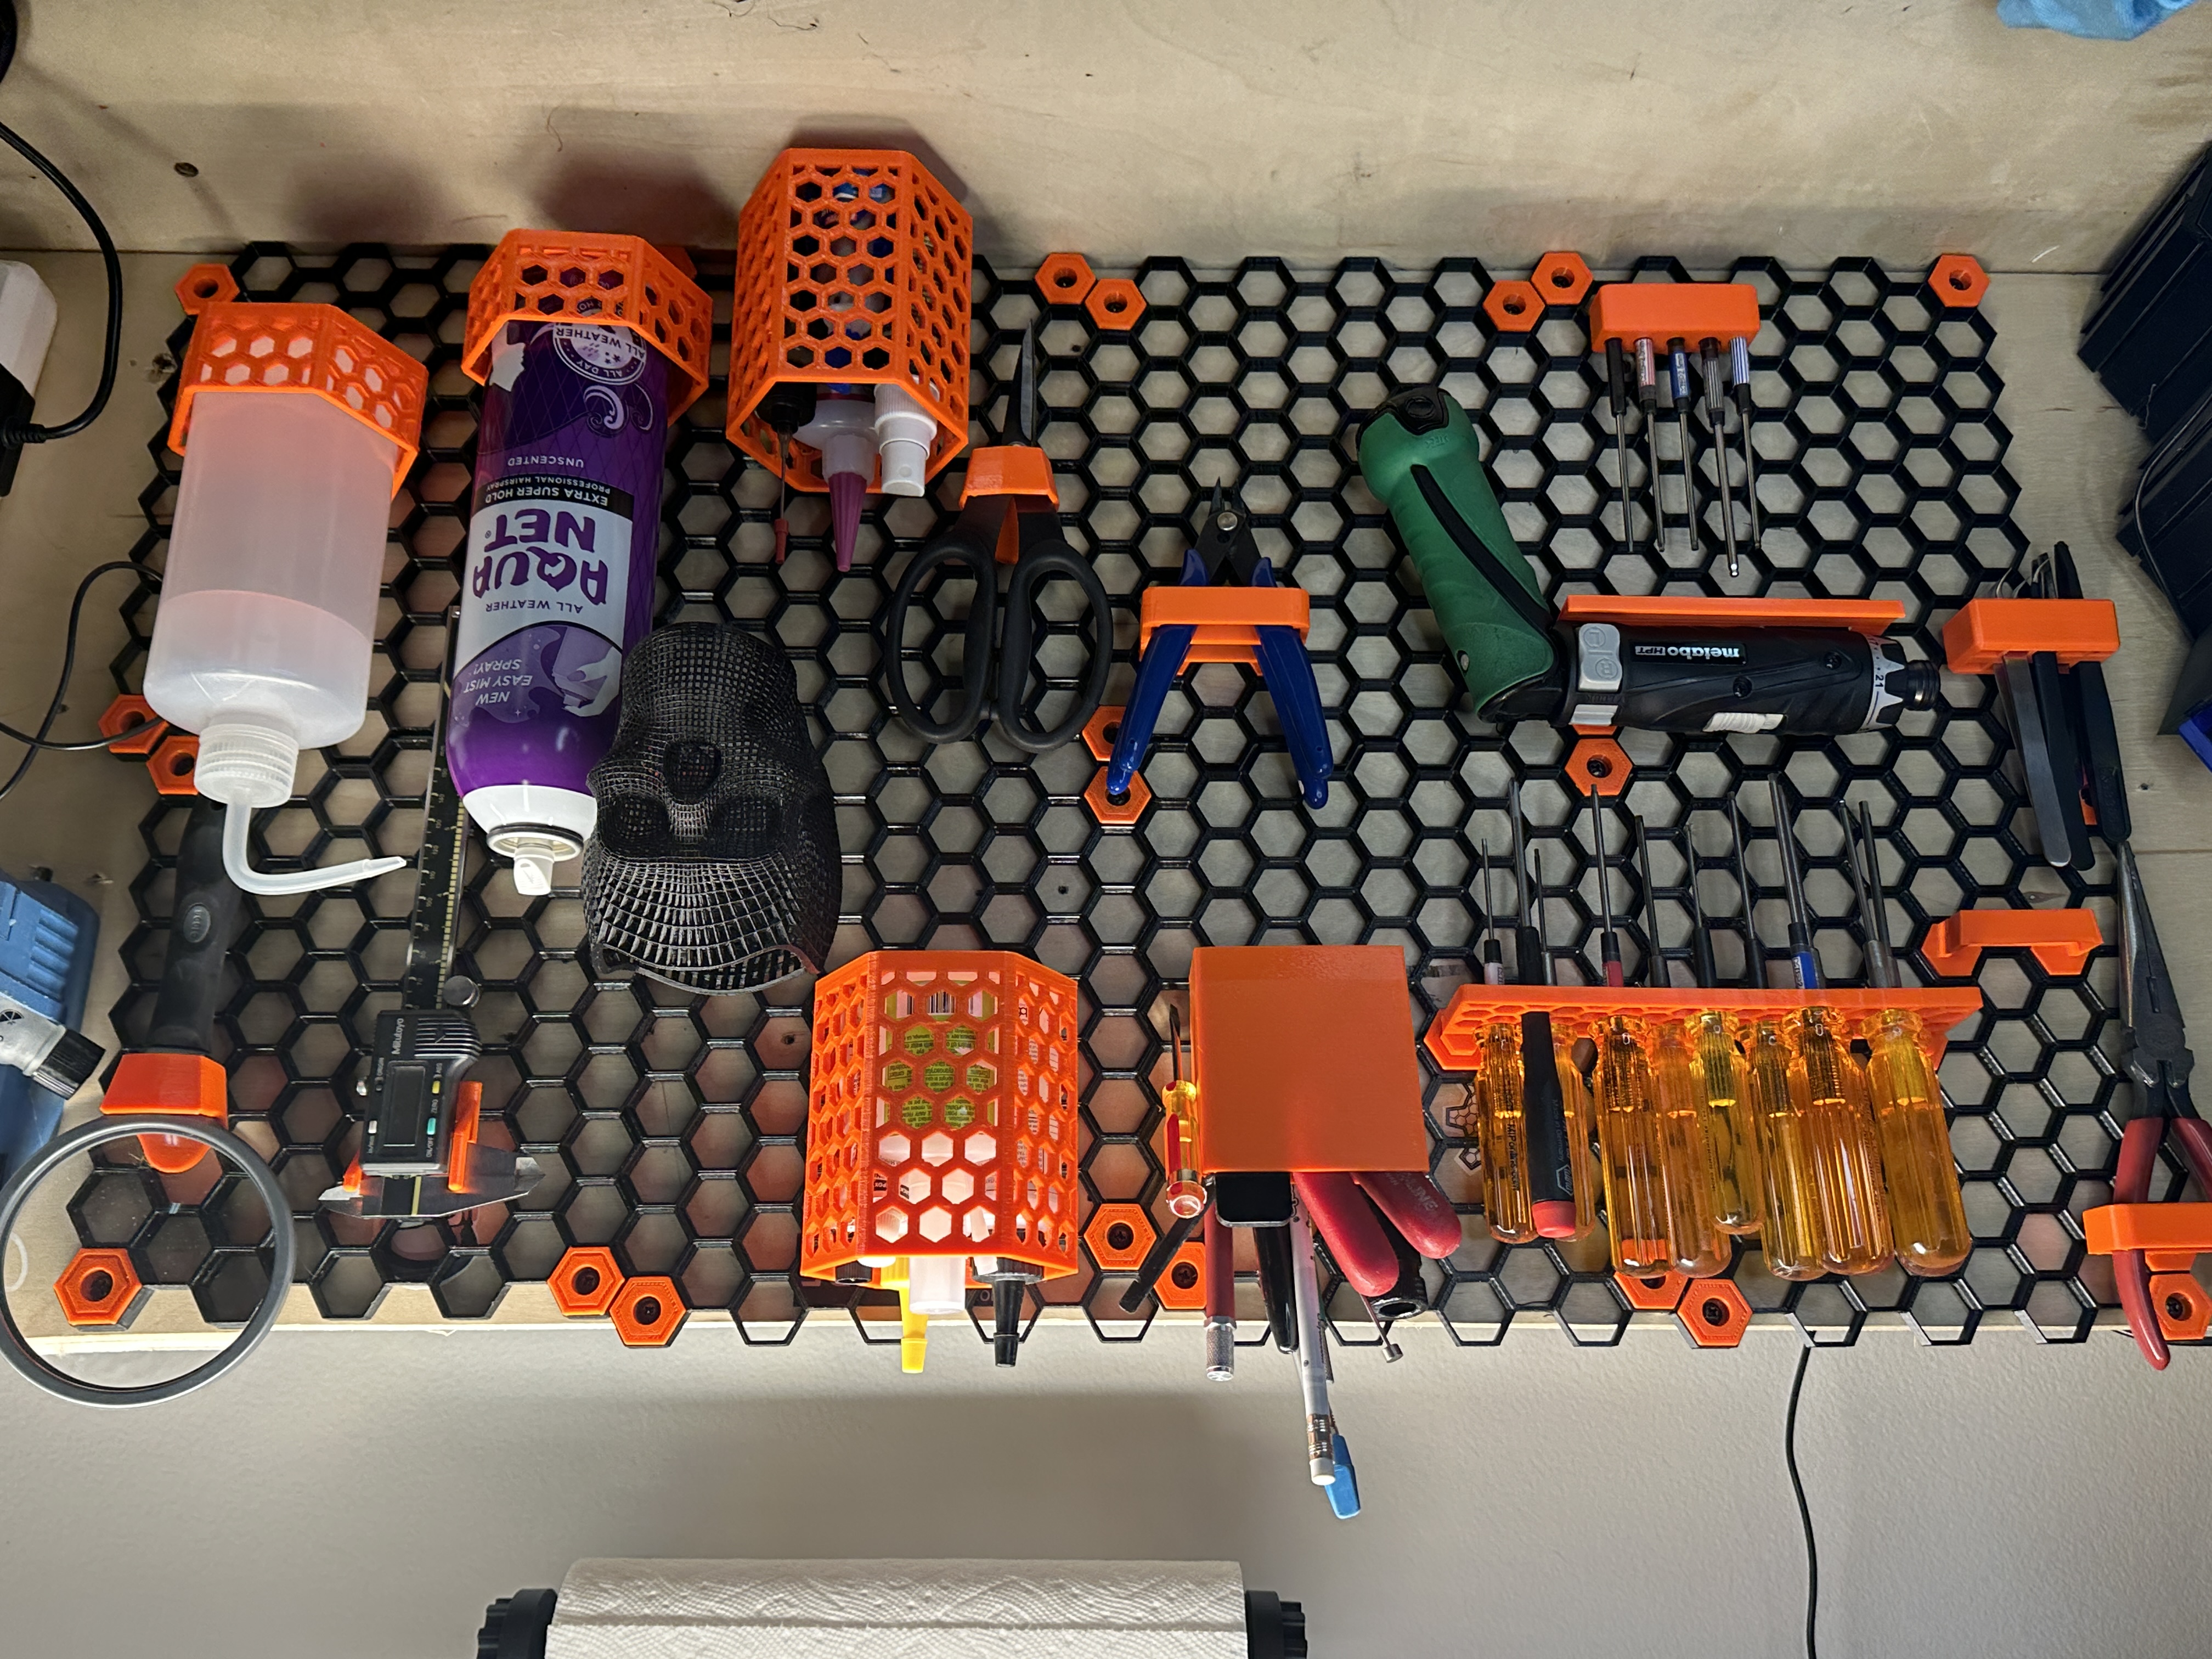
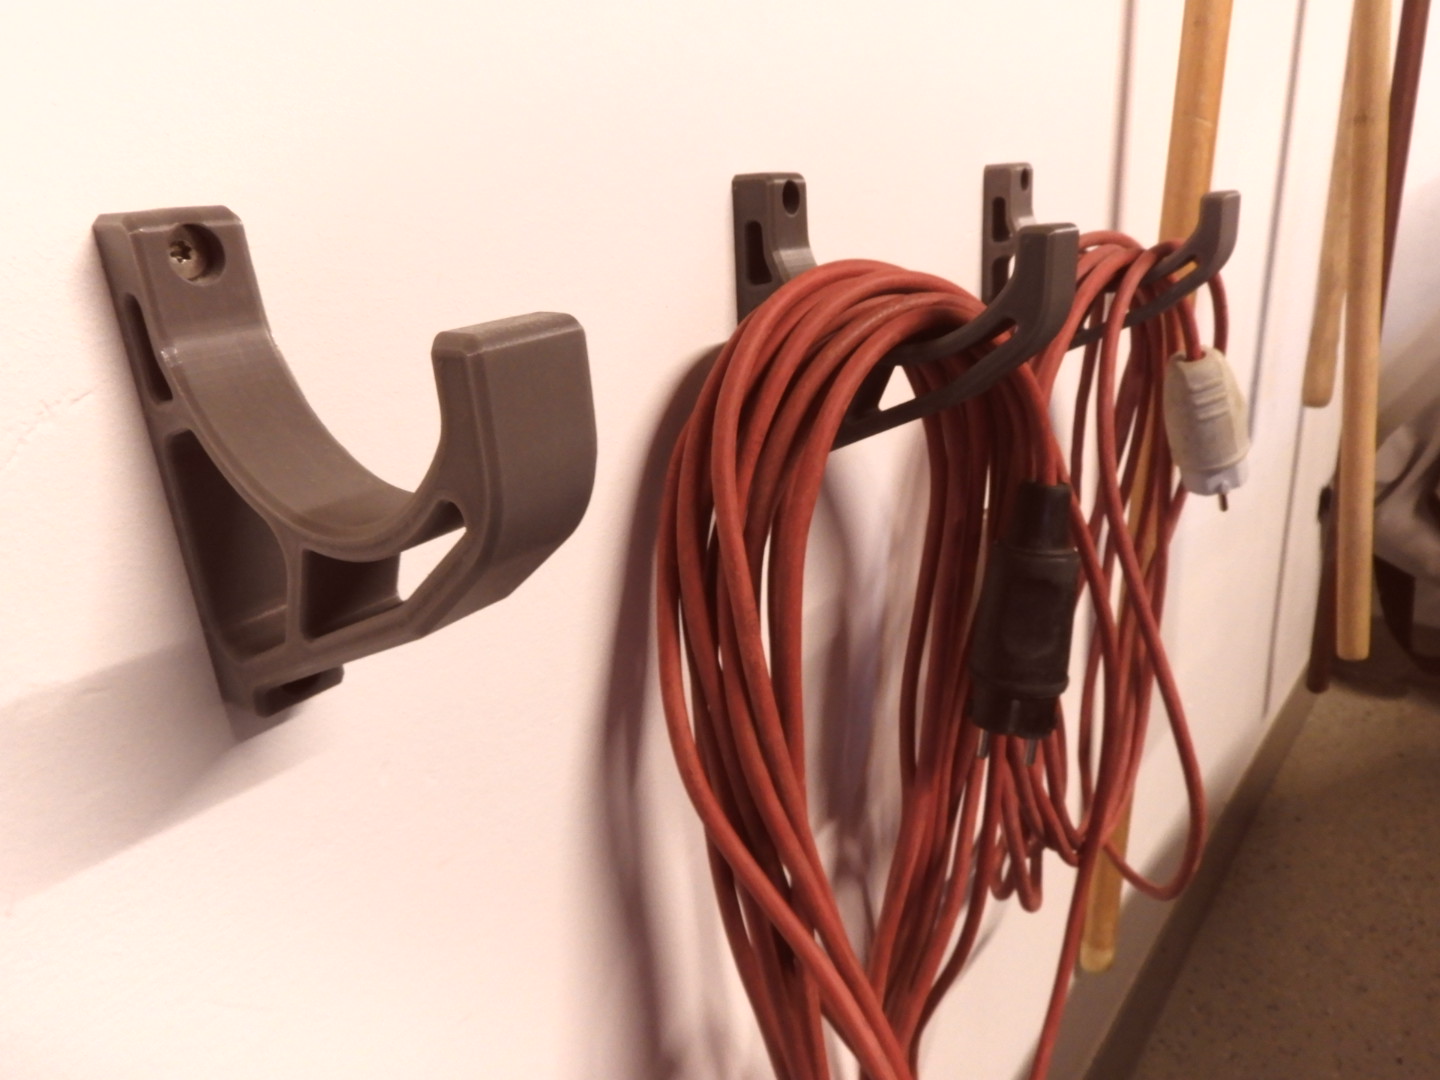
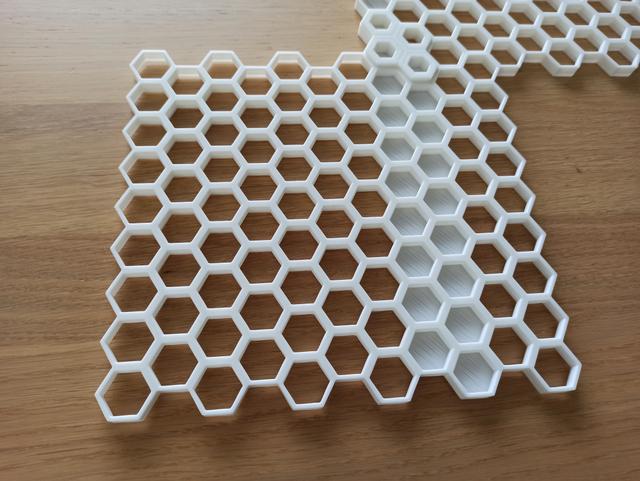
Very useful and functional code in OpenSCAD for a fully customizable honeycomb-pattern and inserts is already available. All necessary information for this can be found in the original models linked. In this remix I made a few modifications for a bigger project. Use the file custom-honeycomb-wall-v2.2_RR.scad for customizing the honeycomb-wall to your liking, and the file attachments_and_connectors_RR.scad for creating connectors and attachments in all variations (for this, the file insert_util_RR.scad must be downloaded into the same folder). Wall Thickness: The wall thickness of the hexes can now be customized to make the wall more sturdy. You can change the value directly in the code by setting the variable wall_thickness in the file custom-honeycomb-wall-v2.2_RR.scad . Remember to also change the wall_thickness -parameter in the file attachments_and_connectors_RR.scad if you want to create matching connectors and attachments. The "honeycomb-wall-example.stl"-file uses the setting “ wall_thickness=2.25 ”. The default is 1.8mm, which means that a single hex has a wall thickness of 1.8mm in the thicker part and 1.8mm-1mm=0.8mm in the thinner part. That means just 2 perimeters at the thin outer border of the hexes. I wanted 3 perimeters for the thin border, so I changed the value “wall_thickness" to 2.25 (technically, 2.2mm would guarantee a thickness of 1.2mm for the thin walls, but for some reason the slicer only made 2 perimeters, that is why I increased it a bit to 2.25). Note that changing the wall thickness doesn't affect the size of the inner holes of the hexes, but it impacts the distance of the hexes from each other – see “compatibility” below. Solid Sections: I also added the option to add sections where the back of the wall (or the whole wall) is solid, so that it can easily be mounted to an existing wall with double-sided tape. Adding accessories remains fully possible even with the solid wall behind! For this, set the parameter include_solids to true and adapt the parameters solid_height (how thick the solid sections are), depth (total thickness of the honeycomb-grid) and column_solids to your liking. For example, set “solid_height=1” (1mm thick solid parts), set the “depth=9” (default 8mm + 1mm, to ensure that the hexes are high enough so that any inserts can still be locked in), and “column_solids=[ [], [], [for (i = [3 : 1 : 7]) i], [for (i = [2 : 1 : 7]) i] ];” to achieve the result from “honeycomb-wall-example.stl”. Note that adding solid sections while also changing the depth impacts the overall thickness of the honeycomb-pattern – see “compatibility” below. Print Instructions: I used the following settings for printing the honeycomb wall: 0.4mm nozzle at a layer height of 0.25mm I printed mine in PLA+ with 10% infill and with 2 perimeters Orient the honeycomb wall as usual with the thick lip facing downward even if you have solid-sections activated. That means that in order to print the solid areas, your printer must cover an overhang of the length of a hex. In my case this wasn't a problem. I added the file “honeycomb-testprint.stl” if you want to do a test print. It uses the standard 1.8mm wall thickness and adds a 1mm thick solid section behind two of the hexes, the overall depth of the honeycomb wall being 9mm (instead of the standard 8mm). Compatibility: The wall is fully compatible with the original wall, and also with all inserts that only take up one hex. To keep in mind: If the wall thickness is increased, the distance between the hexes is also increased. That means that the size of any connector that extends over more than 1 hex must be increased as well. Change the wall thickness in attachments_and_connectors_RR.scad to match your honeycomb wall-thickness in order to create matching connectors and attachments. If a solid section is added to the back of the honeycomb-wall (and ideally the depth of the wall is increased for that), the honeycomb-wall will be thicker than the original model. This does not apply if you fill the whole hex and leave the depth as it is.
Originally published on Printables