Dagger (model rocket)
by ilikeairplanes · via Thingiverse
| Format | STL |
| Category | Mechanical |
| License | CC BY-SA |
| Uploaded | Mar 27, 2026 |
⬇ 12 downloads
❤ 2 likes
👁 57 views
Description
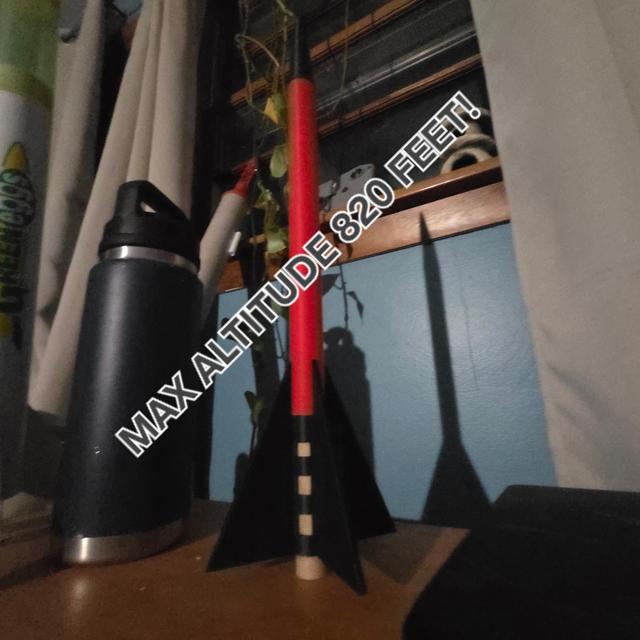
Chat i may have cooked. this thing should be absolute cinema. 100% 3d printed. Can be made by anyone. Only 3 pieces!!!!! 1x nosecone 1x tube 1x engine holder In your slicer, disable uniform scaling and extend the tube to 250 mm on the z. If your printer cannot do 250, just do the longest you can. So this is pretty self explanatory, but on the tube you will notice that at one end the wall is thinner. This is where the nosecone goes in. Print it with the thinner end up top to not need supports (seriously, who wants supports?) To build, you start by putting the tube on the engine mount. Congrats! You have completed half of the building. Next, get a piece of paper, scissors, a bunch of rubber bands and some glue. Hot glue works for this too. Now, cut the rubber bands in half and tie each rubber band to each other until you get one long rubber band. This is your shock cord. Now, take your piece of paper and cut out a small piece, around 3/4 inch by 2 inches. Fold this into thirds so that you have three square-like rectangles. They will not be squares, and that is completely normal. Now, take an end of your shock cord and your glue and then put the glue in the center in a line of boxes 1 and 2. Place your shock cord on this. Next, put some hot glue over the shock cord on box 2, the middle box. Fold box 3 over ( the box without any glue or shock cord) and hold until set. Next, put some glue on box 1 and fold over again. Hold until set. Your shock cord should now be secured in the paper. Next, put some glue on one side of the paper and immediately place it into your body tube and hold it to the side until set. Put it a bit in, not too little that the nosecone will not go on. Next, take the other end of the shock cord and tie it with a double knot to the nosecone. Next, take a 12 inch parachute and loop it onto the nosecone. Now, your nosecone should have both the shock cord and parachute attached. PREP FOR LAUNCH Insert engine into rocket. Estes C6-3. Insert recovery wadding and fold and insert parachute. Insert shock cord and place nosecone on top. Get the engine ready. Place the igniter inside the engine and put the plug over it. Your rocket is now ready to be put on the launchpad and be launched. PRINT SETTINGS (for once, this is actually important) 5-6 wall lines (For durability) gyroid 15% infill brim on the tube(trim off then sand edge) Supports- yes (but you only need it on the nosecone on the edge) IF YOU HAVE A MULTICOLOR PRINTER, DO NOT DO IT IN ONE PRINT. SAVE FILAMENT AND JUST DO IT IN 2. (THIS IS ONLY IF YOU ARE DOING MULTIPLE COLORS) Enjoy!
Originally published on Thingiverse


