Ender 3 v3 KE Lightbar and Gantry Combo - Trivious Edition
by Trivious · via Printables
| Format | STL |
| Category | Art |
| License | CC BY-SA |
| Triangles | 69.8k |
| Uploaded | Jan 20, 2025 |
⬇ 70 downloads
❤ 18 likes
👁 1.0k views
Description
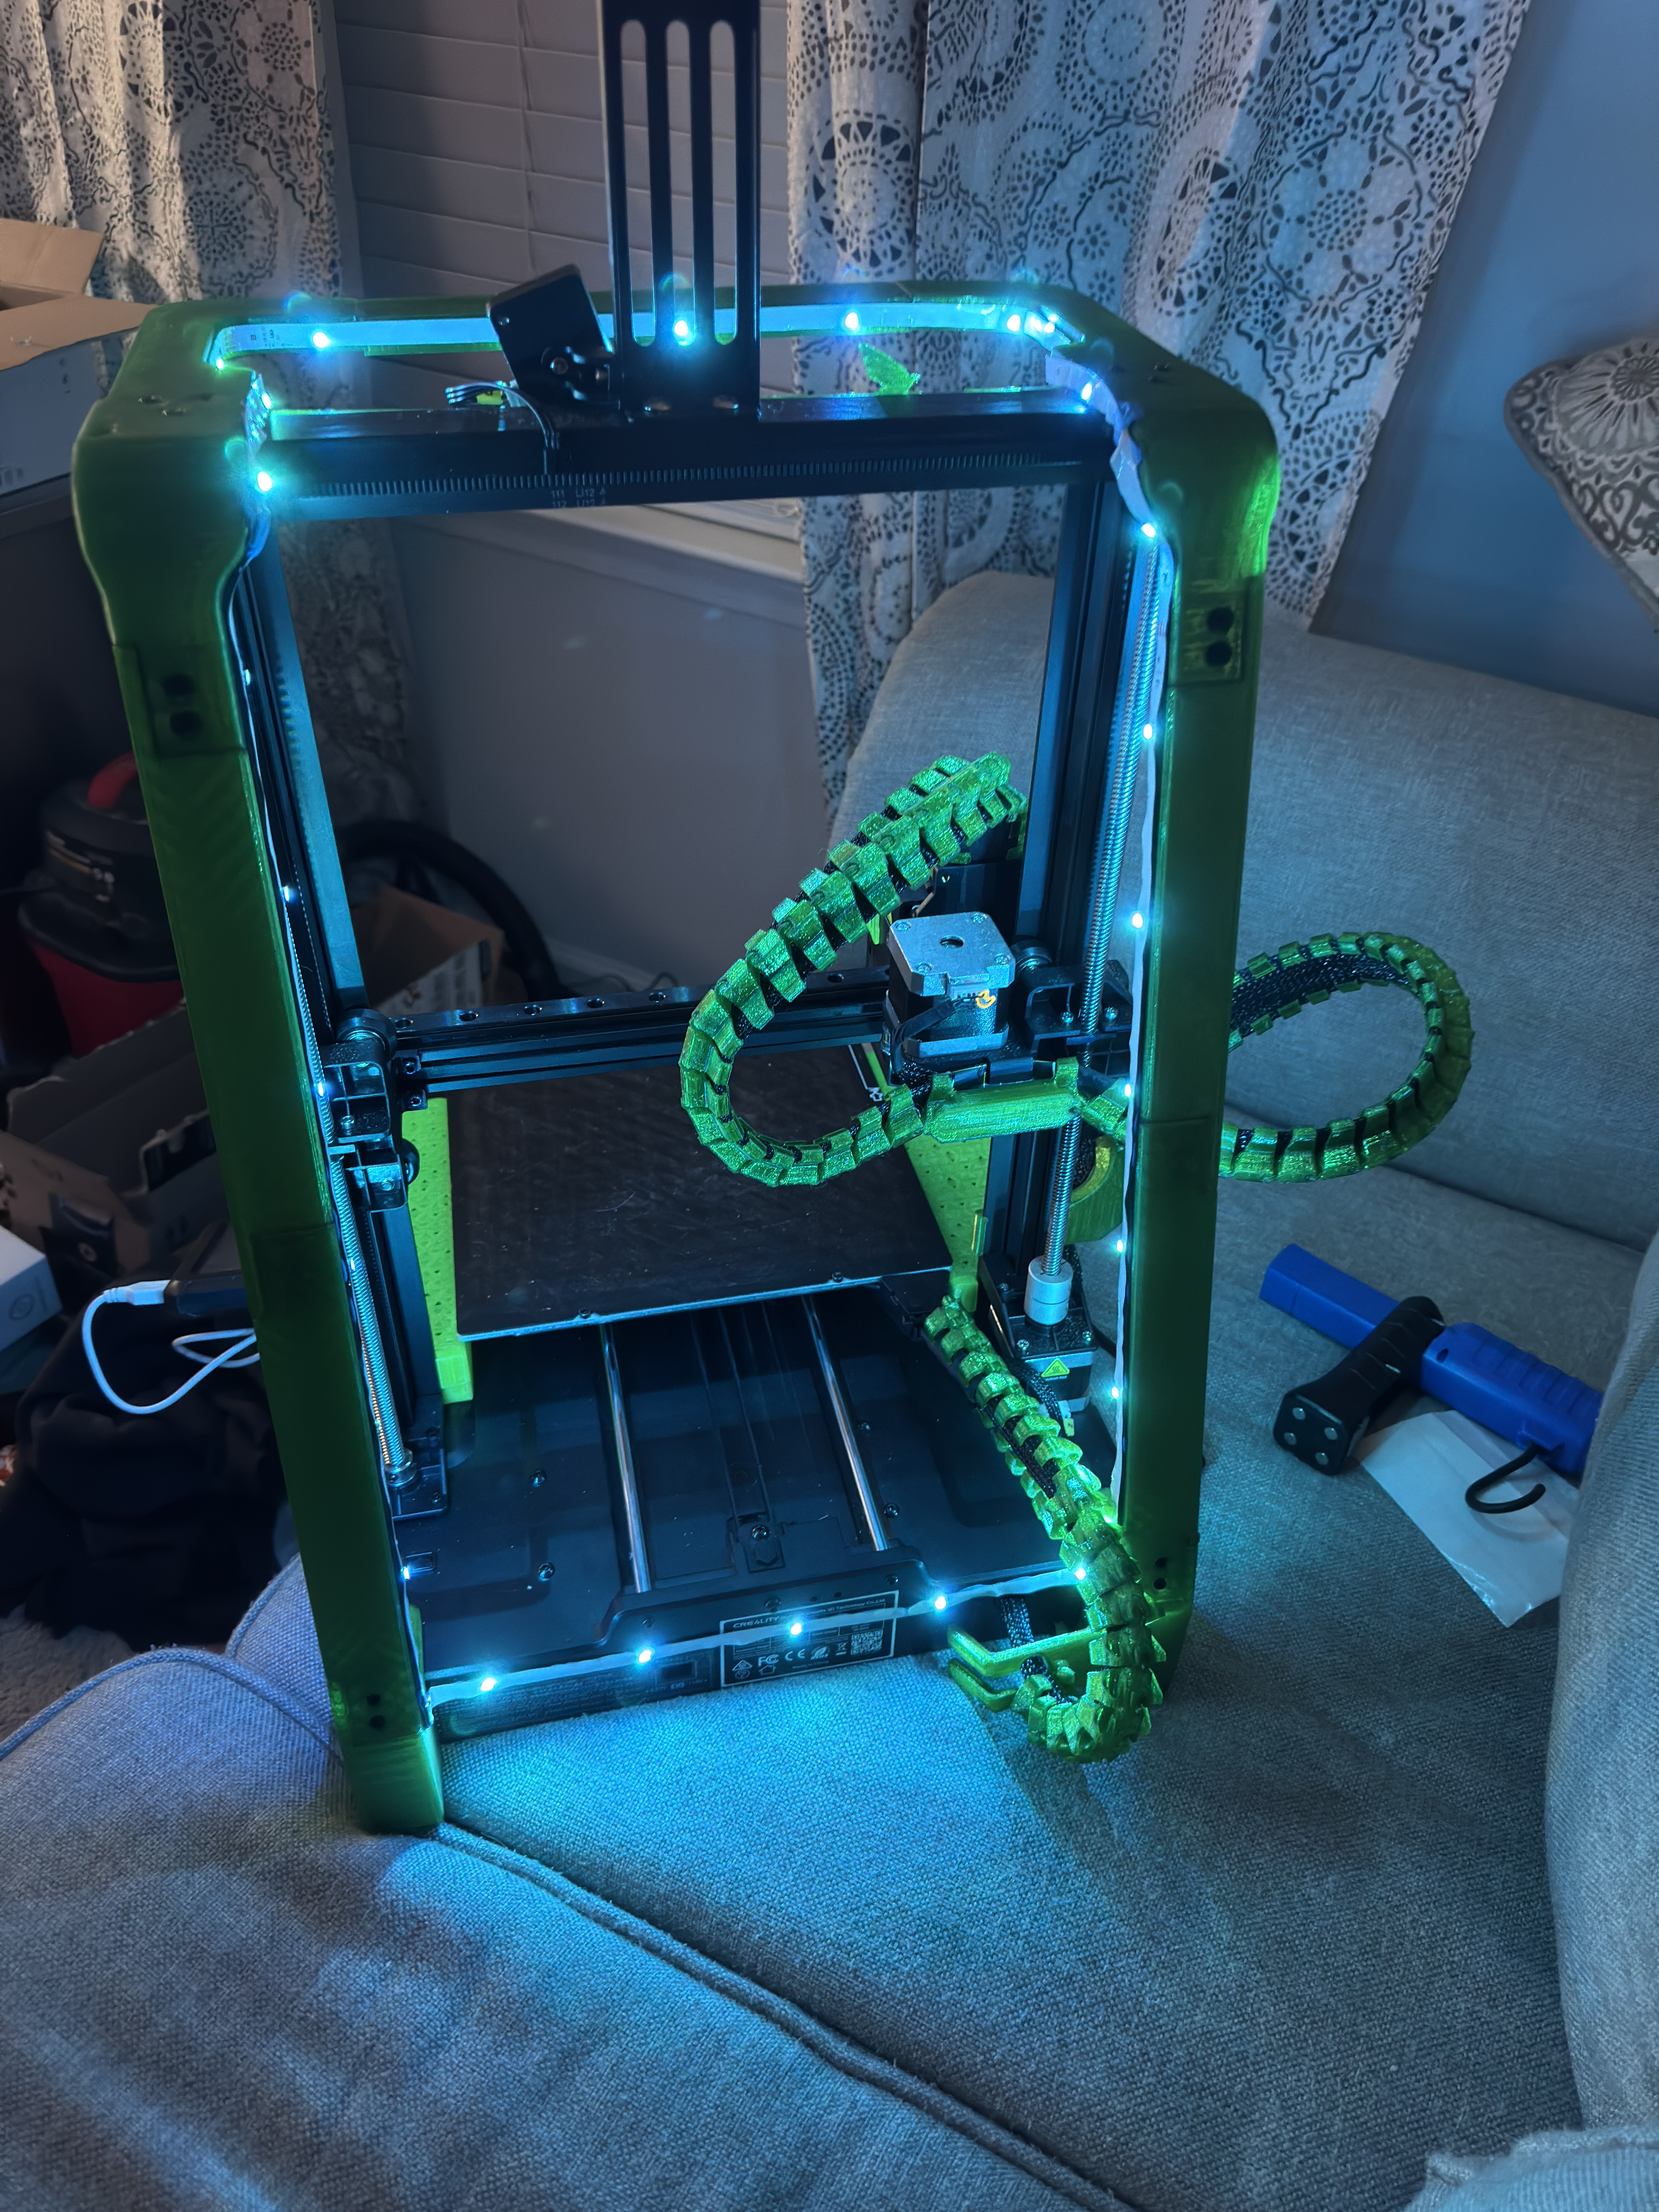
I got an Ender 3 V3 KE in November 2024. I've been printing for years on other peoples printers both filament and resin, but the price of the machines and time it took was not where it needed to be yet back then. Now that it is I started out with this printer mainly as it had decent reviews and autoleveling. This is FAR from a budget machine. The Ender 3 V3 KE is an absolute power house for the price point. I noticed a few things that were incensing so I needed a light and I needed to stop the shaking of the top gantry from the VERY poorly engineered tower that holds a 2.2LB weight overtop a plate moving at 350mm/sec. *** Bonus *** I got a 16 foot LED multicolor and multifunction strip kit for $2.99 on amazon that does strobe, fade, full RGB, and sound sensitive and ran the controller behind my nebula pad on the side. My LEDs were not as bright as I had hoped, but they are not permanently attached so I can replace them whenever I want and no disassembly is required. Additionally I opted for the USB LED lights so I could just run it to the hidden USB C in the bottom of the Nebula pad. (The USB-C doesn't work as it has no +5 volt so I went ahead and plugged it in via the side usb lol) I'll keep it simple. Parts you cant print are linked below. The tutorial provided by Cheesmac will do but I suggest a few things. *** On the gappers/shems I needed none on one side and 2 on the other at 3mm for the top and bottom of the fitting. You will understand when you assemble the braces to the bottom mounts. They are so small I would just print 4 of each to be safe, but thats up to you if you dont have them and want to reassemble your printer to print them just to tear it down and start over. Either way I did the ladder and I got lucky because I printed two of each and used 2 of the same side (that was it no more left). Luckily the other side needed no gap. That alone speaks to how far my gantry was off by. *** Once you print the lightbar/gantry top combo piece you will notice the 3 triangular alignments for the screws that top the gantry bar. When I assembled mine I noticed that the cylinders for the existing screw holes (on my new gantry support top) were not in all the way in at first which led to a ¼" gap on the gantry. Make sure you get those holes lined up with the original holes or the screws will not reach. 📷 Image redacted — claim this model to add your own media *** The second issue with this piece is that in order for the screws to make the length I either had to get longer screws (these came with it so why complicate it) or simply chamfer the screw holes on the top of the new gantry to allow the head of the M3 Hex screw to fully sink into the printed piece. After that it fit perfectly. 📷 Image redacted — claim this model to add your own media *** Tightening the TOP gantry should NOT be overlooked. I recommend you get all 3 screws in on each side and tighten them just snug until the end and when you tighten, you should fully tighten the single screw near the back off the machine first as that is where the gantry support puts the pressure. 📷 Image redacted — claim this model to add your own media Unprinted Materials: You will need 12 self tapping M3 screws at 10mm. I bought this kit and now I have a shit ton of self tapping M3s for various projects left over. It was $10 on amazon. 📷 Image redacted — claim this model to add your own media 📷 Image redacted — claim this model to add your own media 📷 Image redacted — claim this model to add your own media Superglue - Pick whatever you want. I like the ones with nozzles that you can reuse, but was not at all impressed by the gorilla glue I got. Its what I used but in retrospect, I should have used something else. Regardless the strength is fine with all of the extra screws. 📷 Image redacted — claim this model to add your own media
Originally published on Printables


