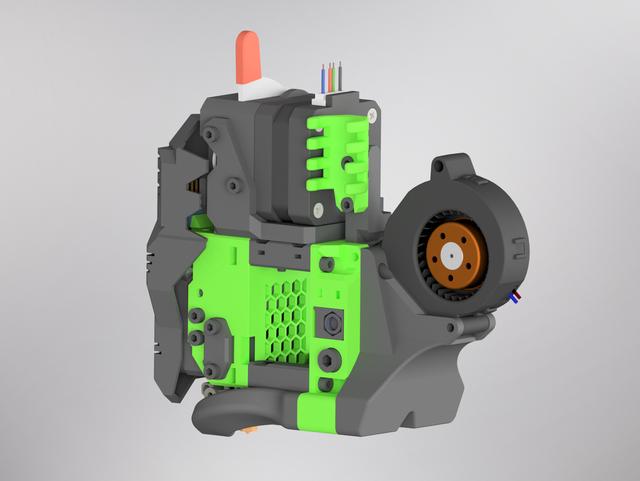
EVA 3 Inlet for EBM-Papst RLF 35-8/14 N
by MCoSoNo · via Printables
| Format | STL |
| Category | Art |
| License | CC BY-NC-SA |
| Triangles | 18.8k |
| Uploaded | May 12, 2022 |
⬇ 112 downloads
❤ 25 likes
👁 1.4k views
Description
This is a remix of the 5015 single fan inlet for EVA 3. It supports the RLF 35-8/14 N fan from EBM-Papst . The fan ist secured with a single M3x25 screw and nut. It is also possible to use two heatset inserts in the lower hole of the fan and use one M3x8 on each side. It should clear the top back 3030 extrusion of the RatRig V-Core 3. But I only checked this in CAD and not yet on the printer itself. Printed in eSun ABS+ with 0.2 mm layer height. Update on 2022-06-21 I added a new version of the inlet where the fan sits flush on the backplate. Use this version if you have not enough space in the back of your printer for the old design. You can use two additional M3x16 countersunk screws to attach the bottom part of the inlet to the backplate. It is not absolutely necessary, but it prevents the inlet from rotating. You will need a ball head allen wrench to tighten the screws. Print one of the three arms to attach the fan on the top left hole to the backplate. EVA-3-Inlet-EBM-Papst-RLF-35-8-14-N-Arm-Screw Screw directly into the printed part. You need one M3x10 screw to attach the arm to the backplate and one M3x20 screw to attach the fan to the arm. EVA-3-Inlet-EBM-Papst-RLF-35-8-14-N-Arm-Heat-Set Use two M3xD4.6xL4 heatset inserts in the arm. You need one M3x10 screw to attach the arm the the backplate and one M3x20 screw to attach the fan to the arm. EVA-3-Inlet-EBM-Papst-RLF-35-8-14-N-Arm-Hex-Nut Remove the sacrificial layer from one hole and press one M3 hex nut into the printed part. Use one M3x20 screw to attach the arm to the backplate with the another M3 hex nut on the right side. Use one M3x25 screw to attach the fan to the arm. Warning I would not recomend the new inlet for the RatRig V-Minion, because the power cables of the fan could colide with the x-axis motor mount and take damage. If you use it on the V-Minion check that you have enough clearance between the fan cables and the x-axis motor mount.
Originally published on Printables


