Finger Slinger 2.0 with Bearing Joint
by Cristobal5050 · via Printables
| Format | STL |
| Category | Mechanical |
| License | CC BY-NC |
| Triangles | 114.4k |
| Uploaded | Aug 11, 2023 |
⬇ 82 downloads
❤ 8 likes
👁 647 views
Description
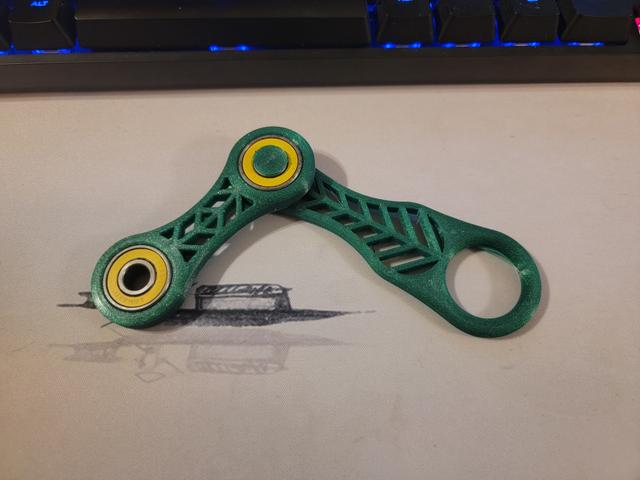
!! Attention: See the new upgraded model here ! !! While the original print-in-place bearing is fantastic and works very well, the nature of the print-in-place arrangement means that the underside of the top part ends up a little messy. In addition, a real bearing provides more stability and weight to the gadget. For this remix, you will be able to print the two parts separately, to a point. I've added a stop to the included g-code just before printing the final cap on the bearing joint. Once the stop is hit, you must carefully remove the top piece (the one with the two holes for bearings to be inserted) and insert your bearing. Make sure to get the bearing all the way in and flush with the top because the printer will be printing directly on the bearing bezel and the pieces are designed exactly. Once the bearing is in, place the second piece on top of the first so that the bearing slots onto the protruding rod. Again, make sure that it goes all the way down and the rod is flush with the top of the bearing so that the print is unobstructed, otherwise, you could damage your printer by causing a collision of the nozzle with the misaligned bearing. Once that is done, simply resume the print and in seconds the final piece will be finished and your new upgraded spinner will be complete! No messy bottom, and out-of-the-box (printer) smooth spinning! There are a few aesthetic things that I will be updating on the print at some point soon, as well as possibly some tolerance adjustments and spacial tuning, but for now, I'm super proud of it, especially as my first project, and would love to hear any feedback you might have!
Originally published on Printables


