Flashforge Adventurer 5M (AD5M) - simpler, easier, faster drag chain termination at hotend (v1.1)
by Doug Joseph (design8studio) · via Printables
| Format | STL |
| Category | Other |
| License | CC BY-NC |
| Triangles | 12.2k |
| Uploaded | Feb 15, 2026 |
⬇ 94 downloads
❤ 11 likes
👁 456 views
Description
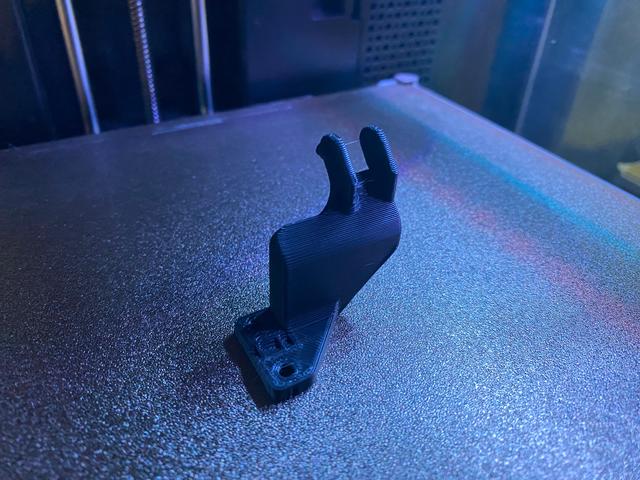
NEW Makes it so part prints as one piece instead of two, no supports needed, and this eliminates a step of gluing two pieces together with CA glue. I'd have simply used the remix of my design by WingWong (@WingWong_521453) but his caused alarm in OrcaSlicer about non-manifold edges (i.e. flawed geometry). So, this is a remix of my own design, with not a single polygon from WingWong's, but I still credited their remix here as I want to give them kudos for the good idea. As I told WingWong (in comments on their remix): Hey, just a heads up: I went to print yours (to replace one of mine that broke over time) and when I dropped it into OrcaSlicer, it threw alarms about non-manifold edges (i.e. flawed geometry). So, I just remixed my original design to have the same approach you have here. But if you can provide an STL that is clean and does not throw errors in OrcaSlicer that would be great. Again, as I stated earlier, this is a cool remix. I see no loss of strength and only ease of print. As the guy who came up with the original design, KUDOS. (The attached photo of a print is my remix of my own design, using your approach. The OrcaSlicer screens are your remix.) Note: All the following is merely copied and pasted from my previous design: OLD (in this, ignore the part about gluing two pieces together) This short video explains everything. NOTE: this is not listed as being compatible with AD5M Pro. I have not tested it with Pro. One maker did, and they said it is not compatible with Pro. The Flashforge Adventurer 5M ("AD5M") is a fantastic printer at a great price. The design for the printed enclosure upgrade is very nicely designed and well thought out. There was really only one aspect of the design that seemed could be improved. This is a simpler, easier, faster, and more durable… drag chain termination at the hotend/extruder. Two prep steps and three install steps: Steps to prepare: Print one extra cable chain link and install it onto the chain. (This should bring the total links to 21. If you still need the file for printing the chain, click here and tap on the menu choice labelled “If you want to do 100% DIY: Drag chain kit”.) Print the two parts in this listing (using 40% infill for strength), and CA glue them together as shown below. The parts print as oriented and without any need of support. Print slice plan shown in OrcaSlicer: 📷 Image redacted — claim this model to add your own media 📷 Image redacted — claim this model to add your own media 📷 Image redacted — claim this model to add your own media Parts glued together with CA glue: 📷 Image redacted — claim this model to add your own media A "ridge" (shown below in x-ray view) fits into a corresponding detent to help with alignment during glue-up: 📷 Image redacted — claim this model to add your own media Steps to install: Attach the new part to the cable chain. (It has a part at the top that resembles the male end of a cable chain link.) Where the cable goes into the hotend / extruder, there is a small tab with two screws in it. This tab secures the cable. Remove the two small screws, and save them for reuse. Replace the small tab with the bottom of the new part. Tighten the same two screws into it that used to hold the old tab in place. Save the old tab if you wish, just in case. Filament choice? If you normally print in PLA, or other filaments that don't require a heated chamber in the enclosure, then certainly this part can be printed with PLA. If you plan on ever printing with filaments that require high temps for both printing and their enclosure chamber temperature, then certainly print this part using a more heat resistant filament choice. That's pretty much it. You're now done. All the other steps from the install should be followed as in the manual for the enclosure upgrade . Other cool options for the AD5M You may also like my other AD5M related design work: https://www.printables.com/model/785667-flashforge-adventurer-5m-ad5m-simpler-easier-faste https://www.printables.com/model/813334-flashforge-adventurer-5m-ad5m-printed-camera-mount https://www.printables.com/model/814546-flashforge-adventurer-5m-ad5m-nozzle-storage-box-t https://www.printables.com/model/827706-flashforge-adventurer-5-ad5m-led-mod-accessory-buc https://www.printables.com/model/828632-flashforge-adventurer-5-ad5m-led-light-bars-mod-ac https://www.printables.com/model/834011-flashforge-adventurer-5m-ad5m-side-cutter-mount-v1 https://www.printables.com/model/834097-flashforge-adventurer-5m-ad5m-improved-spool-holde https://www.printables.com/model/886714-flashforge-adventurer-5m-ad5m-filament-cutter-comp https://www.printables.com/model/1119699-flashforge-ad5m-enclosure-hinge-remixed-to-be-easi https://www.printables.com/model/1119872-flashforge-ad5m-door-handle-remixed-to-print-witho Use Klipper stuff on AD5M stock hardware, …such as Mainsail, Fluidd, and Klipperscreen, etc, with the stock Klipper install on the AD5M's main board. Get it here: https://github.com/xblax/flashforge_adm5_klipper_mod Check out other cool AD5M related options here: https://github.com/g992/flashforge-ad5m-5mpro-research My PayPal tip jar: https://paypal.me/design8studio 📷 Image redacted — claim this model to add your own media 📷 Image redacted — claim this model to add your own media
Originally published on Printables


