Flying V Guitar
by Semi · via Printables
| Format | STL |
| Category | Other |
| License | CC BY-NC |
| Triangles | 2.3k |
| Uploaded | Jan 13, 2024 |
⬇ 572 downloads
❤ 148 likes
👁 6.3k views
Description
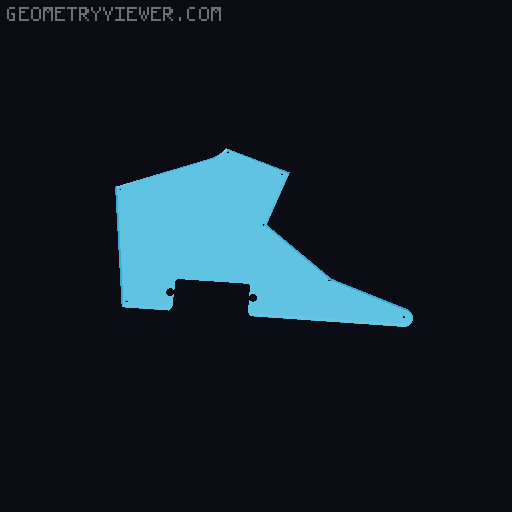
Description: So, this is still a work in progress and updates/Modifications are sure to follow. However for now it works and is printable and useable in its current state. Have a look at the images and video's below for reference. Some assembly and DIY experience is HIGHLY recommended.. this is not as plug and play as the PrusaCaster and can get expensive. I would NOT try this as your first 3d print/project. The tolerances on this are TIGHT ... but I know and trust my Prusa i3 mk3s+ 📷 Image redacted — claim this model to add your own media When I first got my 3d printer as a birthday present in Jan 2022, I wanted to make a guitar and everyone told me it wouldn't work. I had seen the plasticaster and honeycaster online, though I decided to learn more about my printer before jumping into something that big. Then of course the PrusaCaster blog came out in Feb '23, and down the rabbit hole I fell. I was very soon making violins for my wife, and on the 15th of April, my son asked me if I could make him a guitar for his 13th birthday on the 1st of May... which didn't give me much time! He started playing guitar after we took him to see Slayer for their farewell tour in June of 2019… He was only 9 at the time, but he fell in love with music and guitars. based on this, I decided to try make him a replica of Kerry King's guitar, and what better than the 2010 Signature V by B.C. Rich from the year he was born. 📷 Image redacted — claim this model to add your own media So while this has all been designed by myself in Fusion 360, Credit has to go to KFK, the plasticaster, the honeycaster and the PrusaCaster for all the inspiration. This one can be made cheaply like the PrusaCaster.. or you can go all out like I did (or still am as I need better parts but I need save up a bit more for the original whammy). After a few days of no sleep and tons of research, I decided to use the specs from the Gibson ‘83 Flying V, and modify it to match KFK’s guitar I needed a 24 fret guitar neck, and decided on the Harley Benton CST-24T. The pickups and parts that come with this should work perfectly. However I really wanted the sounds that KFK gets on stage, and I opted for the original EMG 81 Bridge and 85 Neck pickups, a built in preamp and 3 way toggle switch. The original parts from the CST-24T kit should all fit, at least I have tried them, but the final design and assemble for this was made very close to the EMG sizes as per the fusion 360 image below. The tremolo (whammy bar) is currently one from the kit, but will one day be replaced by the Kahler Hybrid tremolo when I can afford it. 📷 Image redacted — claim this model to add your own media 📷 Image redacted — claim this model to add your own media Finally.. before his Birthday I had to have it tested, and well.. I think Jerome's expression in the video below says it all: Hardware Minimum Required: Harley Benton Electric Guitar Kit CST-24T 20 off M2 x 8mm flathead/countersunk screws (or ~14.. if you glue the back cover for the left mid section in place. This location is for the light controls and circut which most would not need) That's it, you can glue all the other parts together in the same way as the Prusacaster, and follow the assembly instructions from the kit for the rest. HIGHLY Recommended: Harley Benton Electric Guitar Kit CST-24T (Guitar 24 fret neck) EMG Kerry King Black set 20 off M3 x 5,7mm threaded inserts 2 off M3 x 40 mm flathead/countersunk bolts 18 off M3 x 15mm flathead/countersunk bolts 40 off M2 x 8mm flathead/countersunk screws Optional: If you can not get the EMG Kerry King Black set, and want to use those parts, then you would need the following: Note: These are more expensive as separate items and are all available from https://www.emgpickups.com/ or https://thomann.de/ EMG 81 Black EMG 85 BK EMG PA2 EMG 3 Pos Toggle Switch IV Printing: Similar to the PrusaCaster. The core MUST be from PLA. For everything else it doesn't matter. (I used PLA for everything) Core: 2mm Layer Height. 7 perimeters, 6 top Solid Layers. 25% infill, cubic/grid pattern (angle adjusted to match the string direction), no brim/skirt. Organic supports for the tremolo/vibrato area only Body R: 3mm Layer Height, default settings. Organic supports on the battery pack only. Battery wont be needed for CST-24T kit anyway. All other body parts: 3mm, default settings. Print on the flat side (see example 3mf files for details) Scratch Plate Mid R: 2mm (Only print the one you need): If using the HB CST-24T only, then print the plate named (with CST-24T holes) If using the EMG pickups with PA2 boast, print the plate named (with PA2 hole) Scratch Plate (The rest): 2mm Layer Height, default settings. Finishing: While it should not be needed, I always file off any sharp area's and also sand down the parts showing to people to make them look better. Assembly: If you have printed the prusacaster, it should be pretty self explanatory. There are holes for the heated threaded inserts and everything can bolt together. For the scratch plates and covers, use the 2mm screws. Lighting: Still to come.. I'm working on a dual outlet jack and LED's that will be placed on the inner areas of the guitar and powered by an additional 9V battery and an Arduino to create lighting effects when the guitar is played. UPDATE: The lighting effects are almost done. I just need a few more components that are on their way to complete the build: UPDATE: Completed the Arduino light setup for this: The wiring diagram can be found at https://forum.arduino.cc/t/yet-another-sound-from-a-guitar-output-to-power-leds-question/1128105/32 Parts used (Requires soldering experience.. I had zero when I started): 1 x Arduino Nano (V3) 1 x MSGEQ7 chip (Seven Band Graphic Equalizer) 1 x 1M long WS2812B RGB, 144 Pixels LED strip (cut into 4) 1 x 9v battery connector 2 x Micro switches 2 x 100 kΩ resistors (or 1 x 200 100 kΩ resistor) 1 x 22 kΩ resistor 3 x 0.1 µF capacitors 1 x 33 PF capacitor 1 x PCB board and connectors ( example ) Arduino code to follow.
Originally published on Printables


