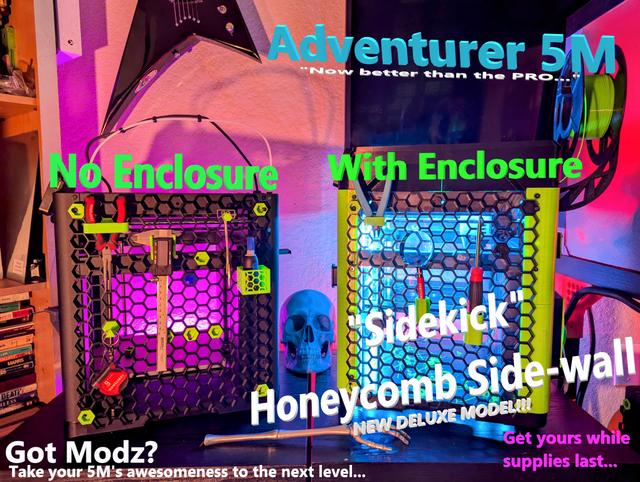
Full-size Honeycomb/Hexagon/Hex Side-wall, a.k.a. "Sidekick", for Flashforge Adventurer 5M
by hydrocannibal · via Printables
| Format | STL |
| Category | Art |
| License | CC BY-NC |
| Triangles | 8.9k |
| Uploaded | Jul 13, 2024 |
⬇ 391 downloads
❤ 130 likes
👁 3.2k views
Description
DESCRIPTION Much thanks to the creators of Honeycomb system, and the Flashforge Enclosure, for making this remix possible, the links are included in this profile. Codename sidekick is ready for unveiling. All pieces are printable on the 220x220 build plate of the Adventurer 5m. Works WITH or WITHOUT the ENCLOSURE . Look cool either way. I hope my honeycomb side-wall, aka “Sidekick”…extended remix… for the Adventurer 5m… brings some added utility and accessory / accessories to your setup. The honeycomb wall itself, is an awesome platform with so many different modifications, ideas, and pieces that people have made for it, its just an amazing platform for accessories…and this brings the ability for all of them to be…..well….stuck to the side of your printer! With the honeycomb wall in place on the side of your 5m, you can develop new ideas for new pieces to integrate with your machine and / or workflow, or just show off. Just having a spot where I can have my most frequently used tools within reach, (like my snippers, bottle of superglue, calipers, etc…) is a game changer in my office workflow and efficiency. Every honeycomb accessory that exists, is now compatible with the side-wall of my 5m…my Sidekick ;) Plus…..it just looks friggin cool as heck. Looks cool, and technical, and is techicnally awesome. I hope somebody someday will make a filament spool holder that will allow the spool to be held neatly on the right side in the middle like that. Maybe that will be another project for another day ;) But the possibilities are now endless….snipper holders….glue containers..raspberry pi mounts, cable management……filament holders….beer holder (hey if thats your thing)…it is now a possibility. Your mind is the limit. Do a search on printables for “honeycomb wall” and check out all the accessories that are out there, this now makes ALL-OF-THEM them possible….smack-dab, right there on the side of your 5m. checkmate. (Im working on the left side as well…and maybe a door, who knows.) INSTRUCTIONS (First look at the diagrams in the pictures, that should explain about 90% of it) This is the Honeycomb side-wall, aka/code-name… “Sidekick”, for the Flashforge Adventurer 5m. It is compatible WITH or WITHOUT the (FLASHFORGE RECOMMENDED PRINTABLE ENCLOSURE). (Works with stock screws if your not using enclosure….with enclosure u will need M4x8mm screws at least). ….I recommend utilizing the honeycomb system WITH the enclosure…for maximum gnarly-awesomeness. You do not need to print the enclosure pieces: A1, A2, and D2, if (you do not have an enclosure, and) you are just installing the honeycomb wall directly on the side of your printer. They are not necessary, the honeycomb part will fit on the side of your printer by itself. (Refer to pictures for example how to install without enclosure.) If you DO have the enclosure….then you need to print these special pieces (A1, A2, and D2) to replace your current pieces…this is to provide the proper holes for screws to secure your Sidekick to the 5m…..ALSO: i would suggest tying your shoelaces and tucking in your whitey-tighties..…because we will soon be approaching MACH-3 of raw, unfiltered AWESOME……….. (upon completion), and I don't want your socks to be blown off. Its also a good idea to start wearing sunglasses now because your printer's coolness will rub off on you (and transfer), so, you know, just kinda go with the flow….know what I'm sayin? Pieces needed: WITHOUT ENCLOSURE: Superglue Print connector A Print connector B Print connector C Print honeycomb_A Print honeycomb_B Print honeycomb_C Print honeycomb_D WITH ENCLOSURE: (include everything from above….plus the following): Print Enclosure_piece_A1 Print Enclosure_piece_A2 Print Enclosure_piece_D1 M4x8mm screws SCREWS: - YOUR STOCK SCREWS WILL WORK WITHOUT ENCLOSURE! Yaaaaay! I did use the M4's in the link below, the heads are slightly smaller. BUT ….the stock screws WILL work, I tried them, they are tight but they work just fine. -If you have an ENCLOSURE, you need to purchase longer M4 screws….M4x8mm and 10mm seem to work too ( https://www.amazon.com/dp/B0BLCFZ2KL?ref=ppx_yo2ov_dt_b_product_details&th=1 ) these are the ones I use. ASSEMBLY AND INSTALLATION After printing Honeycomb_A thru D pieces, assemble them A, B, C, D, counter clock-wise, like in the pictures. If you dont assemble them exactly like in the pictures, the side wall will not fit properly. To get the pieces to stick together, use whatever method you prefer, but I used gel superglue (for manageability): Put a small bead of superglue all the way down one side of one of the honeycomb pieces (on the part that will be touching another piece), and squeeze them together in different spots (for 40 seconds at a time) with your fingers, take care not to glue your fingers together or to the piece. Refer to the pictures I have provided, to ensure that you are assembling your pieces in the right order, so you do not have to print it twice like I did. Use the picture/diagram to REMOVE THE CORRECT SCREWS from the side of your printer. Once honeycomb wall is assembled and glued. Begin by screwing the top right (piece D) first, into its respective screw hole, refer to the pictures for correct screw hole ((Its the 2nd from the top on the right side, but do check the pictures first)). This is the only piece that is actually ATTACHED to the honeycomb wall itself. This will stabilize the piece and make it easier to screw in all the other pieces. The other 3 pieces are secured via honeycomb “connectors” that screw into the printer. CHECK PICTURES FOR PROPER ORIENTATION OF PIECES AND CONNECTORS: Next, we are going to insert the connectors into their proper holes in the honeycomb wall, and screw them into your printer, securing the wall to your printer. Refer to pictures to see which connector goes where. We will go counter-clockwise starting with connector A on (top-left) side. Then B on (bottom-left). Then C on (bottom-right). NOTE: PUT THE CONNECTOR IN ITS RESPECTIVE HOLE WITH THE LETTER ON THE BACK FACING UPWARDS. (This will ensure that the hole is aligned properly for your screws). Connector B, you can use the very bottom left cell (this one is the recommended)…or the one directly above it. If you use the one on top…you have to flip the connector piece. CAUTION: When screwing in the pieces on the side of your printer….use caution and be gentle. You do not want to cross-thread your machine screws, this happens when you insert the screws at an incorrect angle, and it strips the thread off the screw, making the screw and the hole, un-useable. Also: tighten screwdriver with your fingers and fingertips. not with your whole arm and wrist….to ensure you are not tightening TOO much…and damaging the screws. This does not matter for the bottom screws, as they are course threaded, and screw into plastic, but take care on the bottom screws, not to overtighten since there is no real “stop" so-to-speak. I screw these in using the muscles in my fingers as opposed of my wrist, to be extra gentle, and when my fingers cant spin the screwdriver…thats tight enough. (so I dont accidently overtighten). If you do accidently cross thread, or overtigthen, its not the end of the world, there are many solutions on google. Once you have screwd in the 3 connectors, you should be done, and your Sidekick is now installed…..and awesome, and your printer is now much awesome(er) than it was before, and so are you. Pat yourself on the back, go to the nearest mirror, and give yourself a thumbs up and a wink, because you performed….awesomely. Post pictures and show off to your friends, mom, neighbors, social media, plumber, UPS guy, lawn care guy…etc… But be cautious….dangerously high levels of awesome that are nearly exceeding threshold values….. are afoot. shoelaces? check sunglasses? check whitey-tighties?………….check LEFT SIDE COMING SOON
Originally published on Printables


