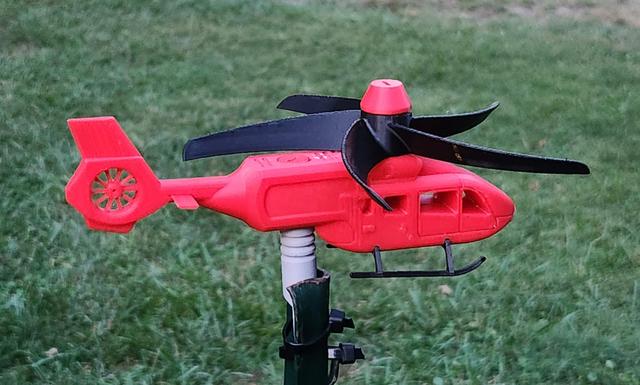
Helicopter Windspinner / Windmill - Airbus H145
by Crafty Prints · via Printables
| Format | STL |
| Category | Home |
| License | CC BY-NC |
| Triangles | 37.6k |
| Uploaded | Sep 3, 2024 |
⬇ 225 downloads
❤ 56 likes
👁 1.3k views
Description
Fun outdoor windmill remixed from mobiobi's Airbus H145 Helicopter and modified with parts from PRINTER's windmills ( Windmill and Windmill XL ). It is an easy print (don't be intimidated by the number of parts) that needs no supports or bearings and can fit the bed of a MINI/MINI+ Mount it outside on your lawn or have it as a unique garden decoration. Almost all of the parts can be printed with default settings and no supports except for the rotor, which should be printed with 3 perimeters and no infill. Print Settings: All parts except for the rotor: Default settings 0.2mm layer height (or lower for the helicopter body if you want more detail) No supports Rotor: 3 perimeters 0.2mm layer height 0% infill Assembly: Join the helicopter halves and insert the horizontal stabilizer into the little hole in the tail of the helicopter, one side at a time, making sure it can go all the way through.* Glue the sides of the helicopter together, making sure they are lined up pretty accurately (otherwise the screws might not fit in or screw properly). Glue on crosstubes with the longer one in the front, and then glue the skids to the crosstubes. To attach the windmill parts: The bigger screw screws into the top of the helicopter and attaches the rotor. The little screw goes into the smaller hole closer to the tail of the helicopter and attaches to the mounting rod. The mounting rod can then be screwed into a wooden post, or you can zip-tie it to a metal rod. *If you are unable to fit the stabilizer in the hole, try scaling the horizontal stabilizer down a percentage or two and it will fit. Different printers might have different tolerances.
Originally published on Printables


