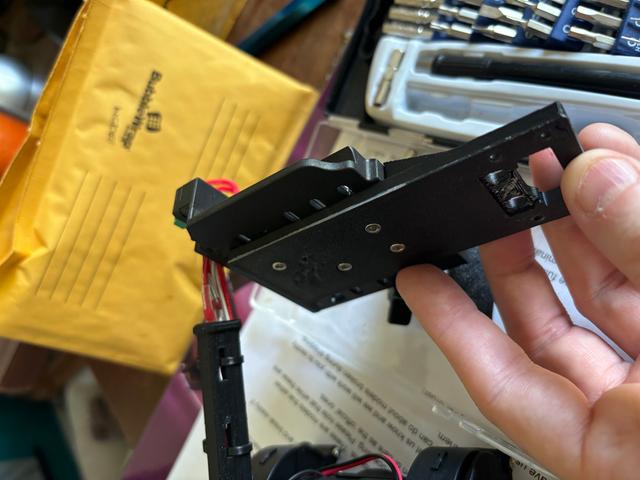
HeroMe 7 Gantry Adapter For Wham Bam Mutant v2 on the CR-30
by Fenikkusu · via Printables
| Format | STL |
| Category | Art |
| License | CC BY-NC-SA |
| Triangles | 3.0k |
| Uploaded | Apr 17, 2024 |
⬇ 14 downloads
❤ 1 likes
👁 346 views
Description
The stand-offs on my linear rails Gantry Plate for my CR-30 3DPrintMill broke, causing me to get a lot of back-and-forth shifting on my prints. I was unable to find a replacement gantry plate, so I decided to reach out to Wham Bam Systems regarding their Mutant v2 Universal Tool Swapping System. They worked with me and designed a new Gantry Plate for the CR30 to allow me to attach the Mutant to my CR-30. Once I got the Mutant installed, I found the nozzle was nowhere near being able to touch the belt, for various reasons. I made adjustments to my CR-30 to lower the X-Axis as close to the bed as I dared (I have maybe 2mm of hardware clearance). I then used TinkerCad to mod the original Mutant Gantry Mount to design one specific to the CR-30. This model drops the primary mount about 30mm below the Mutant's Mobile Plate, allowing the nozzle to properly contact the belt and letting me resume printing. I also added a brace to help brace it against the Mutant to help prevent it from bending. Not sure this is required, but it doesn't appear to be hurting anything. Some Notes: I am using the Stock Hotend Notes about installing the Mutant I had to cut the wires closer to the hot end. This meant I had to use a new Heat Cartridge and a new thermistor since the wires were now too short to reuse. The spacer for my Y-Axis Linear Rails no longer fit (I will have to remodel it later to line the belts back up. The ground doesn't have a connection location. I have the wire hanging right now (not connected to the mutant). The X End Stop Switch connects to the Gantry Plate, not to the Mutant. For a stock system, you need only wire/cut: The Heat Cartridge The Thermistor The Heat Break Fan The Part Cooler Fan The models I used for my HeroMe 7 Were: This Gantry Adapter HMG7.2 Universal Base V2 HMG6-dual-5015-6deg-brace-inserts HMG7.3 Creality OEM-CR10S-Ender3-5 2-Screw Mount V2 HMG7 Creality OEM-CR10S-Ender3-5 Skirt V2 HMG7.4 Cable Tower Tube Tall Right You will likely need to adjust your Min/Max on your X and Y axes as otherwise, you will either run into the Bed Leveling Knobs or you will run into the motors or frame. You will lose some print space. I went from 215x250 to 183x233. I believe we can get the X-Axis back, but only if A) You sacrifice height and B) we can get a replacement for the bed leveling knobs that the ducts don't run into. I printed the gantry using the same suggested settings as the HeroMe 7 except for supports. Oriented with the front on the bed (brace up) 3 Walls 30% Infill ABS Supports When aligning the part cooler to the nozzle, I held the hotend assembly at the normal vertical angle (90*) and then used the HeroMe Spacer to align the ducts correctly and tighten everything down.
Originally published on Printables


