HeroMe Gen 7-remix Anycubic Mega-S X-Gantry
by Luc Dunn · via Printables
| Format | STL |
| Category | Art |
| License | CC BY-NC-SA |
| Triangles | 42.3k |
| Uploaded | Oct 23, 2023 |
⬇ 47 downloads
❤ 7 likes
👁 512 views
Description
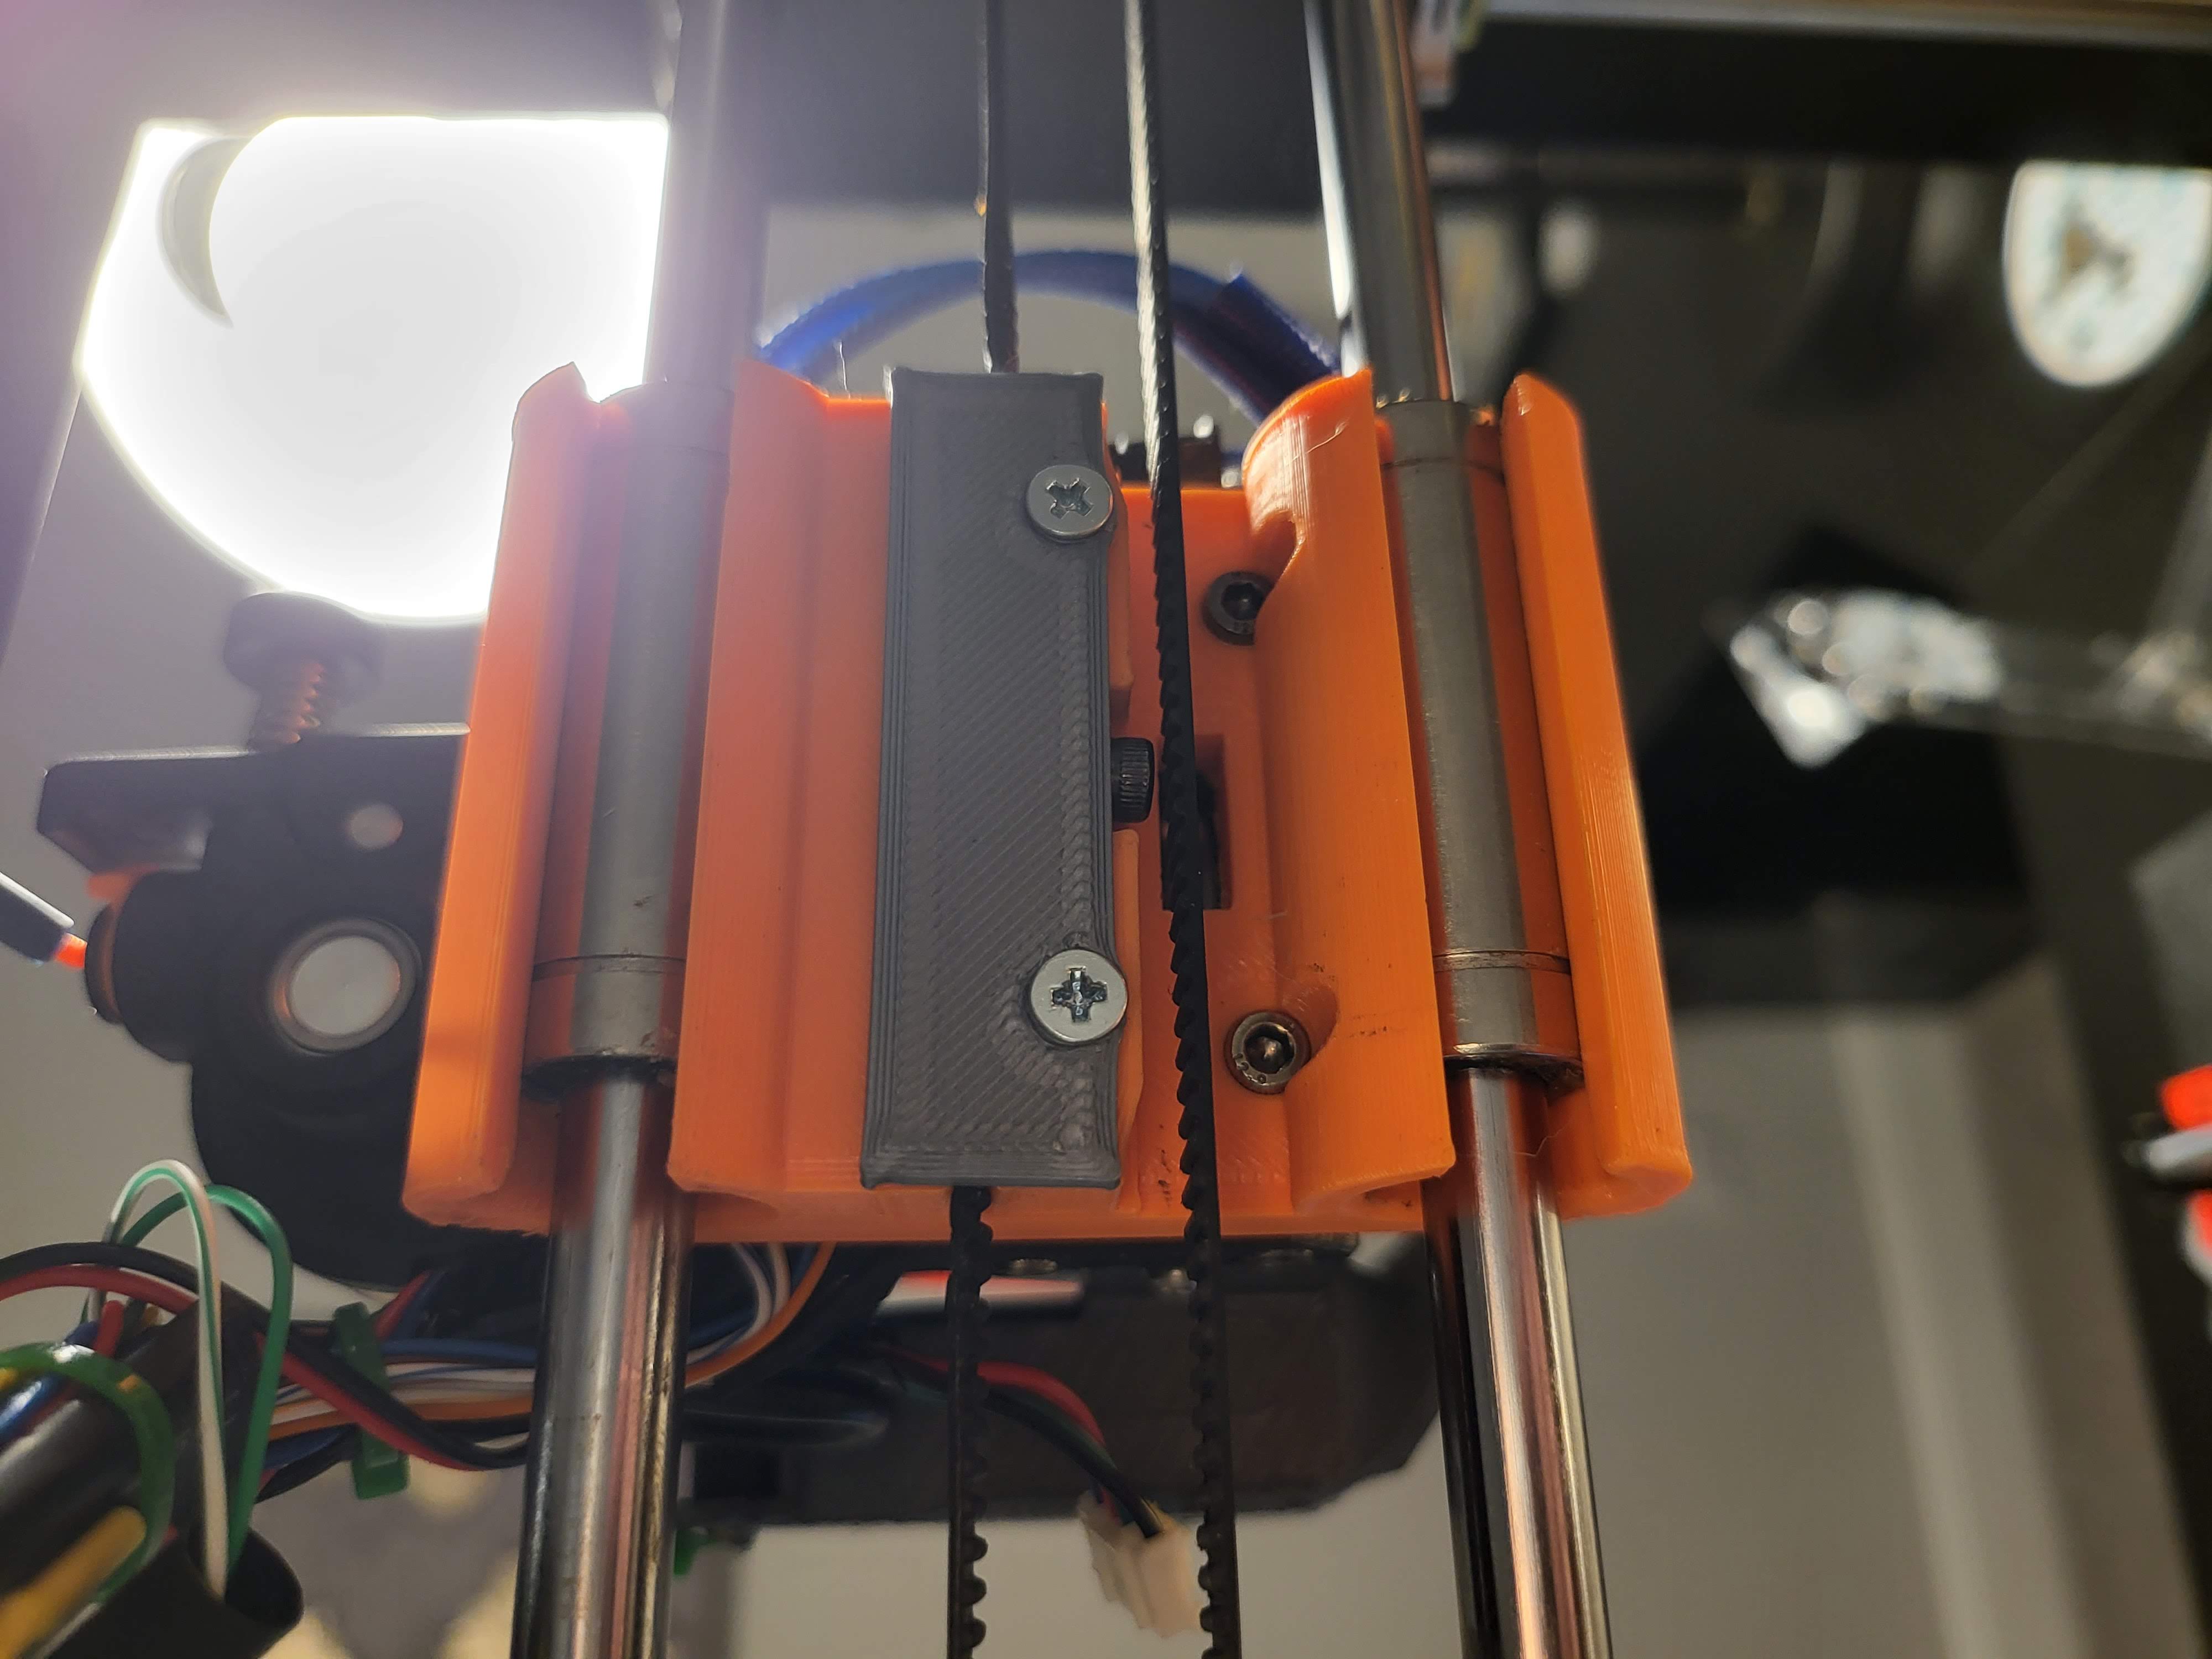
The original HeroMe Gen7 X-gantry design did not fit on my Anycubic Mega S. It seems that the X-gantry rods are spaced and sized differently on some versions of the Mega or Mega S. (On my Mega S, the X-axis rods are 8mm in diameter, and spaced 50m apart. These parts are designed for that hardware) I did try to simply remix it but also made my own version of the X-Gantry mount that can be found here . The original HMG7-style design I've remixed seems more sturdy but sacrifices Z-direction gantry clearance. This style also requires less hardware. You Will Need: 1 pc of each part in this Printable X-Gantry Remix X-Gantry Remix Belt Cover 1 pcs M3 threaded inserts (less than ⌀4.7mm OD like other HMG7 inserts) 2 pcs M3x50?mm screws 2 pcs M3x15?mm screws 1 pcs M3x10mm screws Printing Instructions: Print one (1) each of both parts in original stl orientations. NOTE: If you have poor bridging performance, you will need supports, or the air duct sections will need cleanup. Recommended settings: 4+ perimeters 6+ bottom/top layers 0.4mm line width 0.2mm layer height 30+% infill Check clearances: The original HMG7 backplate should easily mate flush with the X-Gantry Adapter plate. Hot press the 1x M3 threaded inserts as shown in the X-Gantry remix part. A slight angle outward will help as it's quite difficult to thread a screw to lock the belt in place. Clean up any excess plastic that may have escaped the pilot holes of the M3 threaded inserts. Clean up the bridged air ducts if necessary, the smoother the better. Assembly Instructions: Remove old hotend assembly, and save the original timing belt. Thread the belt around the motor and opposing pulley. Insert one end of the belt and then the other end into the X-Gantry remix part. There should be some overlap of the belt ends, and you may want to use needle-nose pliers to pull tight before inserting. Insert and tighten the M3x10mm belt-locking screw. Be sure it grabs both belt tails tightly, but over-tightening my warp your printed part. Attach the remix plate to your HMG7 Universal base using 4x M3 screws and be sure to include the belt locking cover over the belts. Check the travel of the assembly on the X-axis manually. There should be no rubbing belts or screws. CAUTION: Using the HMG7 hotend means your X-axis endstop will probably not work in its original position. Check that your fully assembled HMG7 hotend + gantry plate contacts the endstop before trying any prints. If not, modify how the endstop switch is mounted or bend its bracket or something until you get reliable switch contact on your new hotend assembly.
AI Analysis: This is a close-up view of a mechanical part from a printer, specifically the gantry assembly. The component features orange and gray plastic parts with screws, designed to support the printer's movement and hold the hotend in place. It is a critical structural element for the printer's operation.
Originally published on Printables


