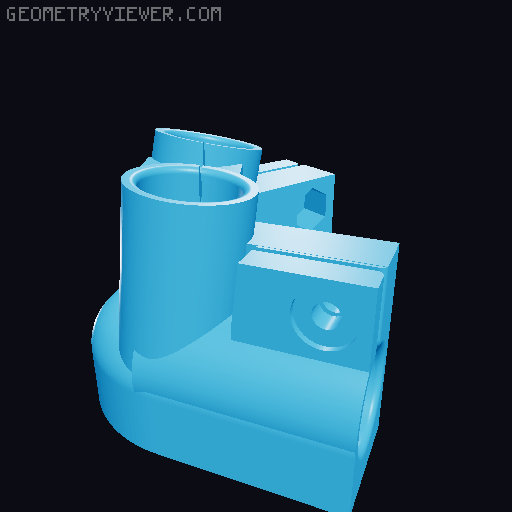
Hill Mount for Hadley Telescope
by hillexed · via Printables
| Format | STL |
| Category | Mechanical |
| License | CC BY-NC-SA |
| Triangles | 64.7k |
| Uploaded | Oct 4, 2023 |
⬇ 905 downloads
❤ 128 likes
👁 7.8k views
Description
Made a Hadley telescope but having trouble aiming at tiny things like planets? need a sturdy mount to put it on so the telescope doesn't shake? Try the Hill Mount! Telescopes are great for zooming in on planets. But when you're so zoomed in, tiny wobbles turn into gigantic movements that make it hard to see. This mount uses strong steel EMT tubing and a stiff truss design to ensure that your telescope is wobble-free. This mount will let you take pictures of Saturn's rings at 150x magnification or higher! I found that the default square prism mount included with the Hadley was too wobbly, so I designed this mount to be ultra sturdy. Instead of expensive aluminum tubes, the Hill mount uses stiff yet cheap steel EMT rods you can find at any big hardware store. As a result, this print is slightly bigger than the default mount, but at 203x187mm it fits comfortably on any normal-sized printer. The results speak for themselves: this mount is stable enough to let you see Saturn's rings at 150x magnification with no vibrations. Features: Rock-solid stability Light enough to carry Fancy angle indicator for measuring altitude and/or looking cool Prints without supports Simple measurements: only two different pipe lengths needed! Two holes for long screws, so you can use rubber bands/hairties to add tension Non-Printed Materials Needed: 2x 1/2" x 10 ft Electric Metallic Tube (EMT). Available from a hardware store - for example, Home Depot and Lowe's sell it for $6.50 per 10 feet 13x #10 nuts, $3* 13x #10 x ½" machine screws, $7* Optional: 6x #10 x 2" machine screws and some rubber bands, to help hold position Total: $24 * This price is if you buy them individually, but you could get them for cheaper. These are the same types of nuts and bolts used for the Hadley telescope (the non-metric version). If you already built a Hadley, you might have some left. If you haven't already built a Hadley, see if your local hardware store has any boxes of #10 nuts or #10 screws to buy in bulk; using a 50-pack box for both this mount and Hadley will make both even cheaper. A reminder: make sure you get the same thread size of nuts and bolts. Choose either #10-24 or #10-32, and be consistent. Also, the ½" in ½" EMT is the name of the size, not the actual outer diameter; ½" EMT has an outer diameter of 0.706". Tools Needed: Screwdriver, matching your screws A tape measure, for cutting EMT to the right size A tool for cutting steel pipe; I recommend a pipe cutter like this or this . I recommend you get a pipe cutter. It makes it much easier to cut through steel, and leaves you with a nice edge. Rough edges make it harder to fit the EMT into the printed parts. Don't use a hacksaw to cut EMT - it's long and tedious and will leave rough edges, which make it hard to fit the pipe into the printed parts. Get a pipe cutter. Printing instructions Print all parts. If you want to print them all at once, you can fit the three base parts into the empty space inside the C-shaped top part. 📷 Image redacted — claim this model to add your own media I printed at 0.2mm layer height and 15% infill, and that seemed strong enough. It's designed to print without supports . Once they're printed, try to remove any stringing or globs inside the holes where the tubes go using pliers or snips. It's a tight fit, and any material inside will make it harder to get the tubes into the holes. Assembly instructions Using a pipe cutter, cut your EMT into: 6x 2.5ft 3x 1ft If you bought two 10" EMT tubes, I recommend you cut them this way (measurements in inches): 📷 Image redacted — claim this model to add your own media The holes in the 3D printed parts are a tight fit. Look at your EMT's edges and make sure there the outside is smooth and there aren't any rough edges sticking out beyond the outer diameter. There shouldn't be any if you used a pipe cutter. If there are, you could try to file them off with a metal file. Look at the inside of each hole in the printed parts and try to remove any stringiness or globs of plastic from the inside of the holes. The top part's holes are on its bottom. Orient the 3 base parts correctly using this picture. There are small arrows on the left/right bases, which will be parallel and point towards the front side of the telescope. The front base is the one without an arrow. 📷 Image redacted — claim this model to add your own media Put three 1ft pipes into the bottom bases to make a triangle. Pay attention to the two arrows on the left and right bases, they should be parallel. It's a tight fit - rotate them while pushing them in to help them go in further. Don't force them in, however; too tight and you might crack the plastic. If you feel too much resistance, take them out and clean up any plastic bits from the inside. Each pipe should go about an inch deep into its hole. Now that you have the bottom triangle, insert two 2.5ft pipes into the top two holes in each base. Rotate them as you push so they go down all the way. Give all the pipes a solid push downwards. The tops of the pipe should be at around the same height, with the two on the edges being slightly higher. 📷 Image redacted — claim this model to add your own media Place the top part on the EMT and guide the EMT into the holes. The first tubes to go in will be the ones at the two tips of the C should go in. Guide the EMT at the front to go into their holes, and push down once all pipes are in it. Now insert #10 nuts everywhere you see a hexagon, on the sides facing the center of the triangle. Each base has 3 nuts facing the inside, and screws screw in from the outside. The top part has four nuts: insert the back two nuts near the tips of the C shape, and the front two nuts slide in from the bottom surface upwards. Use a screwdriver to screw in a #10 screw from the outside to tighten. If your screws are pushing your nuts outwards instead of going in,it could help to use a pencil to lightly push the nut towards the screw as you screw it in. Make sure you put in and tighten all 13 screws! Using the mount Place telescope on mount. The semicircle-shaped printed bearings should go in the semicircle-shaped surface on top of the mount. Make sure the edge of the bearing, which sticks out slightly, is past the side of the mount, not on top of it. You should be able to smoothly slide the telescope up and down. Optional: rubber band tensioning If your telescope slides on the mount, you can use rubber bands to add some downwards force on the telescope, increasing friction and making it less likely to wobble. To make rubber bands easier to use, each side of the top part has two holes that don't go all the way through to the other side. Insert long #10 screws into those holes and center of the Hadley bearing (1.5" or longer recommended). Then they make good mounting points to wrap a rubber band around. Optional: Azimuth bearing If you have access to woodworking equipment, and you want smooth azimuth rotation, you could follow the instructions for Marci's Mount to mount this on top of a rotating wooden disc on top of a vinyl record to give you a nice azimuth rotation. I haven't done this myself, but it's possible! The three bases each have a hole 7in away from the center of rotation that fits a #10 screw. Acknowledgements The wonderful truss design and tube clamps were heavily inspired by Ivan's “Strurdy mount for Hadley telescope” . This mount is taller, and uses bigger and stiffer EMT tubes.
Originally published on Printables


