Hovalin v5.1.0 - A 3D printable Acoustic Violin
by Matt Hova · via Printables
| Format | STL |
| Category | Gadgets |
| License | CC BY-SA |
| Triangles | 950.1k |
| Uploaded | Aug 4, 2025 |
⬇ 2.5k downloads
❤ 686 likes
👁 15.1k views
Description
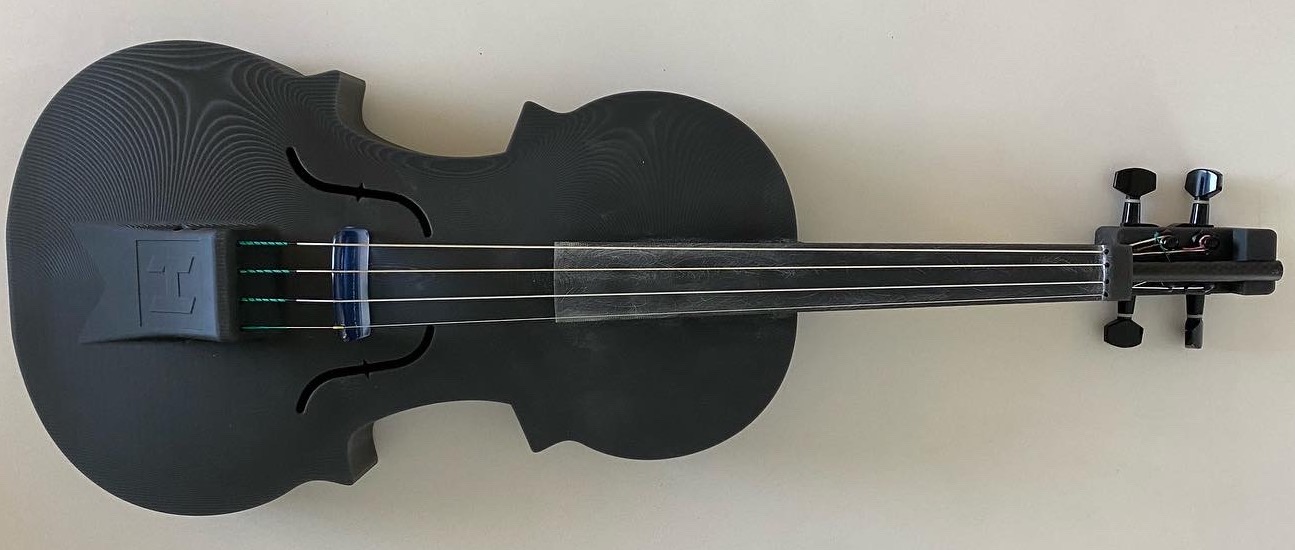
The Hovalin is a functional acoustic violin that can be produced using most standard consumer 3d printers. The total cost of raw materials for the violin (4/4) is currently about $70. The Hovalin was designed with Autodesk Fusion 360, and its shape and dimensions are inspired by the Stradivarius violin model. The Hovalin project is inspired in part by David Perry's FFFiddle . Shopping List TUNERS The Hovalin is designed specifically to these tuner dimensions, so please use them: Black Chrome Gold ROSIN Rosin helps to keep your violin from squeaking and keeps the bow on the strings. Here are a few brands of rosin that we suggest: Bellafina Rosin Leto Rosin Bernardel Rosin STRINGS Strings can be expensive. We are fans of high value, low cost. Here are a few brands of strings that we endorse: D'Addario Prelude D'Addario Helicore Thomastik Reds CARBON FIBER RODS 8mm (aka 5/16 inch) outer diameter by 500mm length carbon fiber rod. No cutting necessary 8mm OD x 500mm length carbon fiber rod BOW Bows can also be expensive, we are fans of high value, low cost. Here are a few brands of bows that we support. ViolinSmart Violin Bow Balanced Brazilwood Bow Carbon Fiber Violin Bow EXTRAS More stuff Fishman Pickup Socket wrench set Blue Tape Print Removal Tools Printing Settings The Hovalin features thin walls. Regardless of if you're printing any size or version, printing with 3 perimeters and 20% infill should be sufficient. Post Processing Remove all buildplate adhesion material and supports. Sanding the fretboard will help get rid of any buzzing overtones. It can also give the violin a more finished look. I've had good results by sanding at 100 grit, then moving on to 300, and then 600 grit sandpaper. 📷 Image redacted — claim this model to add your own media Install Tuner Pegs Snap off the screw holes on the tuner pegs using a wrench. 📷 Image redacted — claim this model to add your own media Insert the tuning pegs into the violin neck as shown in the picture. 📷 Image redacted — claim this model to add your own media Once the pegs are pushed into place, screw in the top piece, first by hand, then using a 10mm hex wrench. 📷 Image redacted — claim this model to add your own media Assemble If you printed the chamber as 3 pieces: Insert the bowtie connectors to make a single connected chamber. Match the labels on the bowtie to the labels inside of the chamber (i.e. “Top” and “Top” are together, “Bottom” and “Bottom” are together). Fit together the neck and chamber pieces. Once the pieces are locked together, insert the carbon fiber rod through the top of the neck down through the chamber so that it is flush with the top of the neck. 📷 Image redacted — claim this model to add your own media 📷 Image redacted — claim this model to add your own media Install Strings Feed the strings through the hole at the base of the violin, through the hole at the top of the neck, and then through the tuning peg. 📷 Image redacted — claim this model to add your own media 📷 Image redacted — claim this model to add your own media You've Done It! Congrats! Please leave us some feedback and share photos / videos of your builds! #hovalin Made with ❤ by hova labs
Originally published on Printables


