Hypatia - a Crayford style focuser for the Hadley Telescope
by Marci · via Printables
| Format | STL |
| Category | Other |
| License | CC BY-NC-SA |
| Triangles | 31.0k |
| Uploaded | Apr 12, 2025 |
⬇ 332 downloads
❤ 65 likes
👁 2.9k views
Description
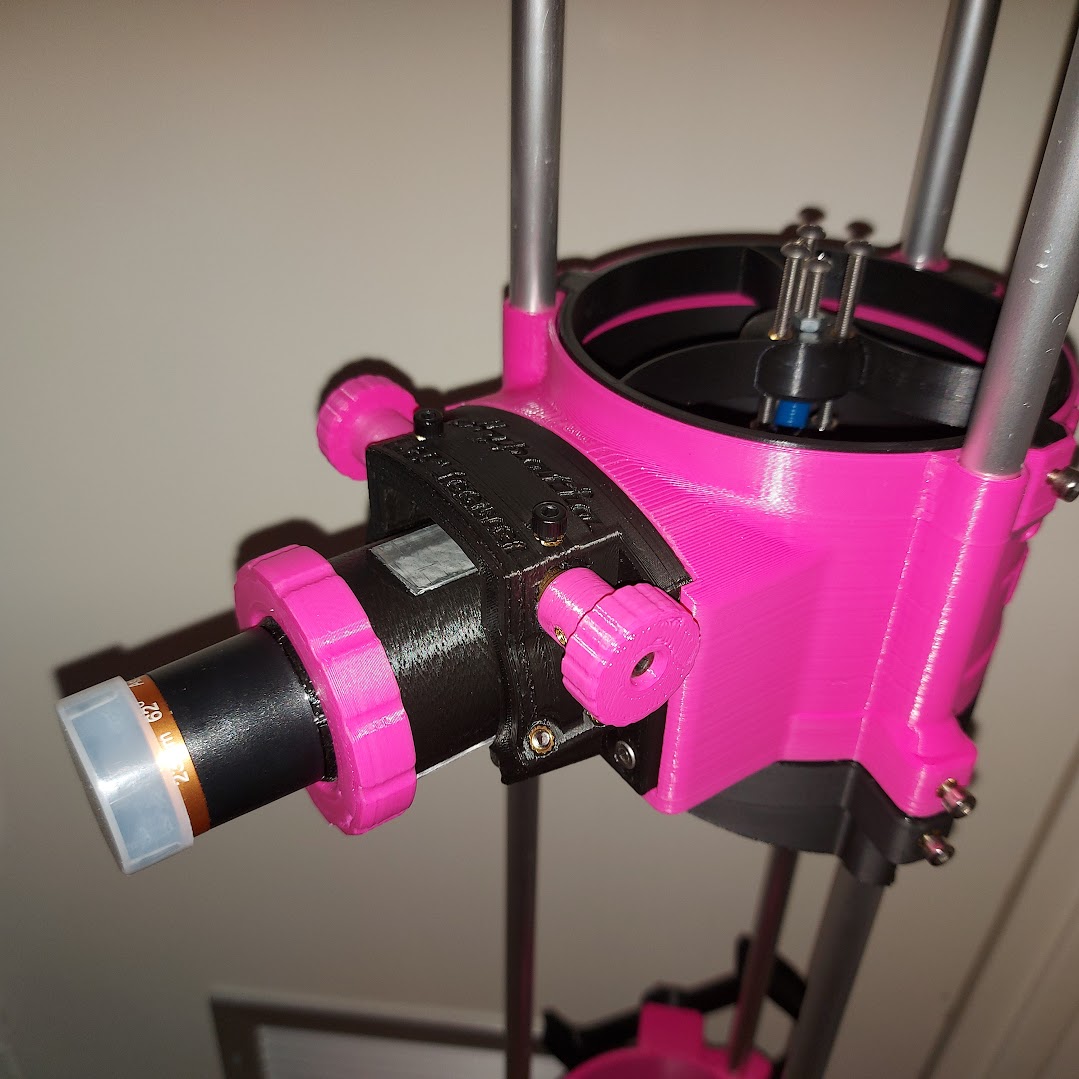
I am proud to present to you “ Hypatia ”, my take on a focuser for the Hadley Telescope ecosystem. It combines what I consider to be the best features in other designs, and some ideas of my own: the Crayford style of focuser - which uses rollers and is driven by a pinion - provides super smooth action and allows for quick and precise focusing a printed drawtube allows for fitting a collet, which holds your eyepieces very securely and lets you easily swap them; the drawtube has built-in endstops so it cannot fall out all files were designed with 3D printing in mind - supports should not be necessary Instructions Print settings The models were designed to be printed in this orientation: 📷 Image redacted — claim this model to add your own media The threads on the drawtube and the nut are designed to be easily printable, a layer height of 0.2 - 0.3 mm works well. The main focuser needs to handle some force, so I printed it with 4 perimeters. I used a 0.6mm nozzle for all models. Print the drawtube and the collet in black, for best optical performance. Heat set inserts 📷 Image redacted — claim this model to add your own media For the heat set inserts to be securely installed, they need to have enough plastic around them. I have included modifier files for the main focuser body and the knobs, so you can easily set the infill to 100% where the heat set inserts will be inserted. They should automatically be in the right place (it works for me in Prusa Slicer). Assembly After printing Install the heat set inserts in the knobs and the focuser body. Good alignment for the inserts for the bearings is important; it can help to insert a bolt through the hole from the bottom end, screw the heat set insert partially on, and then install it using your soldering iron. This way the insert will be aligned correctly. If necessary, clean up the print. Make sure the bushings fit in the holes and can move smoothly, make sure the screws for the bearings fit through the hole. Drawtube and collet To get a perfect motion and grip with the collet, sand the inside of the drawtube and the outside of the collet lightly with some sandpaper. Clean the dust, then coat the outside of the collet with some candle wax, I lit a candle and used a q-tip to apply it. You can apply some to the threads on the drawtube too. The fit was nice before, but after I did this it was just amazing. Cut the aluminum strips to size, make sure they are nice and flat so that you have smooth action. Glue them onto the drawtube using super glue, and check that they sit flush. Installation ⚠ Before working on your Hadley, take some safety precautions. Put on your mirror caps, and work with the telescope laying horizontally so that if you drop anything, it won't fall onto the mirror ⚠ Install the bearings on the main focuser body using the M4x20 screws. Tighten them so they have little play, but still turn smoothly. Insert the nylon screws into the top, but only partially. Now screw the body onto the LTA of your Hadley; you will not be able to reach the screws after the drawtube is installed, so make sure it is attached securely. Attach 1 of the knobs to the pinion and fix it in place using the grub screw, and add one of the bushings. Have the other bushing nearby. 📷 Image redacted — claim this model to add your own media Insert the drawtube into the main focuser body, then insert the pinion. This order of operations is important, since the pinion locks the drawtube in place. Add the other bushing and the second knob, fix it in place too. Tension the pinion using the nylon screws. Make sure the pinion sits horizontally, and that all bearings sit flush with the aluminium strips. Click the top flange of the collet into the collet nut, then screw it onto the drawtube. Bill of Materials ItemamountcommentHeat set insert M4 x ⌀6mm x 6mm6 M4x20mm screw4 M4x15mm nylon screws2for tensioning the pinionBearings OD 8mm ID 4mm4width doesn't really matter, I used 4x8x3Flanged bushing, ID 4mm OD 8mm, flange 12mm2 Dowel pin 4x100mm or M4x100mm screw1for the pinionFlat aluminium strip 20x2mm, 36mm1I bought these at my local hardware store in strips of 1mFlat aluminium strip 10x2mm, 56mm2 M3 grub screws, 6mm length recommended2for the knobsHeat set insert M3 x ⌀4.5mm x 4mm2for the knobsoptionally: some candle wax for lubricating the collet Acknowledgements Many thanks to the lovely community on Maff's Hadley discord server who inspired me to make this focuser, and gave me some smart insights to make this project a success.
AI Analysis: This is a mechanical part designed for a telescope, specifically a focuser. It features a bright pink and black color scheme with adjustable knobs and a lens assembly. The focuser is mounted on a telescopic stand, allowing for precise alignment of the telescope's optical elements. Notable features include the adjustable knobs for focusing and the clear lens cover.
Originally published on Printables


