LaPavoni Post Mill Umikot (51 mm) - Remix
by FreshP · via Printables
| Format | STL |
| Category | Home |
| License | CC BY-NC-SA |
| Triangles | 378.9k |
| Uploaded | Mar 14, 2025 |
⬇ 96 downloads
❤ 22 likes
👁 967 views
Description
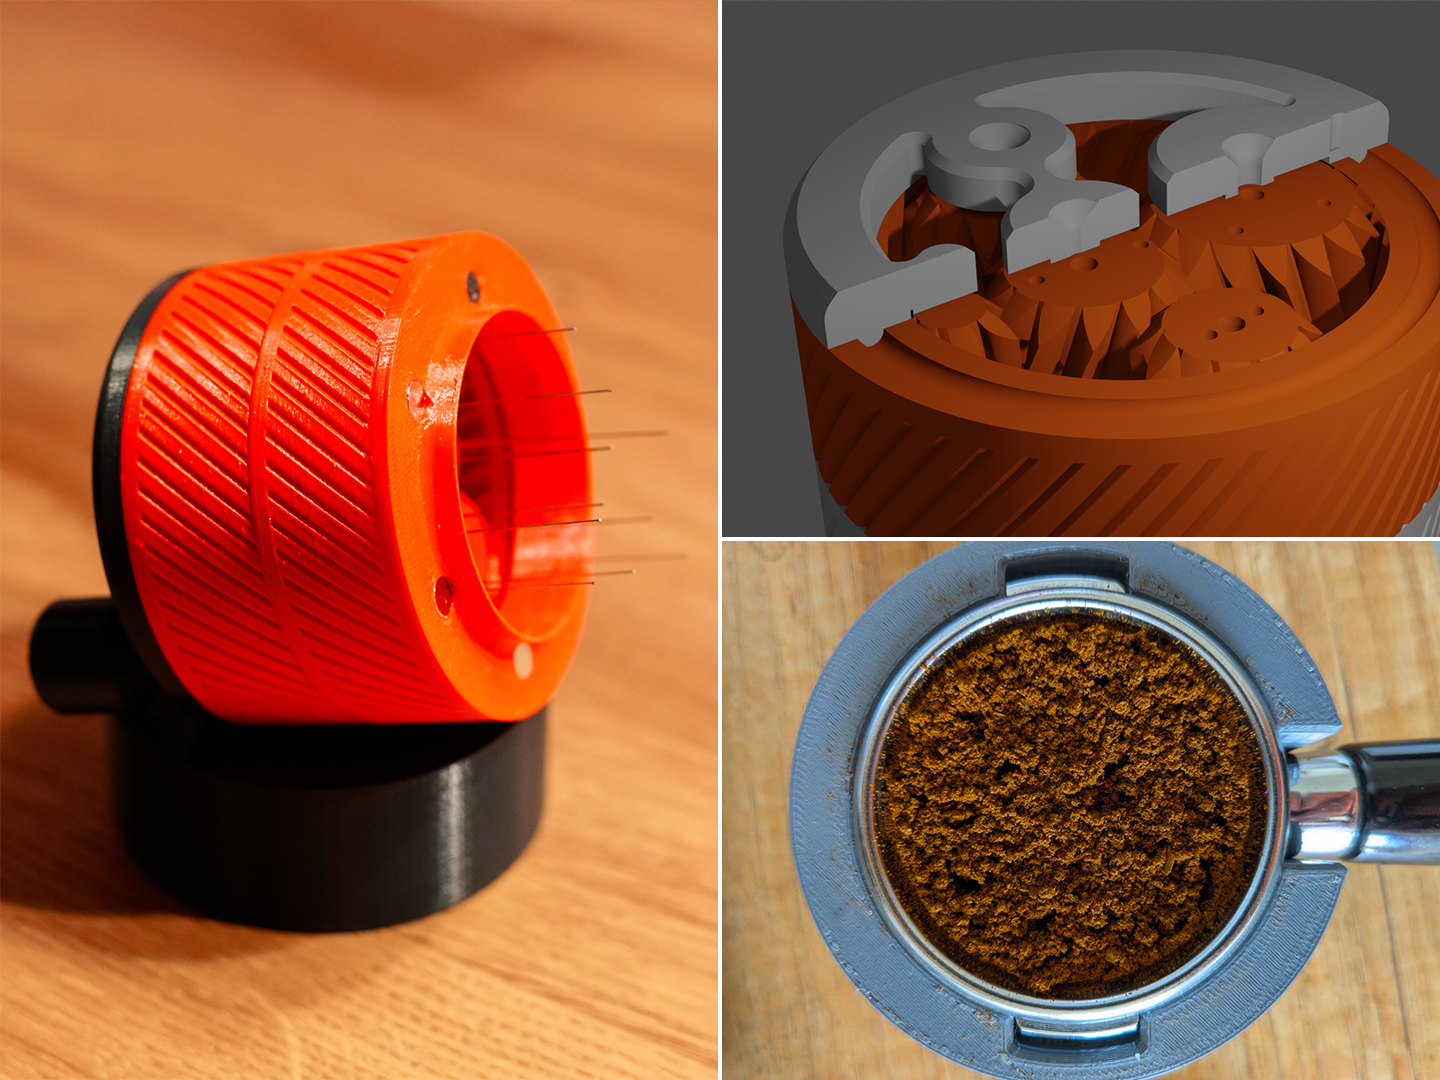
Printing This model consists of five seperate parts, each indicated by the leading number of the stl file. For parts 1 & 4 there are two version available, so pick one. All parts printed with 0.20 mm layer hight. Part 1 - Handle Print as is in any material you deem suitable - I've used PLA for mine. Part 2 - Spin Ring Make sure to print this part with the flat side down, so no supports are needed. Material is once again irrelevant, I've used PLA. Also use the randomized seam setting, this will make the follower glide smoother in the groove as it's surface wont have a ridge. Part 3 - Upper Mech Print this part with the groove facing the printbed and add a brim for stability. I'd reccomend PLA here, because the print head does a lot of jumps and you will end up with a lot of strigning. Once again use the randomized seam setting, so you groove surface is as smooth as possible. Also no supports are needed, the groove should bridge just fine. Part 4 - Base You can make this part either with magnets or without. The magnets used are 6x1.5mm and should just snap into the holes. Note that the force isn't strong enough to hold the portafilter, but it adds some additional friction. I recommend printing this part in PETG or some other material which can handle higher temperatures, as this is the part that touches the possibly hot portafilter. Note that this part can also be substituted with the bottoms of the original 51mm Umikot , if you like to have the notches fitting the portafilter lugs. Part 5 - Stand Nothing special about this part, but if you're using the original bottom, this stand won't fit, so print the original stand. Assembly There is no need for me to rewrite well written and detailed instructions, so just follow the assembly instructions of the original 54mm Umikot . This also contains the reqired parts you'll need to buy. Footnote Time for some shameless self promtion: I've created a tamping station which perfectly fits the flat bottom of this WDT tool and puts it on the same level as the top of the portafilter, making the whole process of using this tool much more steady. You can find the tamping station here . It's the file called LaPavoni_Tamperstation_Flush.stl
Originally published on Printables


