Looser pieces for Akaki Picnic Basket
by Crab · via Printables
| Format | STL |
| Category | Other |
| License | CC BY-NC-SA |
| Triangles | 2.5k |
| Uploaded | Nov 9, 2025 |
⬇ 13 downloads
❤ 1 likes
👁 65 views
Description
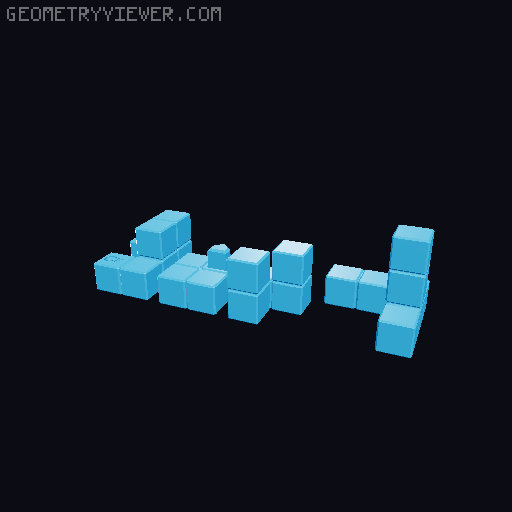
Akaki has created a wonderful puzzle series, called the Picnic Basket . One basket uses multiple piece-sets to provide a multitude of puzzles. Some users (along with me) have found the pieces fit too tight and stick in the basket; some users have suggested a hole in the basket bottom to push pieces upwards. I've found a solution by modelling my own pieces using the PuzzleCad plug-in that runs under the OpenSCAD 3D modelling software. If you want to create piece-sets that fit looser, this is a great solution for you. Simply scaling pieces up/down does not maintain the proper tolerances for burr-shaped pieces. Once the pieces moved more freely against each other, solving the puzzle was a more enjoyable experience for me. Since the basket takes a few hours to print at 0.2mm layer, I also include a practice basket that you can use that prints at 0.3mm layer height in under 50 minutes on a slow printer. It should take only about ⅓ of the time as the regular basket and is just designed for tinkering with a puzzle. With my older MK3S+ printer, I print the basket and pieces at 0.3 mm layer height because it saves a few hours in printing time. The 0.3mm layer height might add to the tightness issue, but even at 0.2mm layer height I think the pieces would still not move as freely as I'd like. My solution is to re-model the pieces adding space, where necessary so the fit is quite loose. PuzzleCad was designed for this. I have provided STL files for the first few puzzles and may add more if I continue making them. But from the template, you can create the rest of the models yourself. PuzzleCad is a plug-in for OpenSCAD and you'll need to install both, if you want to create your own puzzle-sets. I've documented the picnic basket pieces puzzleCad file and you should find it relatively easy to use. You'll notice that the pieces appear slightly different. For aesthetic purposes, I've chosen to show the individual cubes for each piece. Some puzzle sets have two pieces that are glued together to form one piece. If you wish to print a single piece with supports, the PuzzleCAD source file provides that option and shows you how to do it. However, you will need to use support with zero clearance, or a layer may droop too much and might not slide as freely. I do this by setting the support option in the slicer to “dissolvable” or zero clearance, then set the printer to pause just after the support layer is printed. I then ‘paint’ the top of the support with a sharpie and resume the print. The ink of the sharpie provides a release agent and you'll get a nice accurate surface. H owever, since the parts fits rather loose, glueing the parts together is an easier option. If you decide to reduce the size of the basket, then PuzzleCad is the perfect solution to resizing the pieces while still providing the proper tolerance so they will move freely against each other. PuzzleCAD source file To use the PuzzleCAD (picnicBasketPieces.SCAD) you must install OPENSCAD and then get the Puzzlecad library files from GitHub. The source file can also be read by any text editor and includes much text that explains all features used in modelling the piece sets. See the last few pictures above for examples of what is contained in this file. Printing Instructions : All my models have been tested and printed at 0.3mm layer height, using just 2 perimeters and 3 top&bottom walls for fast printing. I use the default 0.3 default profile on my MK3S+ and I've even increased the printing to 115% using the LCD setting on front.
Originally published on Printables


