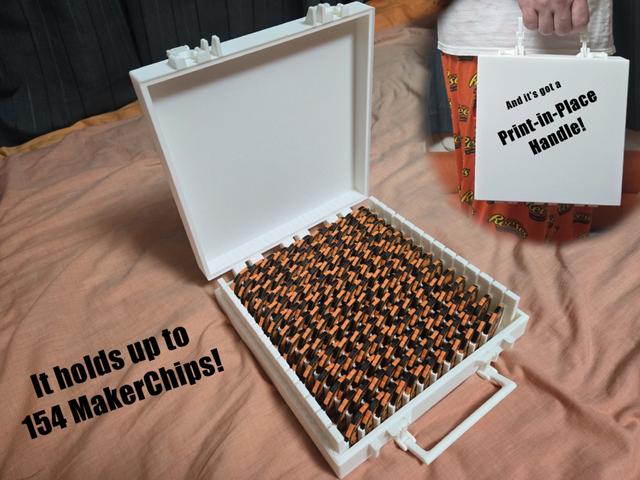
MakerChip Carrying Case with Print-in-Place Handle
by CarlThePumpkinMan · via Thingiverse
| Format | 3MF |
| Category | Gadgets |
| License | CC BY-NC-SA |
| Uploaded | Apr 15, 2026 |
⬇ 2 downloads
❤ 1 likes
👁 41 views
Description
Intro In my experience, MakerChip carriers are one of two things: They’re either meant to carry as many Chips as possible, OR they’re meant to display them–never both. Just like the Pokemon Coin Case I adapted it from, this case is made to hold as many Chips as possible while still allowing enough space between Chips to make them visible at a glance. This is especially helpful when taking MakerChips to exchange at events; a max of 154 can be swapped out with other Makers’ Chips in such a way that they don’t get buried by other Chips should you want to locate them again later in the event. Note that it's made specifically for 3mm-thick Chips; older 3.5mm ones may not fit properly. Other features include: 14 removable Holders carrying up to 11 Chips each Compliant grippers to keep the Chips from falling out of the Holders Butterfly-style latches to keep the Chips safely inside when not in use 180-degree rotating hinge A Print-in-Place handle more than strong enough to carry an entire case full of Chips (handle-less version also available) Parts List Files: HandleMakerChipCaseSTEP.STEP - Step File containing a case full of holders with the handle attached HandleMakerChipCase3mf.3mf - A 3mf file containing all the settings I used to print the case with the handle on it HandlelessMakerChipCaseSTEP.STEP - Step File containing a case full of holders without the handle attached HandlelessMakerChipCase3mf.3mf - A 3mf file containing all the settings I used to print the case without the handle on it Printed Parts: Special Print Instructions: Both versions of the case have the exact same files to print; only the Bottom is different. Top - The top of the case Bottom - The bottom of the case (this is the one that has the handle attached if you print the handle version) Latches x2 - Two clips to keep the case shut Holders x14 - These are all one big body, but you can feel free to Split to Objects in order to print them in different colors if you want. The actually hold the physical chips Assembly Intro: This requires absolutely no glue, and all the parts are fit together by pressure–it may take a bit of force to get them together, but once they are, they’re not falling apart! Instructions: Put the two Latches into place on the front of the Top. Make sure you orient them the correct way–when you close the case, it should be easy to get your finger underneath them and unlatch them. If you mess up, just pop it off and put it back on the other way. Put the Top and Bottom next to each other such that both have the open side facing up. Then, put the hinges of the Bottom over those on the Top, and press down firmly to snap them together. Slide all 14 Holders into their slots in the Bottom. Close the Top, latch them shut, and fold the Handle up so it fits in the slots on the Top, if you printed the version with the Handle. Do the reverse to open it, and voila! May your MakerChips be always safe from harm. Conclusion: That’s about it! I appreciate you reading through my description here, and if you do decide to print it out, I’d love to see you post pictures with all your Chips! And of course, if you see me in person, don’t hesitate to ask me for one. I’ll be at JRRF this year, and hopefully many more events in the future!
Originally published on Thingiverse


