Midweight (Light) SKÅDIS Board Accent Panel + Edge Connectors
by MuteKnee3D · via Printables
| Format | STL |
| Category | Organisation |
| License | CC BY-NC-SA |
| Triangles | 15.2k |
| Uploaded | Mar 4, 2025 |
⬇ 184 downloads
❤ 35 likes
👁 661 views
Description
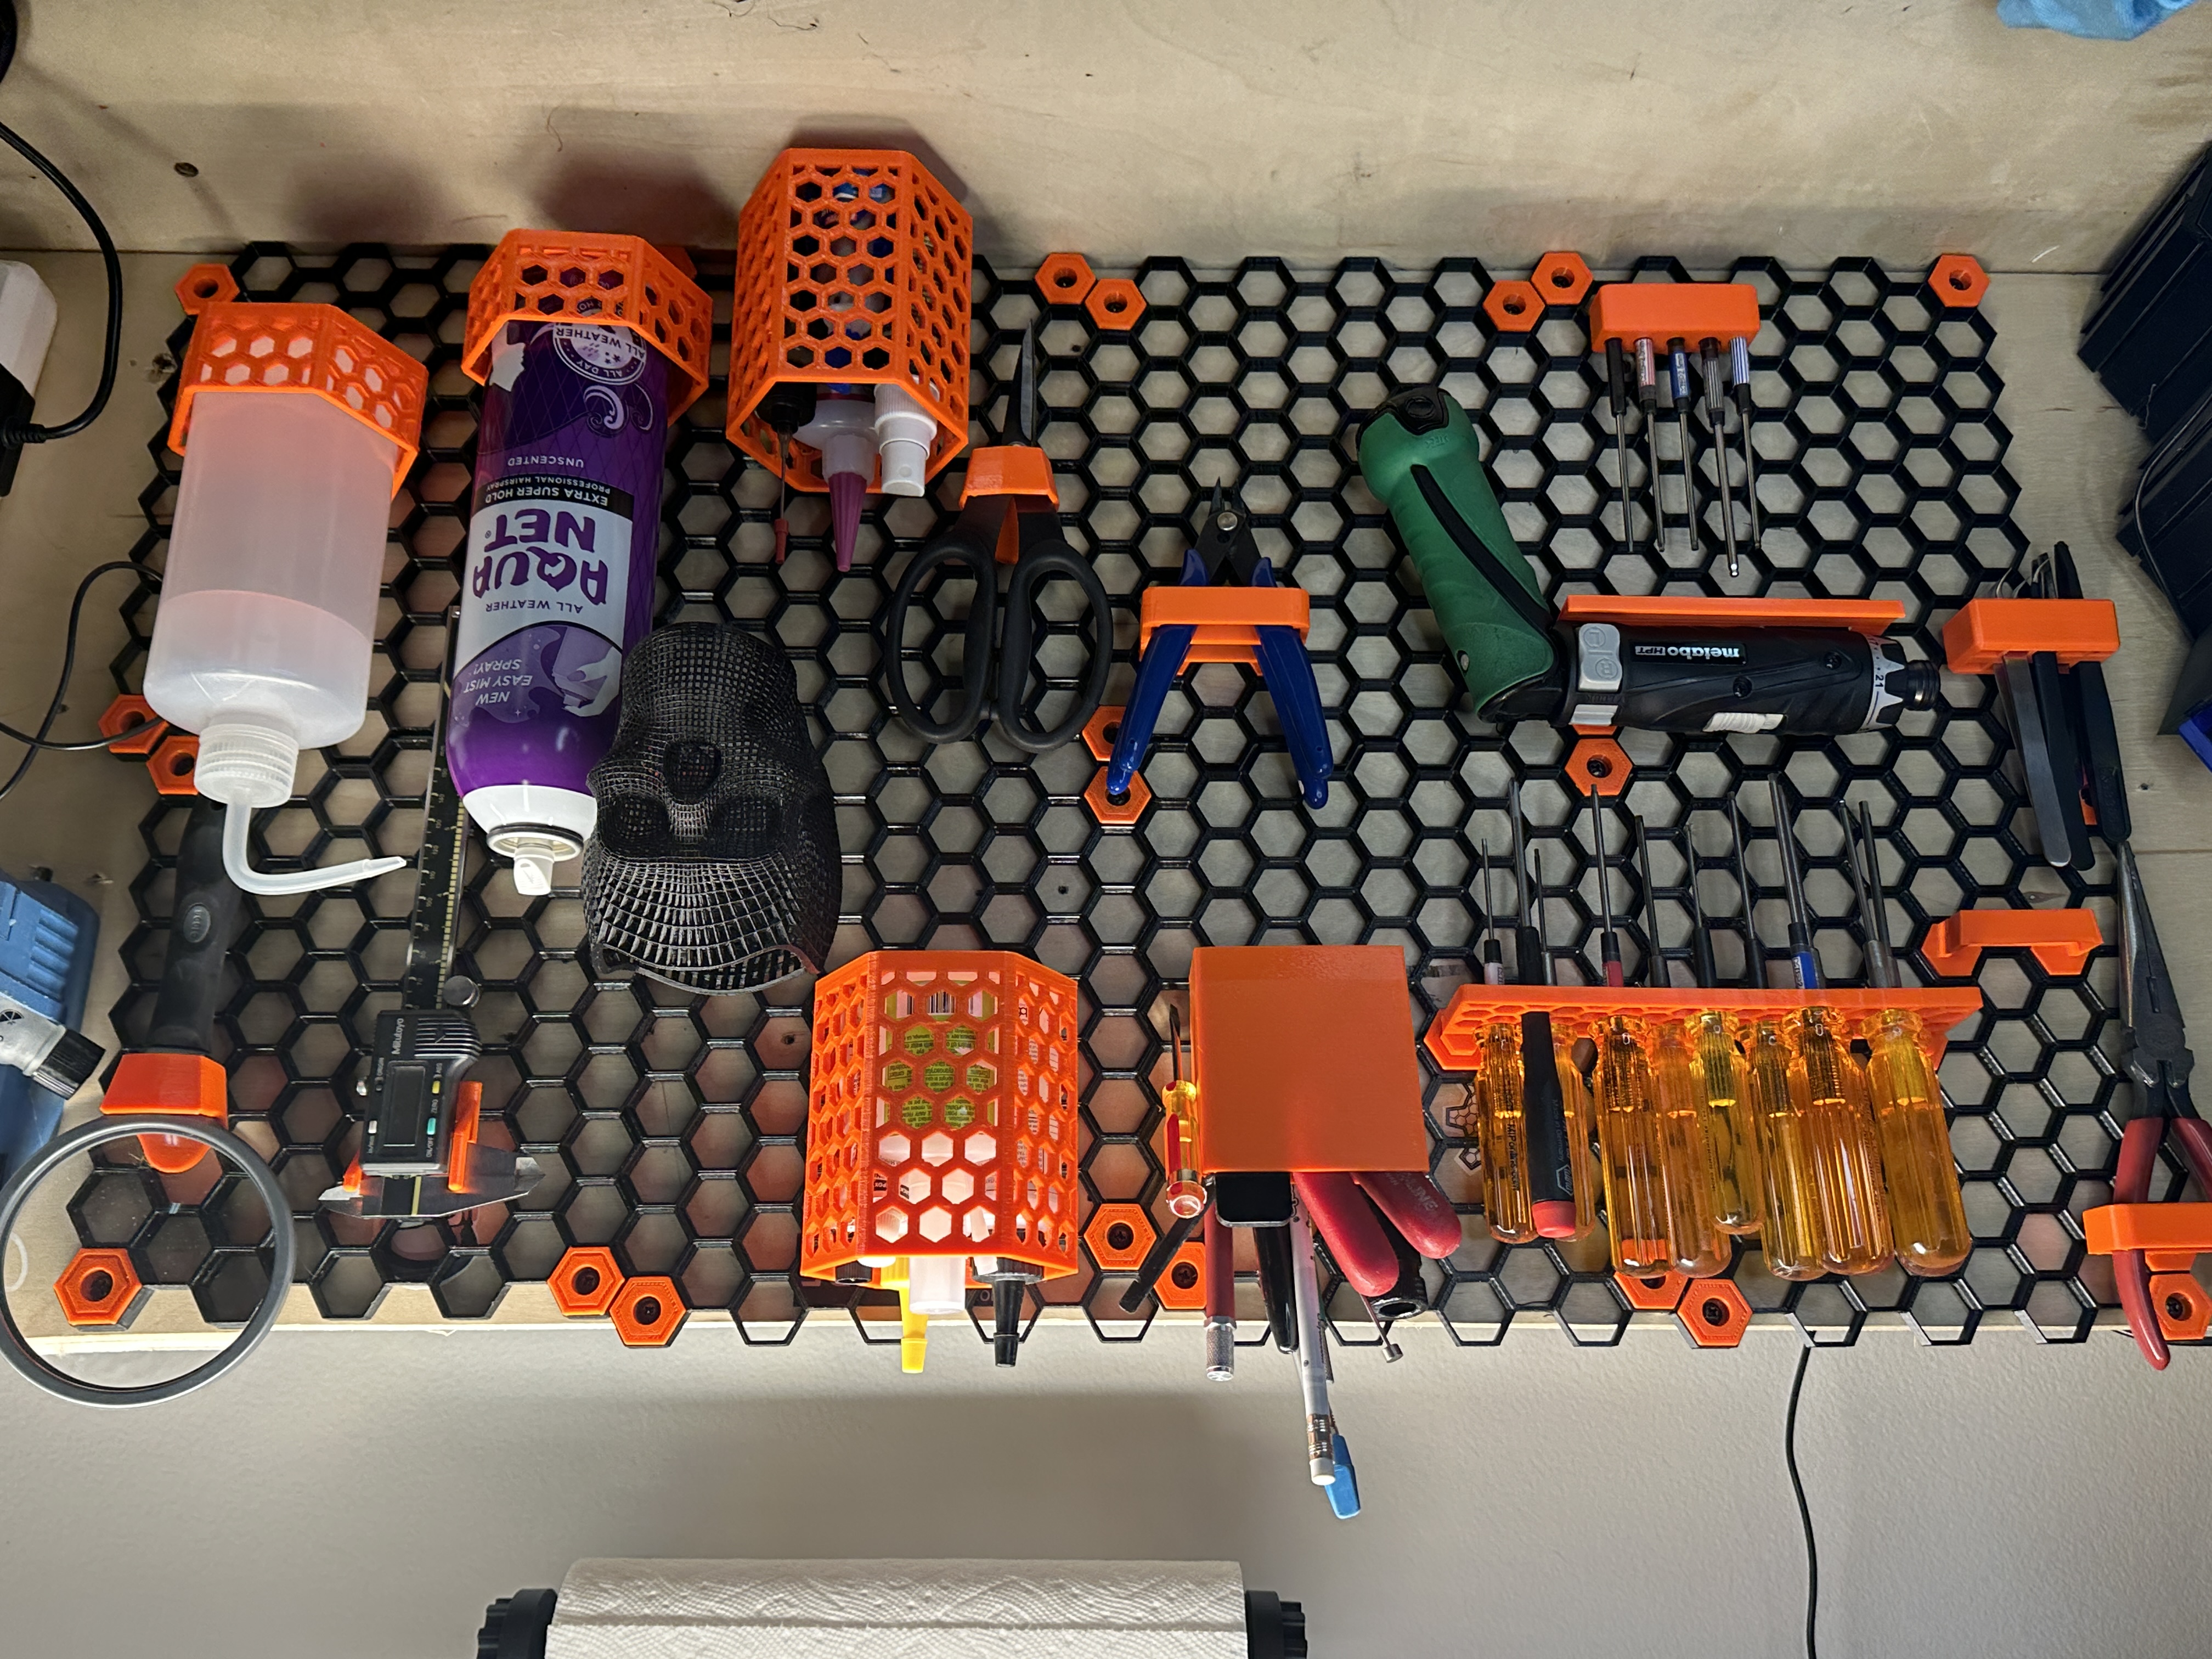
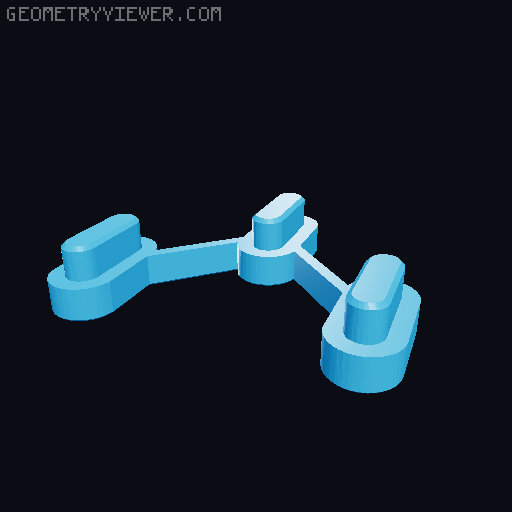
Although I have a plus sized print bed I especially like the 200x200mm “ Light SKÅDIS (Skadis) Board” by grafit.xyz and wanted to add a couple more options. Here is a midweight “accent” panel to add a bit of aesthetic. I even like the look of the mounting tool as a permanent fixture and added some options to be used along the outer edges of the panel assembly. I have added a solid skin to the original “lattice” style panel to give the occasional accent piece with the additional bonus of some added stiffness for hanging heavy objects. For the mounting tool pieces I was having issues with the little tabs fitting too tightly and/or breaking off. This might be because of my printer settings - for example, I like to print these with random seams which could be why they fit tight. Regardless, I have added some negative space inside the tabs to make them stronger and less prone to snapping off. You won't see it from the outside but inside there are three 2mm negative cylindrical voids. You can see them in your slicer. I also shrunk the connectors down to 99% the original size. Personally, both of these tweaks have produced better results for me - if you want the original size you can grow my version of the mounting tools to 101 % in your slicer. For print settings on the midweight panel I use PETG with random seams, no gap fill, no support, no brim. I bump the line height and width up slightly to cut print time. 3 walls - 3 shells. To print the connectors I use random seams and mouse ears (4mm & 145° max angle - orca slicer). 3 walls - 3 shells. Gap fill - everywhere. For the original light panels from grafit.xyz I get a more consistent first layer by printing the outer wall first.
Originally published on Printables