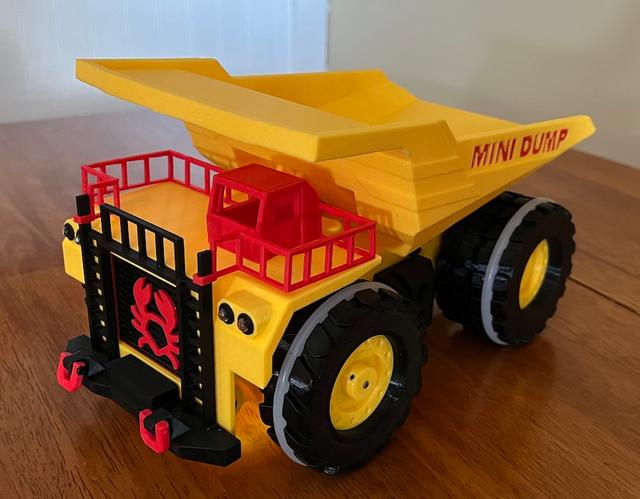
Mini-Dump V3 Power Remix
by Crab · via Printables
| Format | STL |
| Category | Gadgets |
| License | CC BY-NC-SA |
| Triangles | 15.1k |
| Uploaded | Sep 4, 2024 |
⬇ 140 downloads
❤ 31 likes
👁 1.1k views
Description
This is a rather extensive remix of the Professor Boots V3 Mini-Dump truck as built using his individual STL release of June 13, '24. Not only are some of the parts modified, but I also created my own PCB for this model which allows the truck to shut itself off, if necessary. All non-printed parts were obtained from AliExpress, except for the PS3 Controllers which were from PowerExtra on Amazon. STEP files can be provided upon request. The mods are shown in the video: Print Instructions All parts were printed at 0.2mm layer height except the dumpbed, hood & rear axle @0.3mm layer height. 3 perimeters recommended. Many parts require support so check in slicer before long prints. I used PLA+ for all parts. PETG for the front motor mounts and TPU (95A) for the tires. Magnets! As with my remix of the smaller version, I added four 10x2.6mm round magnets for the hood closure. (2.6mm are common on AliExpress, but 3mm are too thick) These magnets are beefy and are guaranteed to keep the lid tight. I add a touch of glue to hold the magnets. I have two versions of the hoods as I found my nylon LED holders were a different dimension. Hood1Boots supports the original nylon LED holders recommended by Prof Boots. Hood2Crab supports smaller LED holders. I included two test pieces you can print to see which works best for you. I wire 4 high-efficiency white LEDs, readily available, and solder them in parallel and then add a resistor to either the plus or negative side, and wire to a connector. As long as the LEDs are identical their voltage drop is equal and a single resistor is all that is needed. I found that adding some crazy glue to the backs of the LEDs while firmly in their holders will lock them in place. Otherwise they can back out of the holder with impact. DumpBed The dumpbed STL I used did not have a hole properly finished in the twin tabs that screwed to the threaded rod end piece , nor could I easily screw the threaded rod attachment to the dumpbed and so I added cutouts to ease in its installation. I also changed the interior of the bed itself for a cleaner look. D Rings A small item, but I made the D Rings so they could rotate fully and be functional, if needed. This requires the remixed bumper. If you have a driver that often hits walls, you might want to make the bumper from TPU ( I have not tried this). DustCover I added a larger cutout to the dustcover as mine would bind a bit on the original when lowering. Chassis The chassis will support a custom PCB I made, or the original Professor Boots PCB. The back section that holds the motor was not quite deep enough for the 12mm motor and I increased its depth and changed the rear axle cover for additional support. The chassis also supports a small cutout on the side for an external 6mmx6mm square or round tactile pushbutton switch (if using the custom PCB) as well as holding the larger magnets (10x2.6mm) for the hood closure. This switch should be glued into the cutout and then you can attach a small connector to the pins which protrude on the inside of the chassis. I added a hole in the chassis so you could get a screwdriver to the screw for the threaded rod holder. (once you build you'll know why) Pinion I added a grub screw option to the pinion on the rear motor. (2.5 or 3mm should work, I used 2.5mm) Grills The screw recess was too small for 6mm wide screws that are used and so increased this width and added a blank grill for those who wish to customize their truck. Hubs I found that the hubs did not fit in the tires quite as snugly as I'd like so I increased the height of the tabs around both the front and rear hubs. The hubs also have a slightly larger hole in case you wish to use an M3 x 10mm screw to secure to the rear axle. Rear Axle My version has a 2.8mm hole for use with an M3x10-12mm screw. My rear axle won't work with the 2.6mm Truss screws, so if you wish to use those, make sure to use the original PB rear axle. The increased hole size increases the strength of the axle to hub connection. The square at the ends is also slightly longer to sink further into the hubs for added support. Dump Bed Letters I included dump bed letters for the words “mini dump” if you really wish to get different color lettering on the dumped. (For those of us without an MMU or AMS) But be warned, it involves messy glue and maybe some cursing. I found it easiest to clean out the letter cutouts on the dumpbed and trim away areas that were tight. Add dab of glue into cutout. I then held each letter with tweezer and heated a bit with lighter with torch flame until just a bit soft. Press into letter opening. You can resoften if letter is ½ way in… just don't overdo it. Custom PCB A custom PCB is available at: https://github.com/crabbedh/RC_Controller which can use a Pololu Power switch module. This module is optional and, if you want, you can add the normal physical slide switch in its place. The Power Switch module allows one to mount a small external switch to turn the truck on/off. It also allows software to disconnect the battery, effectively powering down the unit. You can power off from the remote, or have your truck power off after a period of inactivity to save your batteries. This PCB has only two pads for power in so you can use your own power source (should be 7-9v) (I use a 450maH Tattu LiPo battery). The Pololu 2808 is available from Pololu.com for about $5 US. One large note with the custom PCB, I do not use the standard connector blocks. I use 2.54 JST connectors (shown in pictures) for the motor connectors and the smaller connector for the off-board tactile 6mm switch. Controllers I used PS3 controllers for this model. To use a PS3 controller, you must configure it using a Windows (only) app called SixAxisPairTool. Current clone controllers from AliExpress DO NOT support this app as the clones aren't as compatible to the ‘real’ PS3 controllers as they should be. I have found that PowerExtra PS3 controllers from Amazon do work. Motors The drive motors are specified as 12v 300rpm N20. I found these a bit on the fast side for indoor use. I am currently using 12v 200rpm N20 motors (3). For the dumpbed lift motor, this is a 12v 1000 rpm M4 threaded rod (55mm). I find that Horserace store on AliExpress is ultra reliable for motors. I also used 70-72mm OD x CS5mm silicon ORings (VMQ) for the tires for additional traction indoors, but the standard traction is pretty good with the additional AWD feature of the 3 motors. I recommend using PETG for the front motor mounts as it is more flexible than PLA. Software On the GitHub site above, there is also a PS3 Controller version of software that works with the custom PCB and can be modified to work with the original PCB. It supports Permanent Steering Trim for anyone wanting this feature. With my custom board, it also supports power source monitoring, small on/off pushbutton mounted outside of chassis and power down from the PS3 controller, or after a period of inactivity (saving your battery). Custom boards can be ordered from JLCPCB.COM by simply dragging the Gerber ZIP file to the main page. Cost of 5 boards is $2US and shipping to NAmerica is only $2US by the cheapest means. The software included uses specific board and libraries and might not compile if yours are newer. You can install older versions in the Arduino IDE. Select the ESP32 Devkit V1 board and I use the following board manager: ESP32 by Espressif System V2.0.17. Then ESP32Servo: version 1.2.1 and PS3 Controller Host (Pernis) V1.1.0. The use of the Power Switch is shown below:
Originally published on Printables


