Movable platform for Creality Filament Sensor
by raily74 · via Printables
| Format | STL |
| Category | Art |
| License | CC BY-NC-SA |
| Triangles | 3.8k |
| Uploaded | Dec 10, 2023 |
⬇ 111 downloads
❤ 13 likes
👁 612 views
Description
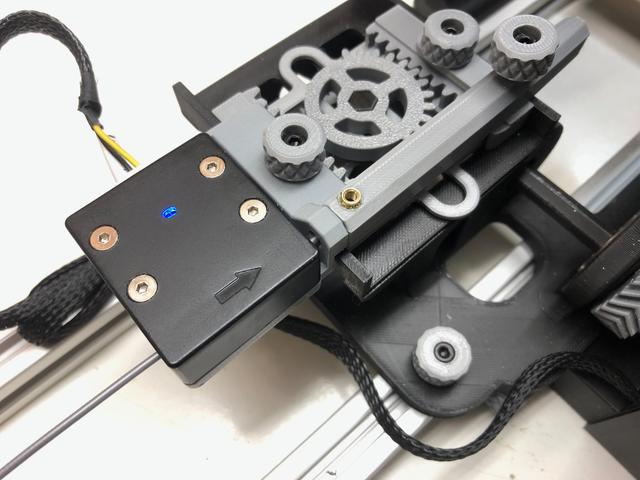
Because my filament sensor was also brand new and the sensor itself looked good enough I didn't want to take it apart. But I wanted to keep the function as in the original by @Damien27 . The sensor should be as close as possible to the filament guide. So I designed a movable platform to put the sensor on, so I could mount it on the filament guide sled. A screw that is 2mm longer than the original is required for assembly with the original "Knob M3". A drop of glue is optional. The sensor itself is attached with the original screws delivered. The PTFE tube is pushed through the integrated guide until it stops on the filament sensor. I also really wanted to preserve the function of the blue LED in the filament sensor. To do this, the LED must be reversed so that the switch still disconnects the negative pole of the motor. To do this, the blue LED must first be removed from the board. This is best done with two soldering irons at the same time. If the LED does not survive removal, a blue LED type 0805 is required. The model was printed standing on the print bed without support at 100% infill. Attention: Please only use the wiring diagram in conjunction with the rotated LED! This bracket is for Creality Ender 3 V2 Smart Filament Sensor https://de.aliexpress.com/item/1005003228969370.html Needed parts to complete this platform: 4x Heat Threaded Insert M3 4mm OD 4.5-5mm 1x Blue LED type 0805 if the installed one does not survive the removal.
Originally published on Printables


