Neptune 4 Bed Plate Aligner with Cable Chain and BTT ADXL345 Accelerometer Support
by true · via Printables
| Format | STL |
| Category | Art |
| License | CC BY |
| Triangles | 17.8k |
| Uploaded | Jun 28, 2024 |
⬇ 199 downloads
❤ 40 likes
👁 1.6k views
Description
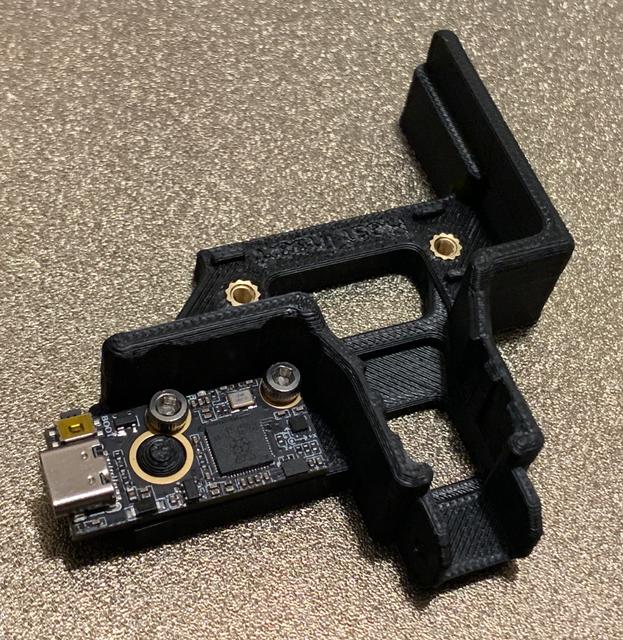
Update 2024.06.19: Added a variant that can fit several models of accelerometer: BTT S2DW 1.0 (tested) BTT ADXL345 v2.0 (tested) Mellow Fly-ADXL345-USB (untested; should be OK in REV6) GY-291 / SparkFun ADXL345 (SPI) (tested) GY-521 MPU6050 (I2C) (untested) Others that fit either the BTT S2Dw or Fly-ADXL345 footprint This is the REV5e file. Insert heatset inserts from the bottom for the accelerometer shelf. Make sure the main mounting inserts are slightly recessed and the top contact layer is completely flat. I tested the model for fitment of BTT and GY-291. Using GY-291 modules, I get identical Y readings but roughly double Z readings as compared to a clamp mount at the center right edge of the bed. Calculated tunings are similar between both mounting positions. For accurate measurements, ensure the bracket is very flatly mounted. Trim off any excess plastic that may cause the bracket to not sit fully flush with the bottom of the cable mold. As long as Z maximum is at least ¾ less than Y, the results should be usable. ---- This is a remix of @Joushou_1339808 's bed plate aligner and cable brace with cable chain support, adding a mount for BTT ADXL345 v2.0 USB accelerometers. Prints flat without supports. Tested for fitment on Neptune 4 and 4 Pro. Not necessary on 4 Plus and Max as they have accelerometers built-in. Note: Only ADXL345 accelerometers are supported with factory firmware. BTT S2DW v1.0 will physically fit, but is not supported on factory firmware as the Klipper version is too old. If you run modified firmware that runs mainline Klipper, then you can use BTT S2DW v1.0 boards. Note: The front Type C port is not for connecting devices. You will need to either plug in to the front Type A during tuning (recommended) or modify the mainboard to add USB ports for a permanent connection (only valid on version 1 boards; see WiFi mods for how to do this). I wanted a hard mounting location for an accelerometer on my Neptune 4 Pro printers. Since I wanted to use this alignment bracket already and may use the cable chain, I decided to add the accelerometer to this bracket. The protruding dome is used as an alignment peg for the large hole on the BTT accelerometer board. Two screws solidly affix the board to the bracket. The BTT USB accelerometers can plug in to the front of the printer via Type C to Type A cable. Cable routes out the side instead of the rear to make it easier to plug in. The accelerometer is not permanently wired; it is only plugged in when needed for tuning. Only one accelerometer is required if manually moving it to/from X/Y locations. If you want a rear cable version for permanent attachment, let me know. I've only modified the heatset insert version as that's the version I feel makes the most sense to use. Use one or two additional M3 heatset inserts for the accelerometer. If you want me to do this work to another version, let me know. TODO: Add instructions on how to use the accelerometer with the Neptune 4 stock firmware TODO: Create a bracket for Neptune 4 Plus X axis accelerometer Version History: REV1: Initial REV3: Provided more tolerance for board and screw heads REV4: Fixed bracket hitting Y axis stepper motor. Board overhangs, but this is OK. REV5e: Further reworked to support Mellow Fly-ADXL345-USB and GY-291 ADXL345. REV6: Fixed Mellow Fly-ADXL345 not fitting. Please test and let me know.
Originally published on Printables


