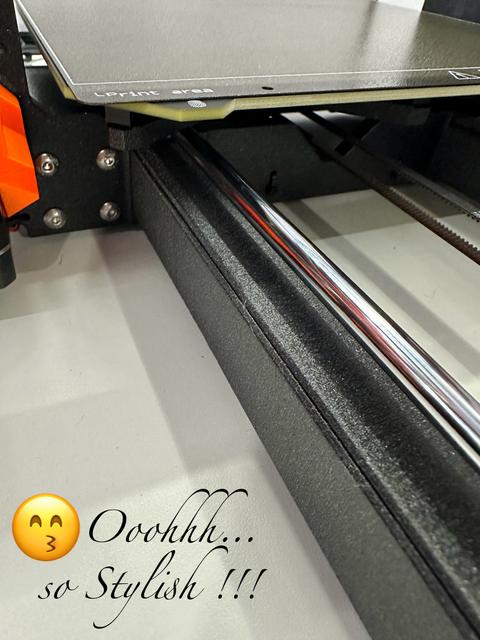
Oh-so-Stylish MK4/MK4S Extrusion Rail Covers (a PRUSA CHALLENGE print)
by mbastas · via Printables
| Format | STL |
| Category | Art |
| License | CC BY-NC-SA |
| Triangles | 3.7k |
| Uploaded | Nov 8, 2024 |
⬇ 65 downloads
❤ 15 likes
👁 462 views
Description
I started with John 's Cable Cover for Prusa MK4/MK4S/MK3 model, but that did not work well for me. The extrusion rail cover segment was oversized (overhanged the edge), and that poor neuron that had finally achieved some reprieve over the whole PRUSA MK4 Bin affair, now found something new to fret and obsess about … -Sigh- (here we go again) … Forget the cabling shroud. Extrusion rail covers! That's where it's at! Hmm? What is where?!? Well, everything, in fact! Everything in existence somehow finds its way in those aluminum Mariana Trenches … filament bits, support material fragments, stringing hairy wisps of plastic, dust (from very the beginning of the Universe), leftover filament spaghetti from that failed print a thousand years ago, meatballs that have somehow quantum-tunneled-materialized to accompany said spaghetti, and generally all forms of matter from all time. Do you know that there are people who siphon/dredge up the rail slot contents and pan it for gold!? Oh, yes! I've heard it being said. It is the domain of the Lilliputian Gremlins that feebly assert themselves in what results as your every failed print. Let's put a cover and end to all that, shall we? Now, I could've done the sane thing and looked for other models of extrusion rail covers. But I didn't, you see. I liked how thin this was and the middle fastening element had just been made so nicely by John that I did not care to redesign it. Fun fact: The errr ... remixed model(!?)(I should perhaps still call it that) … was made entirely in PrusaSlicer . I took John 's model and started hacking away at it … add a negative box here (there goes the cable cover), trim away dimensionally there (the wings, the span from wing to middle section), keep the bits that work, save/export each as an STL, re-import, mirror, approximate and merge! Et voila! But, we are left with a razor thin model. 📷 Image redacted — claim this model to add your own media I mean … thin … 📷 Image redacted — claim this model to add your own media Thin, as in: “I don't even know if this thing will even print upright, anymore…” But let's try it, shall we? Why NOT!? I kept to John 's instructions: - Spiral vase mode (with no bottom layer) 📷 Image redacted — claim this model to add your own media -Brim 📷 Image redacted — claim this model to add your own media to get us here: 📷 Image redacted — claim this model to add your own media 📷 Image redacted — claim this model to add your own media I measured out the extrusion rail segments I wanted to cover and found the two in the back requiring a top cover of about 117 mm, the tops in the front requiring 185 mm and the front side extrusion rails being 195 mm. The point of the massive redesign was to get the “wings” to follow the rail chamfer more closely while being sized to permit top and side rail coves to just meet up with no gap. I set out to print these in PRUSAMENT PETG in Galaxy Black . Every one of these worked. Every single one! (#yourPRUSAisaBEAST) To be fair: I have an enclosure . I used the stock MK4 Nextruder fan (since my MK4S upgrade kit is still likely weeks from shipping), I have a Diamondback 0.4mm nozzle, and only ever printed in the orientation depicted. I did not open the enclosure, I did not breathe on it, I did not so much as blink in its direction to not cause perturbations that could/would cause the thin blade of a model to waver/shift in the wind as the vase mode made the nozzle dance gracefully across the top wall scaling skyward toward ever greater heights. (I consider this a PRUSA CHALLENGE print. You get to see how dialed in you are, how different variables affect a print (filament/fan wind direction/flow rates/extruder speed/acceleration), you learn how to print in vase mode, make something that defies expectation, and emerge with eager openness to any future challenge and expanded consciousness horizons for what is possible). You could also lay it down on it's back, figure out how to get the same gorgeous external and seamless appearance on the wings, and mess with removing supports from such a delicate structure. Let me know how that goes. Ok, with the model standing upright, if you need to re-size it to a different length measurement, all you have to do is unlock the dimensions and scale the Z-axis measurement to whatever you need it to be (change the e.g. 195 mm to whatever measurement you need). 📷 Image redacted — claim this model to add your own media Technically, I could have added a single STL that was a few mm tall, and told people to measure and scale to their sizing requirements, but I figured including what mine were would be a good starting point and likely to serve most. You COULD size down to print covers of the inside rails between cable fastening clips, for instance, or even cover the undersides of the rails (which, I don't know why you would, but -hey- you could and someone out there is probably going to do it, am'I'right!?). The end result is soothingly gorgeous extrusion rail covers that complement the MK4 beautifully. At least to my eyes doing the beholding. Good luck, and let me know how it goes.
Originally published on Printables


