Planetary Gear Stand
by Starmaze64320 · via Thingiverse
| Format | STL |
| Category | Art |
| License | CC BY-SA |
| Uploaded | Apr 20, 2026 |
👁 3 views
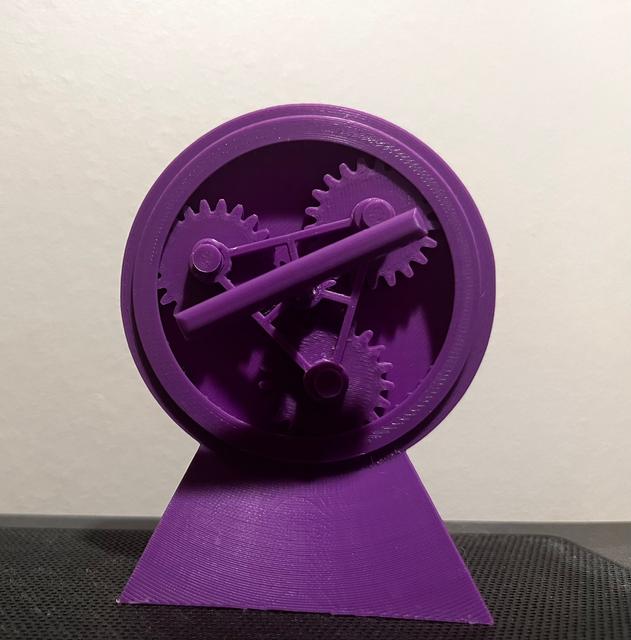
Description
You can use this as a fidget toy, or as a stand. It doesn't matter what settings you use too much when printing except for the stabilizers, but here's what I did: For everything I used PLA. For the Ring Gear, planetary gear, aligner, sun gear, and stand/holder I used three perimeters with a 15% infill. I used 0.1-0.2 layer height. For the Sun Gear Handle, I used all of those settings, but also printed it on its side, so it only had supports where the stake would go in the sun gear, and so it would be stronger. For the pins, I also used 0.1-0.2 layer height. I did this at 5% infill, and only one perimeter. You will want to print: • Three Planet Gears • Three Stabilizers • One Sun Gear • One Sun Gear Handle • One Aligner • One Stand/Holder • One Ring Gear Assembly: • You can place the aligner over all four gears, in their designated placement • Now that these are all placed, you can put the stabilizers over the planet gears where the diameter is the smallest (You may need pliers to do this) • Now that all the gears are placed, take the sun gear handle and put it in the hole in the sun gear. (I used a hammer for this) • Now that all the gears are fully secure, you can place the ring gear over all the gears, so that the aligner is facing up, and the teeth on the ring gear are facing down. • While that's in there, you can now place it into the holder or stand. • You are now free to spin the gears. NOTE: When I assembled this, everything held together perfectly fine without the user of glue. The ONLY two places where using glue is acceptable, is in the sun gear handle, and when your placing the ring gear into the holder/stand.
Originally published on Thingiverse


