Polydryer 10% Air Exchanger Upgraded
by ross549 · via Printables
| Format | STL |
| Category | Other |
| License | CC BY-SA |
| Triangles | 4.1k |
| Uploaded | Mar 20, 2026 |
⬇ 12 downloads
❤ 2 likes
👁 124 views
Description
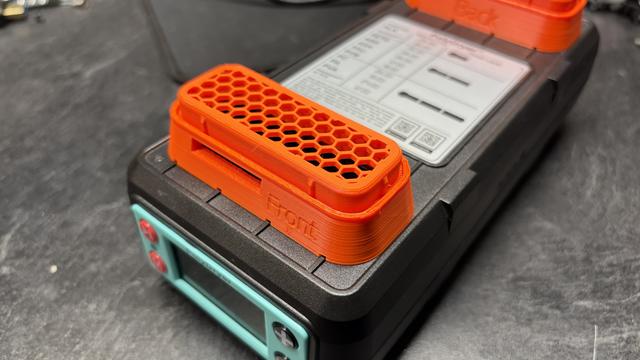
Introduction I liked the air exchanger model from user gwg, but I thought I would be able to make some changes. I hope you find them useful. The top has been changed to a solid peice, and you must use a modifier to use hexagonal infill to print like I have. More on this below. The bottom of the adapter now matches the geometry of the PolyDryer, and should seal a bit better. Printing Please note the STLs have a solid top. The files will need to be oriented as shown below to insert the modifier: 📷 Image redacted — claim this model to add your own media Right click the object, choose "Add Modifier", and select Box. Size the modifier... it should be approximately 3mm tall on order to account for the full thickness of the top (oriented to the plate) of the model. Adjust as needed in Z in order to just barely cover that part of the model. You will see the color change. 📷 Image redacted — claim this model to add your own media On the right in PrusaSlicer, right click the "Generic-Box" item, and select layers and perimeters. Set your top and bottom layers to 0 (zero). 📷 Image redacted — claim this model to add your own media Go to your Infill settings. Choose the Honeycomb fill pattern, and select your density. You may want to play with that percentage until you get something you are comfortable with. Finally, you MUST use supports for a successful print. Use the support painter and rotate the model to the bottom to see the areas needing support. In your support settings, choose organic. When you are done painting and lice the model, it should look like this: 📷 Image redacted — claim this model to add your own media If this is what you end up with, it should print successfully. I printed mine using ASA, but PETG should be OK as well. Results not guaranteed. ;) Fun Fact 📷 Image redacted — claim this model to add your own media The rear port of the PolyDryer has a rib that does not line up (circled) with the one on the other side of the port. I had to do an additional round of testing to ensure it was correct. :) 📷 Image redacted — claim this model to add your own media The front port is lined up. ;) Each part is labeled, and should be placed on the appropriate port. Happy printing!
Originally published on Printables


