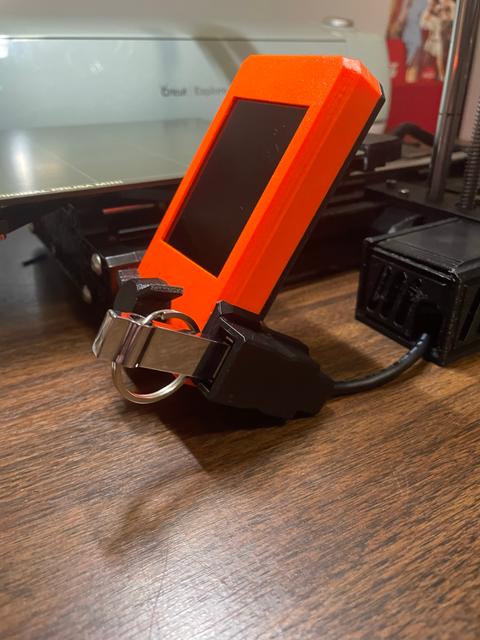
Prusa Mini Back Cover with USB for AmazonBasics Cable
by T3D · via Printables
| Format | STL |
| Category | Art |
| License | CC BY-NC |
| Uploaded | Dec 30, 2021 |
⬇ 36 downloads
❤ 10 likes
👁 752 views
Description
INTRO: I wanted to print a USB extension for my mini and I wanted to make a backplate for the LCD. I found RDWare's file, but I didn't feel like buying a new cable since I already had the AmazonBasics 1 Meter UBS 2.0 extension cable ( here ), so I modified their design using RT3D Workshop's cable mount for the same cable, following RDWare's idea of not using any supports bu supergluing the parts together. This is the result! HOW TO ASSEMBLE: I have labeled each part with a letter to hopefully make assembly easier. STEP 1: PRINT ALL PARTS. All of the parts have a flat side. print with that side facing down, towards the print bed. No supports necessary at all. You should be able to use your normal settings. I used Overture PLA in black STEP 2: GLUE THE RIGHT ANGLE INTO THE INDENT 📷 Image redacted — claim this model to add your own media This angle is labeled B. The thing you are gluing it onto is labeled A. This indent can be found on the opposite side of the A label. STEP 3: PREPARE THE USB 📷 Image redacted — claim this model to add your own media VERY IMPORTANT: DO NOT FORGET TO INSERT THE USB BETWEEN THESE TWO PARTS After you have inserted the USB plug into part D (the one with the curve in this photo), glue it to part C as shown. Do keep in mind that this is pretty permanent, especially depending on the type of glue you use, so it will be very difficult to get your cable back. In case you missed it from earlier, this is the correct cable: https://www.amazon.com/dp/B00NH11R3I/ STEP 4: GLUE USB INTO PLACE 📷 Image redacted — claim this model to add your own media I have tried to create a good amount of surface area to glue the parts to. Be sure it is in the correct orientation. STEP 5: INSTALL 📷 Image redacted — claim this model to add your own media The backplate should fit into place on the existing front panel. You will have to use new screws that are longer. I used M3x12 and those worked. I'd recommend buying a box of them like this to use for all future mods. I also made the channel for screwing the assembly to the printer slightly longer to make it a little easier to attach. OPTIONAL: BOX 📷 Image redacted — claim this model to add your own media I've also included files for a box that you can use to wrap up the extra cable in. While not required, I think it is very nice for cable management. Thank you for checking out my mod, I hope you like it! Please let me know in the comments if you have any questions and I'd love to see if you make it.
Originally published on Printables


