Remix - Customizable Back Horn Speaker Enclosure
by andimoto · via Printables
| Format | STL |
| Category | Electronics |
| License | CC BY-NC |
| Triangles | 12.1k |
| Uploaded | Sep 26, 2023 |
⬇ 572 downloads
❤ 90 likes
👁 4.9k views
Description
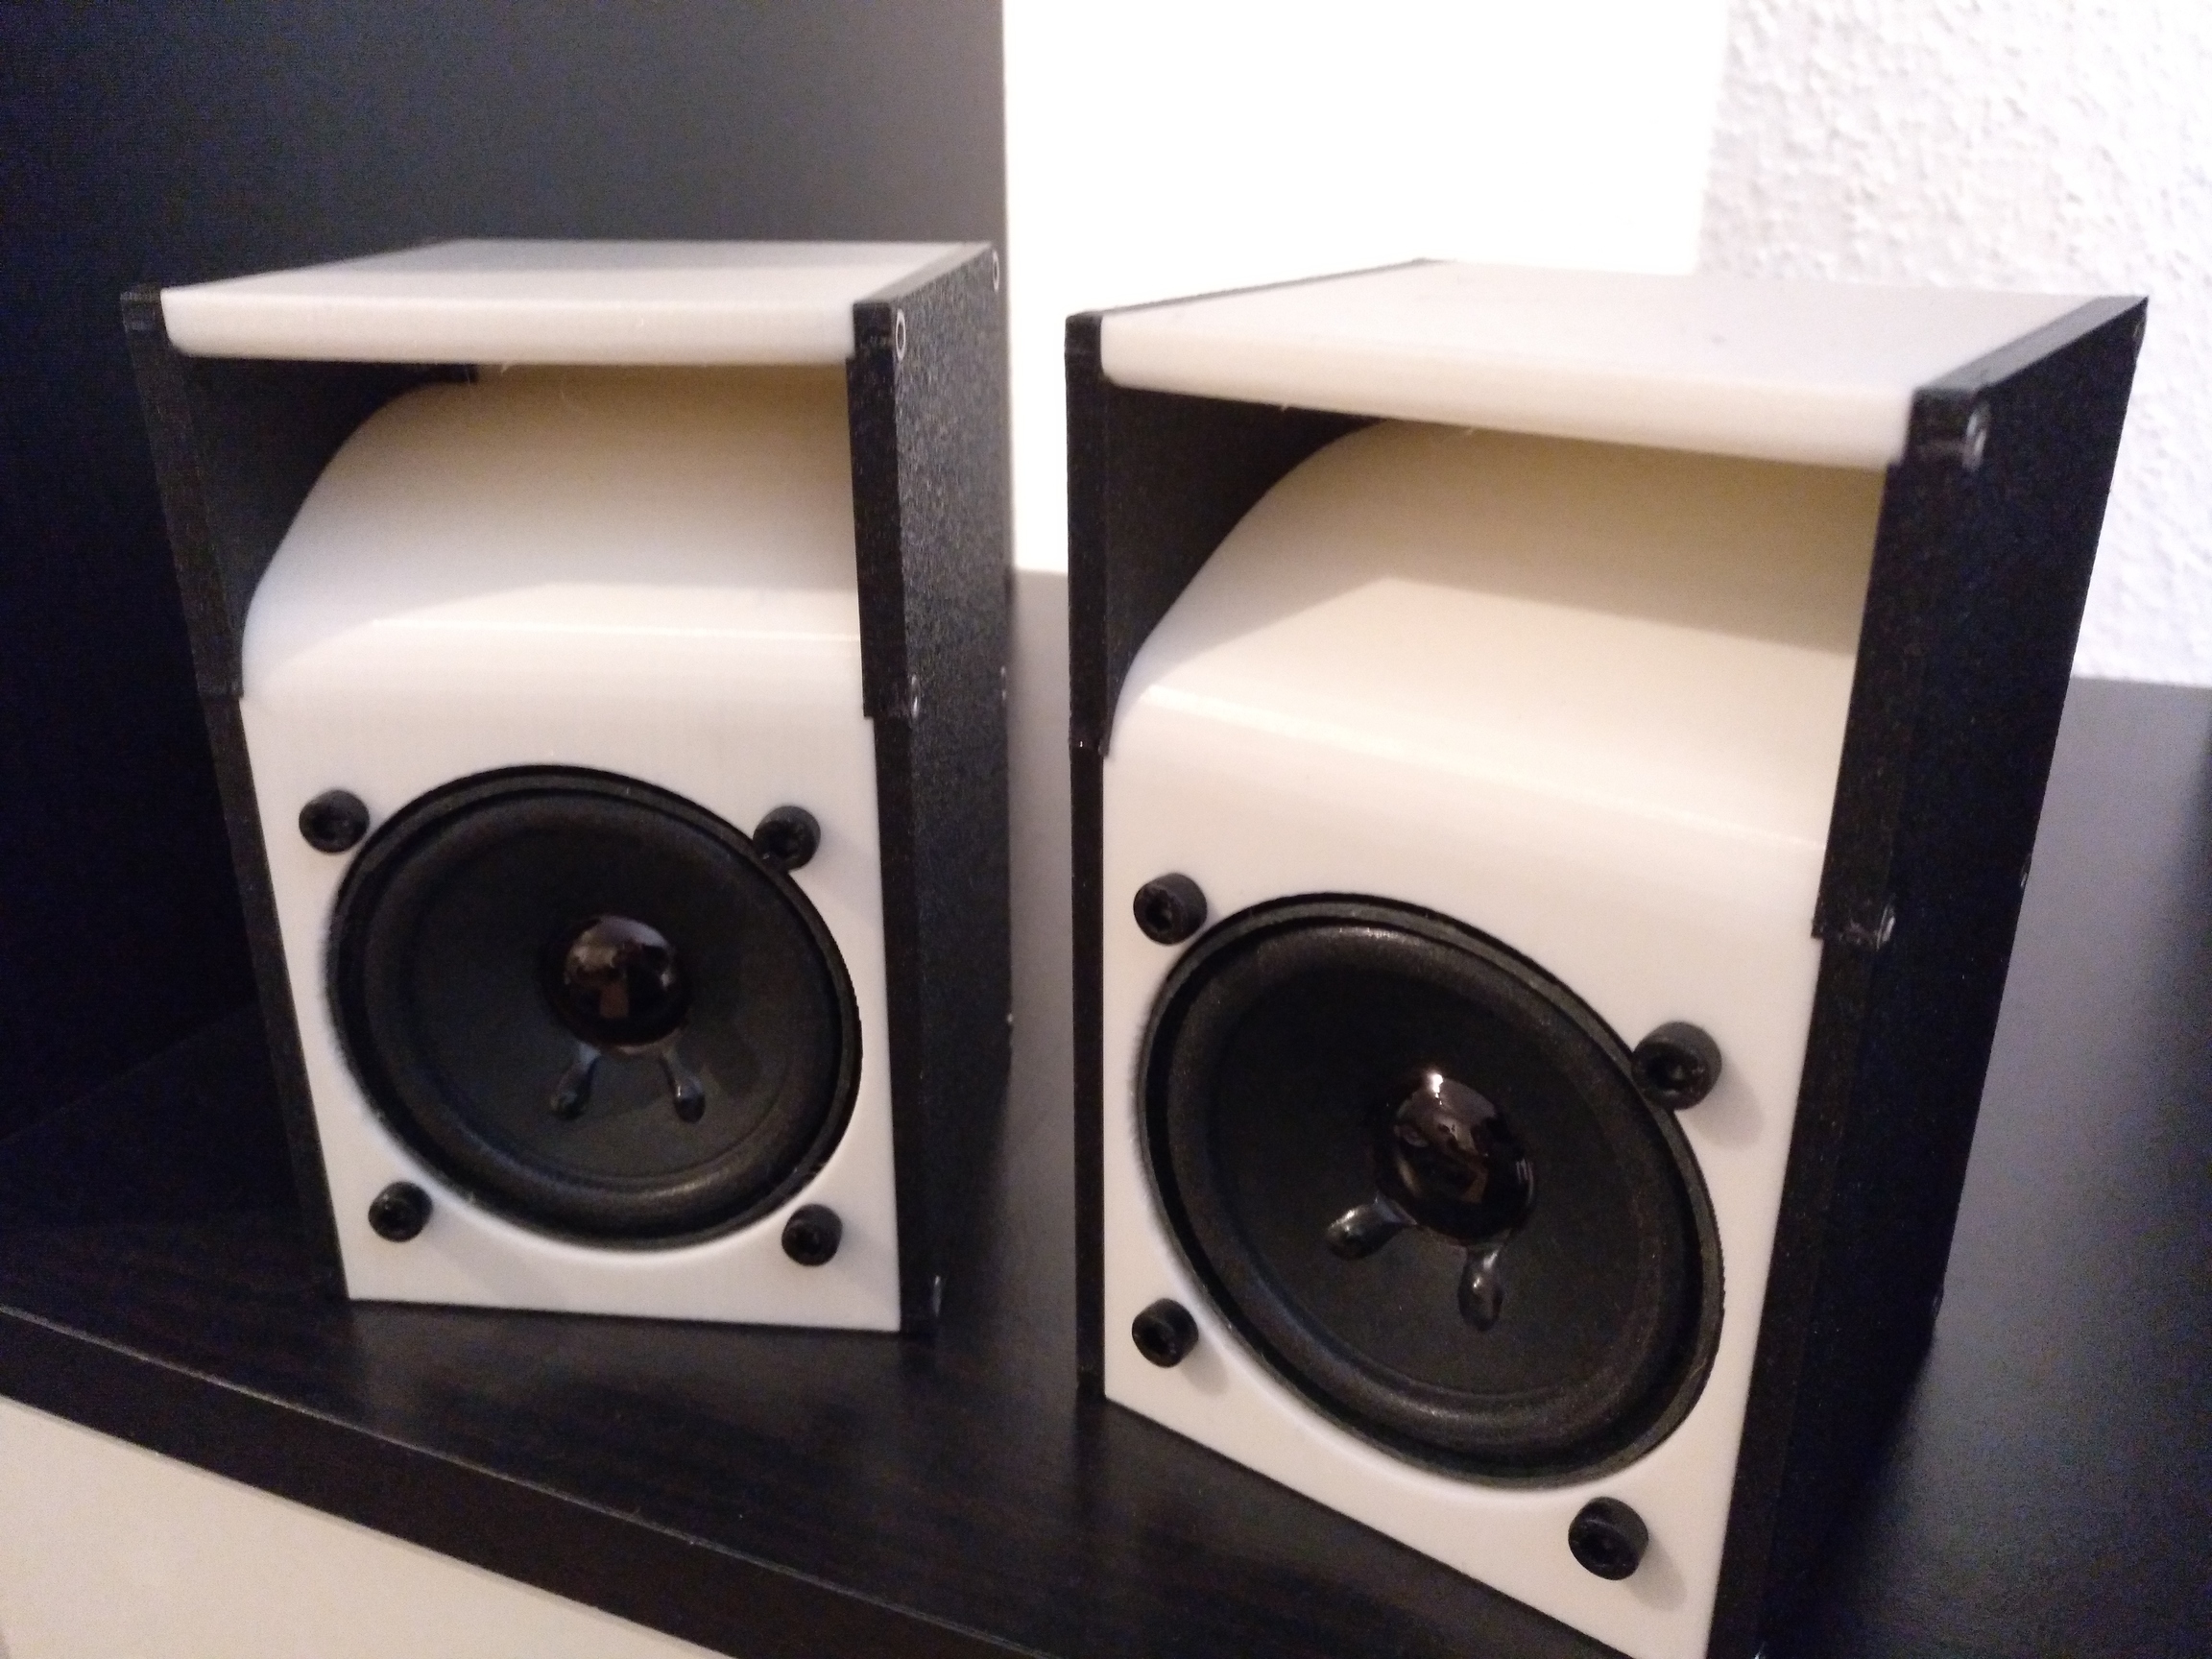
This is a Remix of the Customizable Back Horn Speaker by Chris Hill. I changed the diameter for the speaker chassis to 66mm and made the whole case a little bit smaller. Also there is no extra space for any PCBs. I left some room for speaker connection terminals. As speaker I used Visaton FR7 2.5". The speaker connection terminals have 3mm holes and an mounting distance of 45mm. The cutout for them is 20mm wide. So it is possible to put them through when the terminals are already soldered to the chassis. It is better to use more flexible cables (1 mm²). Then the back plate snaps in and holds good. I used stiffer cables and it just holds in there… For terminals I used these ( https://www.amazon.de/St%C3%BCck-Lautsprecher-Terminal-pol-Klemmleiste-rot-schwarz/dp/B00C7R67EM/ref=sr_1_11?__mk_de_DE=%C3%85M%C3%85%C5%BD%C3%95%C3%91&crid=2Y4ALIAAVINDC&keywords=lautsprecher+terminal&qid=1680861792&sprefix=lautsprecher+terminal%2Caps%2C137&sr=8-11 ) But they are not good. If you want to use the back plate, buy terminals which are 20mm in height and have a hole distance of 45mm. Holes are for M3 Screws. Don't tighten the screws, back plate will bent and does not hold. Unfortunately, I designed and printed the speaker housing before I wanted to use the terminals :). Printing: use (Tree)-Supports on the chassis cutout use Supports on the Screw Holes on the Sides Parts needed: 4x M4x6 screws (chassis) (any screw head you like) 4x M4 nuts (chassis) 12x M3x10 cylinder head screws for side plates (longer screws can be used) M3x6 or M3x8 screws for the back plate (any screw type) M3 nuts
Originally published on Printables


