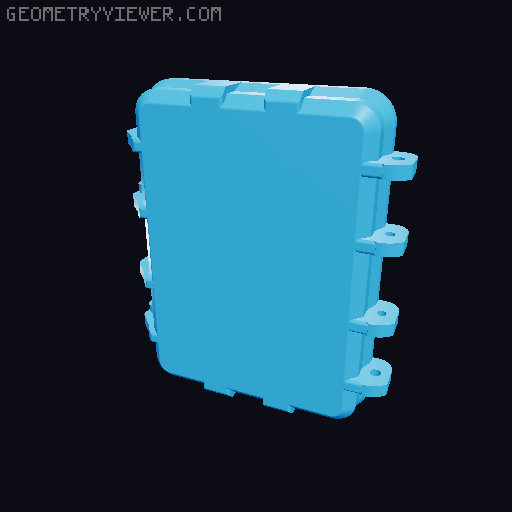
Rugged Box - Card Box Single
by ItemNumber35 · via Printables
| Format | STL |
| Category | Organisation |
| License | CC BY-NC-SA |
| Triangles | 8.7k |
| Uploaded | Dec 11, 2023 |
⬇ 289 downloads
❤ 70 likes
👁 1.3k views
Description
[Mostly a copy and paste from the double box. Reference that for slightly more info and pictures!] https://www.printables.com/model/619230-rugged-box-card-box Will fit one pack of bicycle cards or analogous size flush. Important: Use 6x M3 x 25mm screws to complete. (Added version with no Ace of Spades graphic) When printing in a solid color: Printed Bottom, Lid, and Latches in PLA. Prusa slicer and MK4. Generic PLA. .20 Speed setting and Octagonal Spiral for top and bottom pattern. Printed the Seal in TPU Limited all speeds to 25mm/s. Temp: 220C Bed: 55C Printing in two colors: It's important you read all of this before using the G-Code its kinda janky Added custom G-code that stops and prompts color change for the Ace of Spades Lid . The file contains the lid. All I did was add 4 M600 commands so it takes some babysitting. I suggest doing at least one test before committing to the whole print. Stop at 4 layers, rip it off, and check it. If it looks good, re-print! Color order: Base color: Start printing with this. It will lay down the first layer in base color only. Secondary color: It will stop halfway through 2nd layer for this (Spades and A's) Base color: It will fill the third layer and perimeter of the lid Secondary color: Another layer of secondary color right over the previous (helps fill gaps and prevents base color leaking through) Base color: Last change. Finishes the rest of the box A few important quirks when working with this G-code: G-code is set for Generic Pla (Sliced in Prusa) Manually tuned first layer to 80% speed and 110% flow for a fuller first layer pattern Tuned the black layer (secondary color) to 80% speed and 120% flow rate. This helps fill in the gaps in the spades and “As” Put everything back to normal for the rest of the print Make sure you purge well. I cannot seem to get a perfect top pattern and no bleed-through spots (Reference last picture up top. Random dot next to “A” and black peaking in ribs) so you may be better off modifying your own G-code. Fairly easy to tell where the stops should be, just add a line with M600. Good luck and remember to stop and test. It took me some fine-tuning to get the look I was aiming for.
Originally published on Printables