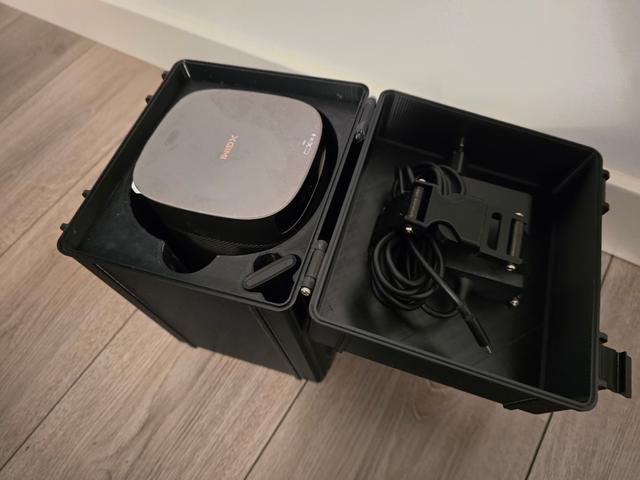
Rugged box for XGIMI MoGo Pro 2 + Adaptor + remote
by CCW_92 · via Printables
| Format | STL |
| Category | Organisation |
| License | CC BY-NC-SA |
| Triangles | 30.9k |
| Uploaded | Mar 15, 2026 |
⬇ 1 downloads
👁 9 views
Description
This box was made based on the Full Rugged Box Parametric V2 design made by: Malte Skræddergaard Madsen @MalteSkrdder_1904488 I've also used The 25mm repair buckle: Made by: Atkc001 @Atkc001_2724309 I didn't include the buckle in the files, because I didn't remix it, so please download that model directly from the link. I've added some extrusions to the lid of the parametric box, so the adapter can be attached to it, and parameterized (is that a word?) it to fit the XGIMI MoGo Pro 2 projector inlay while it stands on the stand as shown below: 📷 Image redacted — claim this model to add your own media It is important that the stand is attached, because otherwise the projector might move around a lot while in transport, and it won't fit well inside the box. The inlay is pretty straight forward, it can be printed in any material, I've printed mine in PETG (though I added some TPU at the bottom of the box, to make it a little softer). Supports aren't needed for the box or for the inlay. For assembly you need: 6 M3 cylinder head bolts 30mm, 2 M3 cylinder head bolts 40mm (these go in the lid) 2 M3 cylinder head bolts 35mm (these go through the buckle) 4 M3 nut (for the lid and the buckle). Printed parts: 1 Box Lid 1 Box Bottom 1 Box Inlay 2 Box-Latches 2 TPU straps (strap_mogo) 1 25mm buckle (see above linked buckle) Assembly is pretty straight forward, you just attach the latches, attach the TPU straps to the lid with the 40 mm bolts and nuts, and attach the other side of the TPU strap to the buckle and fasten with nuts as well. After that, attach the lid to the bottom of the box, and the latches to the lid, both with 30mm bolts, and don't forget to insert the final 2 30 mm bolts so that the latch has something to grab on to.
Originally published on Printables