Simple Shrinkage Test
by TeachingTech · via Printables
| Format | STL |
| Category | Other |
| License | CC BY-NC-SA |
| Triangles | 6.6k |
| Uploaded | Sep 5, 2025 |
⬇ 626 downloads
❤ 76 likes
👁 2.0k views
Description
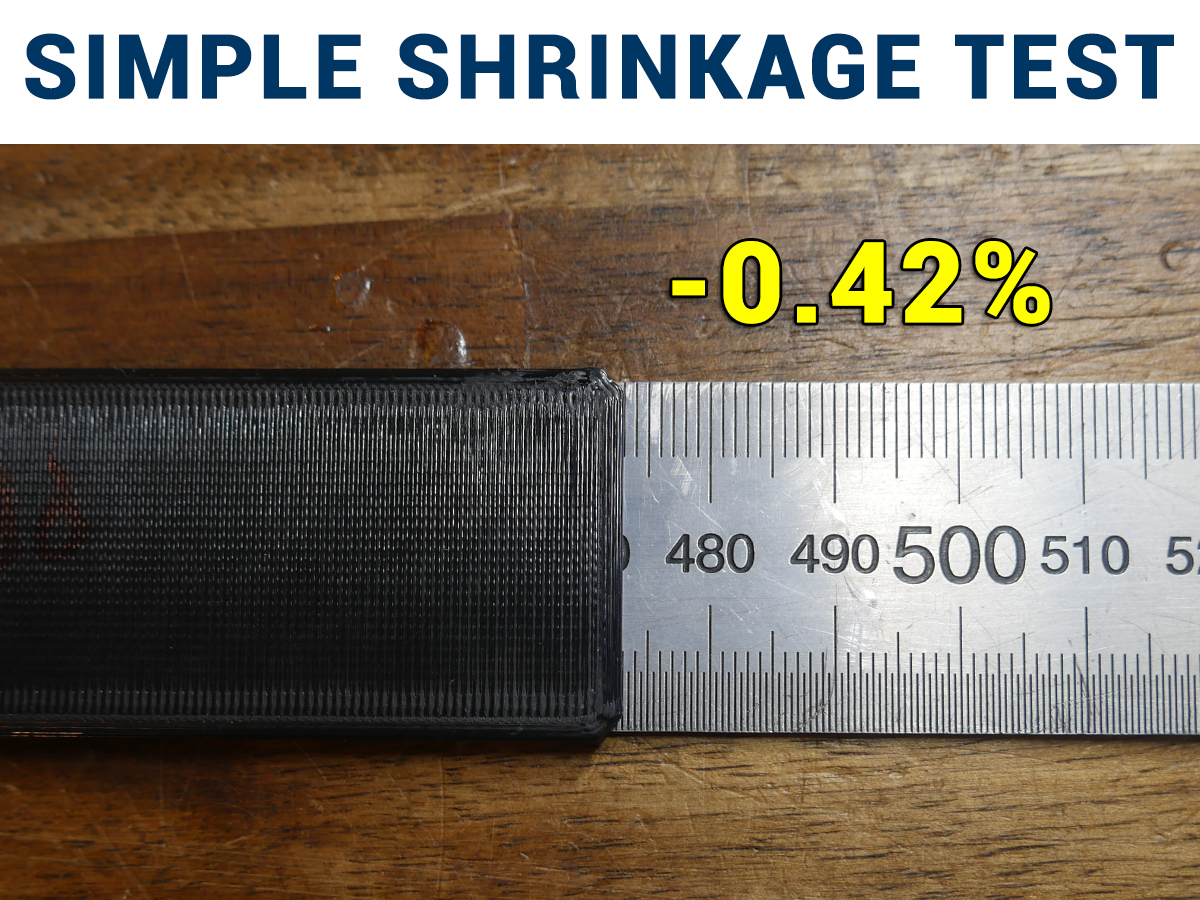
Make more dimensionally accurate parts by testing and compensating for material shrinkage. If your large prints aren't quite fitting as planned, this simple test will help recify that. Inspired by the EnXlosure by Voxel3D_Nederland and covered in this YouTube video: Instructions Select a test strip that is as large as your printer can fit. Parts are labelled with the intended bed size. The strip will be rotated to run diagonally across the bed. The scale must be 100%. Print the test strip using whatever your typical settings are. This includes infill percentage, perimeter count, etc. Remove the part once completely cooled. Sit the strip on top of a ruler, carefully lining up one side with zero. Measure the total length of the strip on the other side. Calculate your shrinkage for this material as follows: Shrinkage % = 100 - ([measured length] / [target length] * 100) For example: Shrinkage % = 100 - (298.75 / 300 * 100) Shrinkage % = 100 - 99.58 Shrinkage % = 0.42 Slicer Compensation The simplest way to compensate is to scale parts up by the measured shrankage. For example, scale a part to 100.42% if the measured shrinkage is 0.42% For a more permanent solution, the material shrikage property can be entered for each slicer. The example of 0.42% shrinkage will be continued for the following instructions. PrusaSlicer In Filament > Advanced , enter your shrinkage percentage under Shrinkage compensation : 📷 Image redacted — claim this model to add your own media OrcaSlicer / Bambu Studio In Material Settings > Filament , enter 100 - shrinkage percent under Shrinkage : 📷 Image redacted — claim this model to add your own media Cura In Material , enter 100 + shrinkage percent under Scaling Factor Shrinkage Compensation : 📷 Image redacted — claim this model to add your own media Retest With these changes in place, reprint the test strip and measure its length to verify you now have accurate parts. Z Shrinkage Scaling? I have not tested vertical/Z shrinkage because the test will be much longer, however a suitable efficient model might be my Simple Z banding test tower: https://www.printables.com/model/393668-simple-z-bandingwobble-test-tower Scale in Z to match the maximum height your printer can manage and repeat the calculation steps above. Odd Sized Beds Simply add cube and non uniform scale it to be 3mm tall, 30mm wide and as long as your bed can fit. Write down the target length for later reference once printed.
Originally published on Printables


