Slide/Press Marker Holder with Eraser for Mini Whiteboards
by Highrise Workshop · via Printables
| Format | STL |
| Category | Gadgets |
| License | CC BY-NC |
| Triangles | 3.2k |
| Uploaded | Aug 27, 2022 |
⬇ 25 downloads
❤ 4 likes
👁 275 views
Description
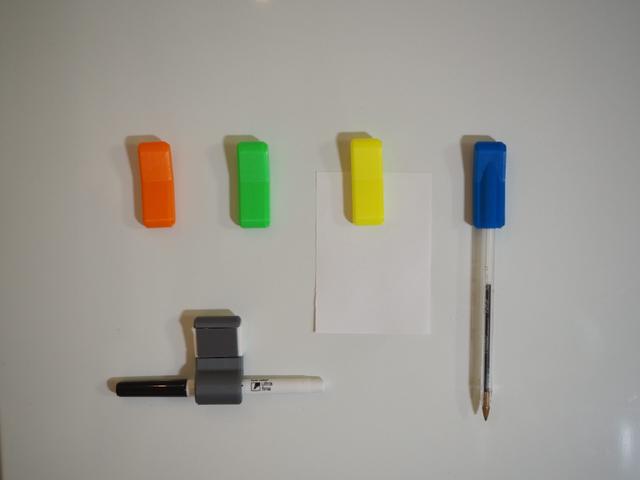
With the environmental issues we are facing today, I felt guilty everytime I reach out for some paper to rough out a design sketch or to perform some calculations. As a result, I have now taken up mini whiteboards as my scratchpad. The mini whiteboard have also given me extra mobility over bits of paper, as paper requires a hard surface to write on. Now, I can have the board with me while watching television, or enjoying the great outdoor from my balcony. Given the extra mobility, I wanted something easy to carry everything I need (instead of having to hold a separate handful of stationary). I have designed this holder in the same spirit as the Slide/Press Fridge Magnet . You can press to release the marker, or just slide the marker into and out of the holder. The new holder holds the marker closer to the center, so it doesn't rotate as easily under gravity or when transported. It also have a small changeable eraser, so I don't have to use my fingers to remove mistakes. This holder is designed for my mini whiteboards. You can also use it on your fridge and turn your fridge into a whiteboard. I have also included a 20mm wide version, so it is consistent with the fridge magnets that it's based on. Assembly Notes WARNING: Do not press the Spring Wedge into the holder with your finger over the gap. Your finger will get pinched. How much it hurts will depends on how loud you can yell. 😱. The model provided uses Ø8 x 2.8 mm neodymium magnets. Cut a bit of felt or fold a bit of paper towel to use as the eraser. You can use the Spring or Solid Wedge to hold it in place. If using the Solid Wedge, you may need to scale it horizontally to get a perfect fit with your material. To adapt the model for larger magnet. Use your slicer: Place the face with magnet on the print bed. Add a Negative Volume same dimension as your magnet. Drop it to the print bed. Then use it to cover the existing magnet recess. (Note: you may need to make the new recess a bit deeper, so the magnet don't stick out of the model) Return the model back to intended printing orientation, by placing the side on the print bed. You can check out my other prints at https://www.prusaprinters.org/social/76585-highrise-workshop/prints . And don't forget to click the “Like” button.
Originally published on Printables


