Taotronics Sympa SP-DL054 Mount Repair Bracket
by Gargoles · via Thingiverse
| Format | STL |
| Category | Mechanical |
| License | CC BY-SA |
| Triangles | 2.4k |
| Uploaded | Mar 18, 2026 |
⬇ 29 downloads
❤ 2 likes
👁 54 views
Description
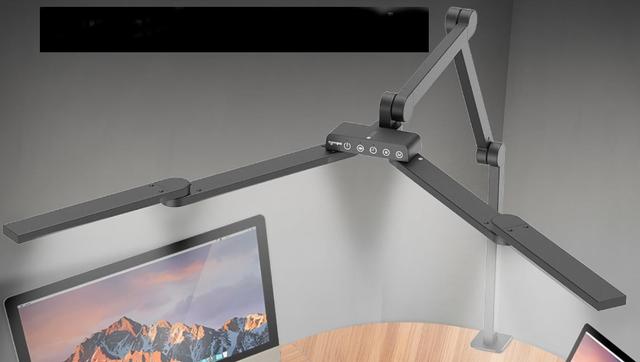
The Taotronics (or Sympa) SP-DL054 desk lamp is attached to its mounting clamps by two tiny screws that easily pop out, so the lamp falls over. Once that happens, the lamp cannot be reattached to the mounting clamp. This bracket attaches to the back of the original metal clamp and has slots to slide the lamp through and hold it up. Printing: Supports (Everywhere, not just Touching the Build Plate) needed for the Back piece 0.4 mm layer height recommended 100% Infill recommended Assembly: Remove sharp screws from the original Taotronics metal mounting clamp. The rubber sticker over the back of the screws can just be cut and the screws pushed through. The Front and Back (labeled in STL filenames) pieces fit around the Taotronics metal mounting clamp. Select 6 screws to attach the Front and Back Pieces to one another. The sharp screws removed earlier are about the right size. Drill pilot holes for your screws; the holes are marked in the Front and Back pieces. Screw the Front and Back pieces together so they hold the Taotronics metal mounting clamp between them. Make sure the correct side of the Back piece is facing up, so that the lamp can slide down through the slots (see photo) and rest on the stop. Attach the metal clamp to your desk/table. Remove the power cord from the lamp, and slide the lamp down through the slots. Plug the power cord back into the lamp. Shims (optional but recommended): The bracket has oversized slots so the lamp can easily slide through them, regardless of the print materials and quality. Shims can be used to tighten the fit. Once the lamp has been slid into the Back piece, use the Gap Gauge to measure the gaps between the lamp arm and the slots. Take measurements on the front and on the side for both the top and bottom slots. The gauge measures: 0.8, 1.2, 1.6, 2.0, and 2.2 mm. Print shims for your gaps. Some sample shims have been provided. Other sizes that can also be edited can be found here: https://www.tinkercad.com/things/9La9J4IrRJQ-lamp-bracket-for-clamp-shims?sharecode=qtQ9EGwDGhQt3fSHus5osUjMi7i-2U9qxixtKBNn9IE
Originally published on Thingiverse


