The illuminated Snowman
by MK-Design · via Printables
| Format | STL |
| Category | Home |
| License | CC BY-NC-SA |
| Triangles | 270.2k |
| Uploaded | Jan 5, 2026 |
⬇ 19 downloads
❤ 3 likes
👁 66 views
Description
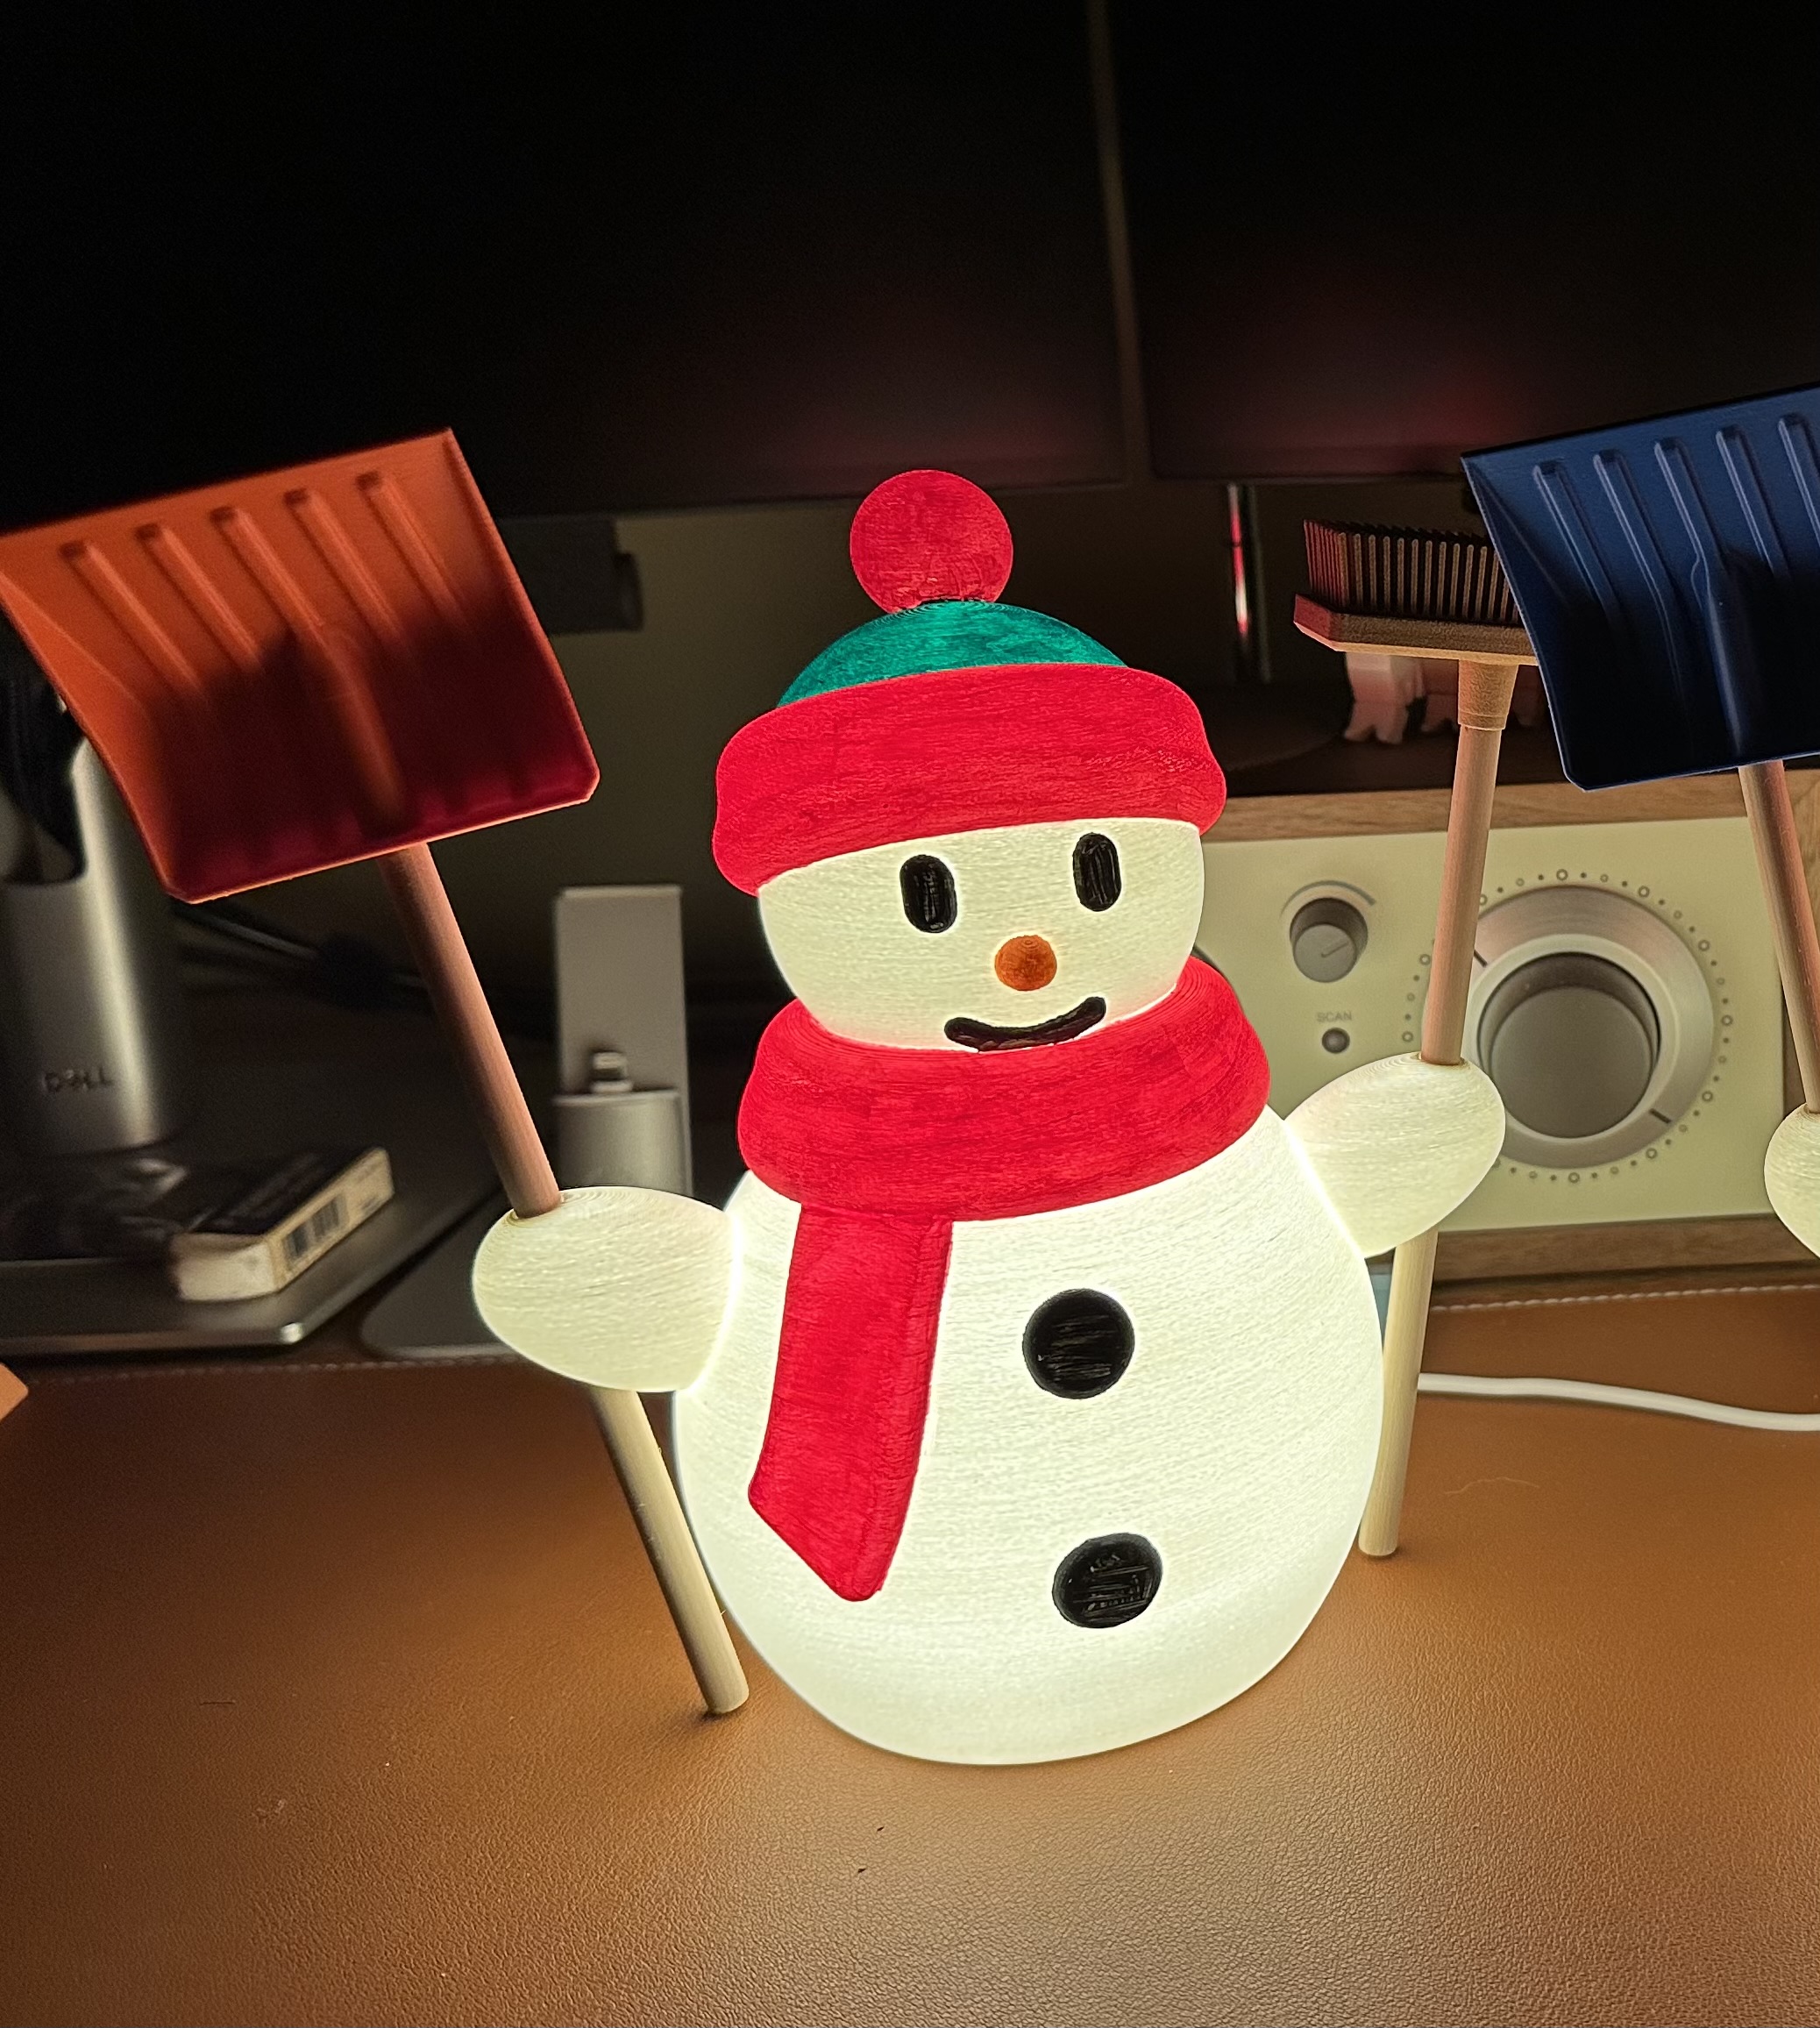
Searching Printables for some seasonal designs to print I found the small snowman for a tealight from Mekatonik_3486 . Unfortunetly it is too small for the LED kit 001 I wanted to use with it. After trying to scale it up and modifying the wall thickness to a constant value which did not work at all I decided to completly design a clone of the snowman in my desired size for use with the LED kit 001. I used this LED kit clone from amazon instead of the original BambuLabs LED kit 001 : https://www.amazon.de/dp/B0F2LYSZH7?ref=ppx_yo2ov_dt_b_fed_asin_title Print Settings and remarks : All STL files will appear in the same print orientation that I used for printing when you import it into Prusa Slicer. Snowman : 3DJake mattePLA white; layer height 0,15mm, fuzzy skin thickness and point distance 0,1mm (choose paint on fuzzy skin on all outside surfaces), 5mm brim; 0,15mm structural profil. Note that due to the fact that the snowman is completly hollow it will not be possible to print it properly without supports. Lid and snap : 3DJake matte PLA white; layer height 0,15mm, seam position rear, paint on seams for the snap, perimeter generator classic, 15% grid infill, 5mm brim for the snap, 0,15mm structural profile. Note that you might need to trim the dovetail slot and the mating surface of the snap (blue colored in below picture) to be able to slide it completely in as this fit is quite snug, in case you overshoot it and the snap does slip out when the lid is tilted just glue it in using some CA glue. 📷 Image redacted — claim this model to add your own media 📷 Image redacted — claim this model to add your own media To prevent rattling of the LED inside the snowman you might need some self adhesive pads attached in the 4 recesses on the inside of the lid, I used this one from amazon : https://www.amazon.de/dp/B015LLS3KQ?ref=ppx_yo2ov_dt_b_fed_asin_title Broomstick : Polymaker PLA peanut; layer height 0,1mm, 50% grid infill, support treshold 50° and 2 raft layers with 90° grid angle, 0,15mm structural profil. Note that it is oriented sideways in order to print the small slot and snap locator on the flat side without issues but will need some rework. Shovel : Extrudr PLA NX2; layer height 0,15mm, seam set to rear side, 5mm brim, no supports necessary, 0,15mm structural profile. Broom : Polymaker Polywood PLA; layer height 0,15mm, seam position rear, perimeter generator classic, 40% grid infill, infill and solid infill speed 80mm/s. Note that assembly is required for the broom, you will need 9 pieces of the bristles and 1 piece of the broom body and glue the bristles into the slots of the body, use only small drops of CA glue and make sure the slots are clean and free of small debris as the fit is quite snug, best practice is using a small round tool to press the bristles into the slot in the gaps between the bristles. 📷 Image redacted — claim this model to add your own media You can leave the snowman plain white or paint it to your personal taste , or even make it a MMU project, I designed the snowman in a way that will easily allow to use the multimaterial painting in Prusa Slicer; I would be keen to see how a multicolor snowman print would come out. Use it as decoration object only or as friendly nightlight for your kids or print it just for fun, but I hope you anyway enjoy my version of the snowman and wish you Happy Printing !
Originally published on Printables


