Ultimate XTouch Enclosure P1P P1S / Easy Install / Multiple Options
by Brad @ FTBT 3D · via Printables
| Format | STL |
| Category | Art |
| License | CC BY |
| Triangles | 18.2k |
| Uploaded | Jan 7, 2024 |
⬇ 116 downloads
❤ 20 likes
👁 699 views
Description
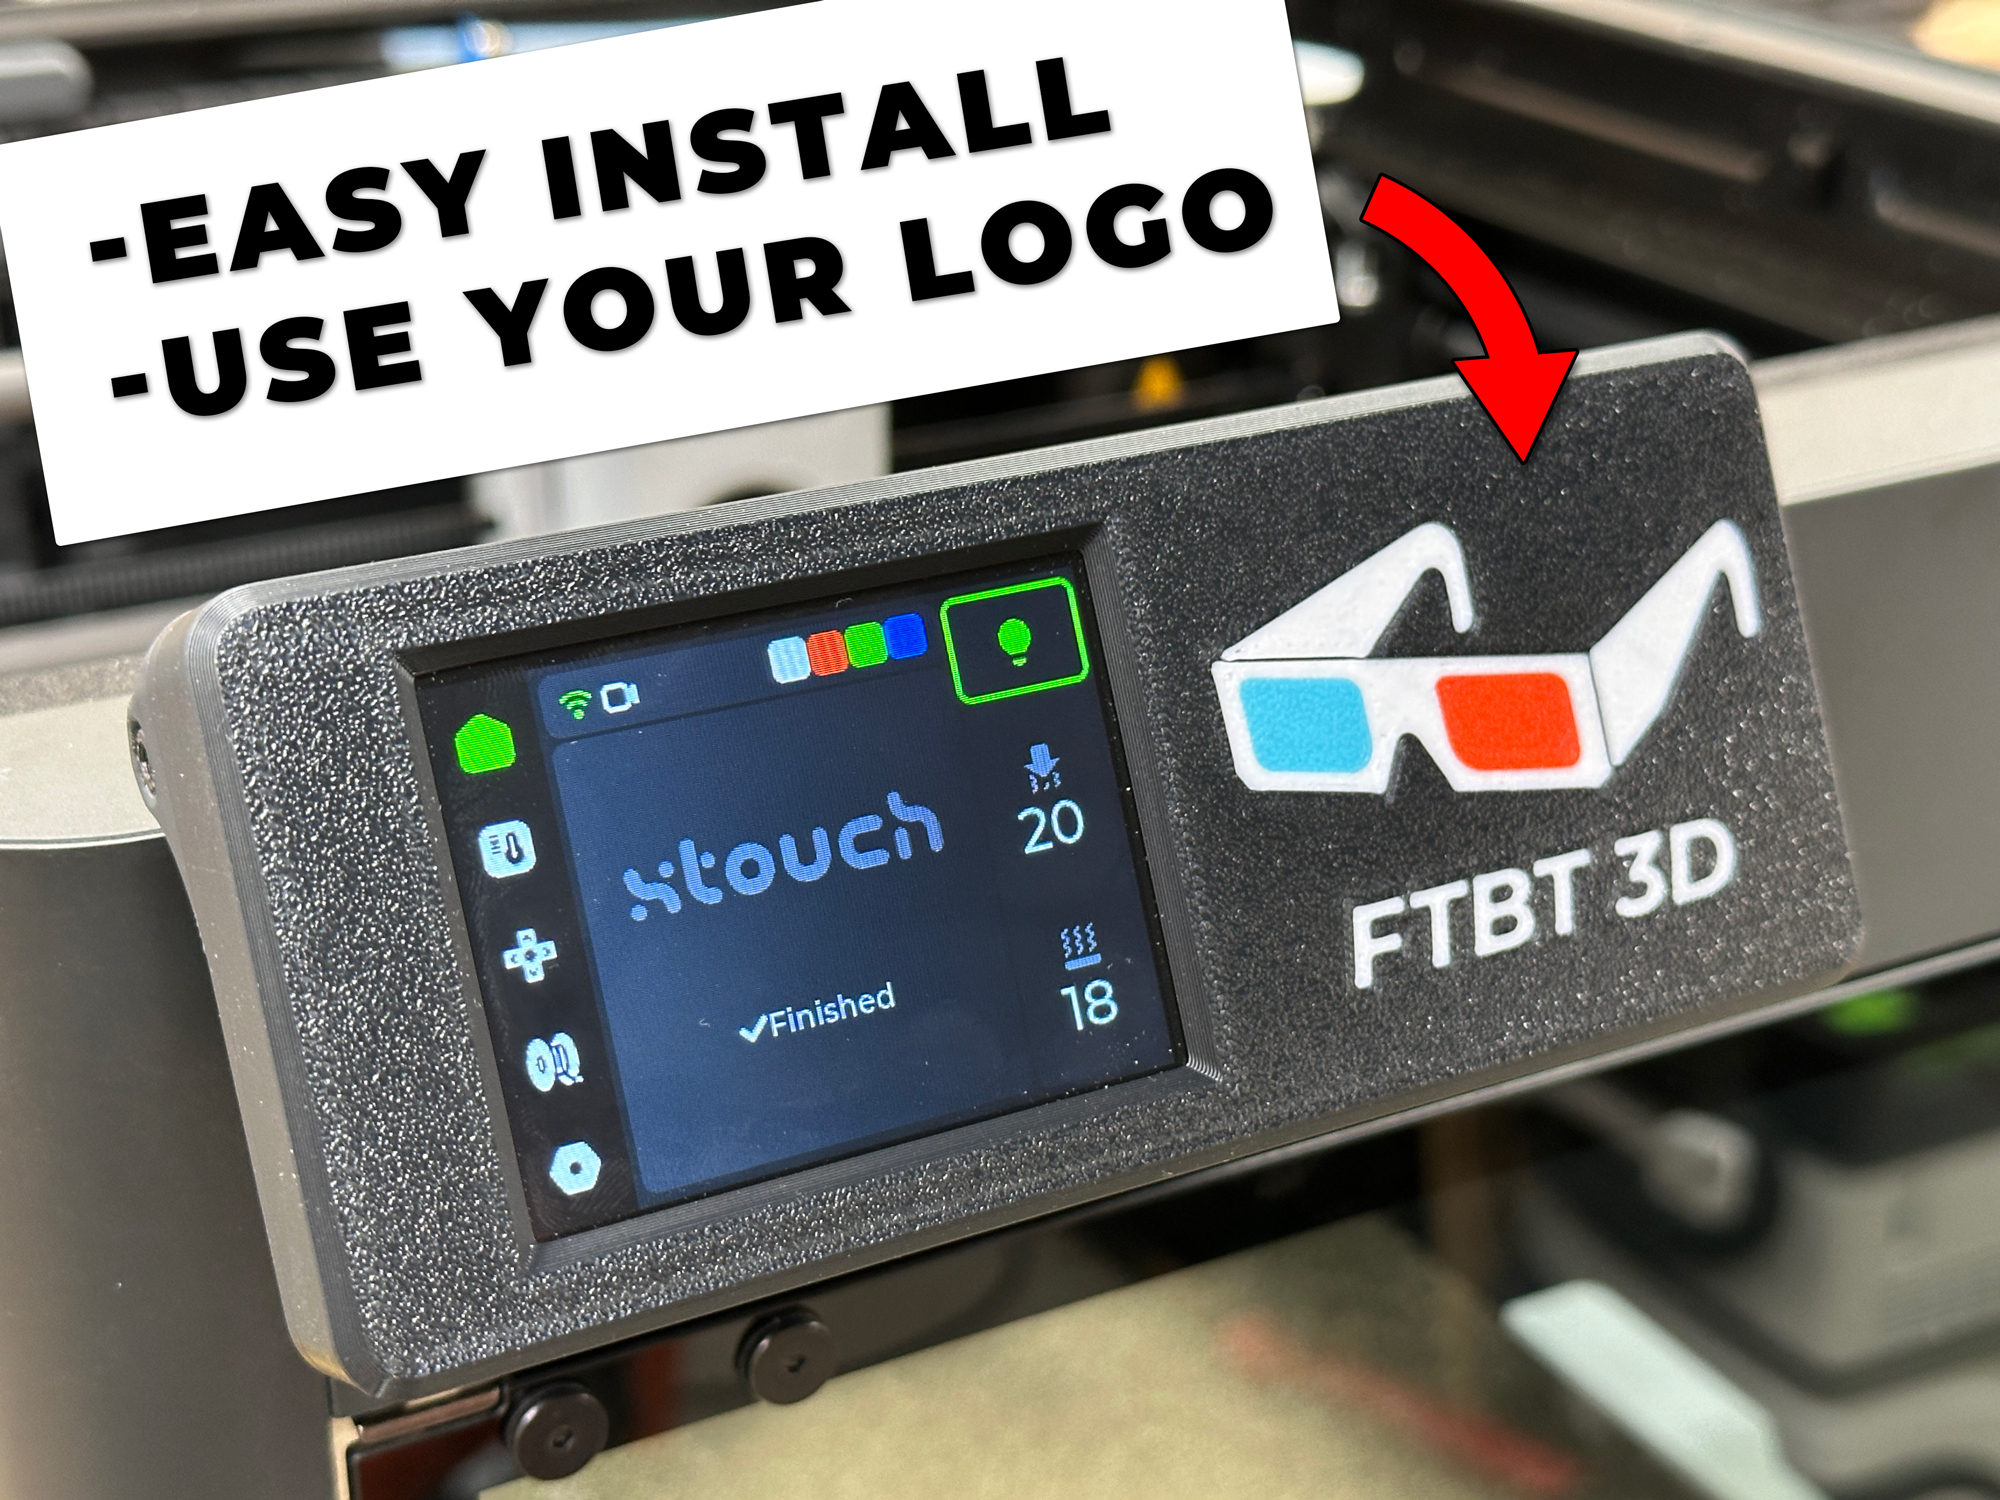
I used my favorite features of other X-Touch enclosures and added some features to make it a cleaner and easier install by splitting the back. The split back design lets you install the ESP32 first before plugging in the USB cable and much easier to work with. It also has push buttons to access the reset and boot buttons on the board as well as a hole for the status light. This let's you have full access to the board without ever having to uninstall it. Use a 1' USB and print the spacer from Johnstylez for a hidden wire install. Use the blank version of the cover to put your own text/logo on the front in the slicer or your CAD program of choice. (I used Fusion and inserted my logo as an svg and extruded as a new body, then cut it out of the cover and left the new body) My Files: Front Cover Enclosure Blank (or for your own logo) Bambu logo Bambu logo with text Split back ESP32 Board cover (countersunk and socket head cap) Cable cover (countersunk and socket head cap) Other Files Used for install: Spacer for clean install (by Johnstylez on MW) Adaptor to fit on orginal screen (https://www.printables.com/model/611634-xtouch-enclosure-for-bambu-lab-p1ps/files) Items used: (affiliate) ESP32 Touchscreen: https://amzn.to/48p8fwv 1' USB Cable: https://amzn.to/3TWdbEZ M3 10mm socket cap bolts: https://amzn.to/3tT9s01 32GB MicroSD Card: https://amzn.to/4aOZ3mC Remixed from TeachTech and johnstylez
Originally published on Printables


