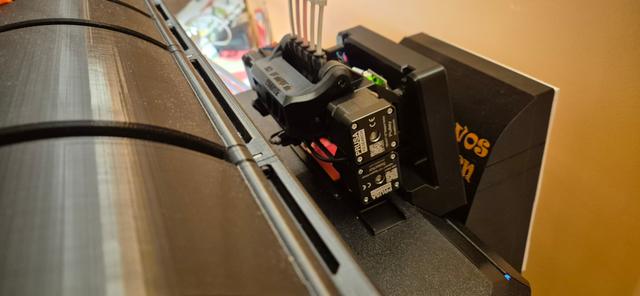
Ultimulti MMU3 with the Prusa CORE One MMU3 Community version
by NikolasZ · via Printables
| Format | STL |
| Category | Art |
| License | CC BY-NC-SA |
| Triangles | 61.2k |
| Uploaded | Aug 6, 2025 |
⬇ 105 downloads
❤ 47 likes
👁 2.1k views
Description
(Edit: I finally learned how to intrude text to objects, so I have removed the Project files, and you can create your own. Basically everything is printed on 0.20mm STRUCTURAL and 15% infill, with a 0.4 nozzle in PETG.) 2 sets of instructions for the Backplate: 1 - Does not yet have the Prusa CORE One MMU3 Community version build If you haven't yet printed out the parts for the Prusa CORE One MMU3 Community version, you can skip printing out the following parts: core-one-mmu3-platform-big-vent-e.stl (the backplate Part E) co_platform_mmu-lock-r1.stl (the leg-holders that slide into the backplate) Print out the following object file: Community_MMU_UltiMulti_Back_MMU_Holder_complete_z15.stl Use 8x M3x10 screws to mount the Back_MMU_Holder to the Community version baseplate. Follow the instruction to install the legs on the UltiMulti MMU3 below. 2 - Already have the Prusa CORE One MMU3 Community version in use Print out the following object file: Community_MMU_UltiMulti_Back_MMU_Holder_Sub_part_z20.stl Remove the Back plate (Part E) from the MMU3 Community version base plate. The subpart you just printed is mounted on the Back plate (Part E) you just removed ( core-one-mmu3-platform-big-vent-e, Part E in the Community Version kit) Use 8x M3x10 to mount the Sub part on to the Back plate (part E). Mount the Back plate (part E) with the connected Sub Part on to the Community version base plate using another set of 8x M3x10. Now the back plate is shifted backwards by about 30mm, to fit the Ultimulti version of the MMU3 into the hole of the MMU3 Community version base plate. Follow the instruction to install the legs on the Ultimulti MMU3 below. Instruction to install the legs on the Ultimulti MMU3 If you already have the Community Version in use, you need to exchange the MMU3 Community version legs to the provided legs in this kit. If you haven't printed out the Ultimulti MMU3 version legs already, skip printing out the following: LEG_ELE_R_C10a.stl LEG_ELE_L_C4.stl Instead you need to print out the following object files: Community_MMU_UltiMulti_leg_ele_left_z7.stl Community_MMU_UltiMulti_leg_ele_right_z17.stl Community_MMU_UltiMulti_Base_leg_z27.stl (Twice!) Use 4x M3x10 screws to install the right and the left leg onto the Ultimulti MMU3. make sure to set the wires according to the Ultimulti instructions (See the pictures from the Ultimulti description). At the same time you install the electronics board so that it fits into the grooves on the right and left leg. Don't forget the Electronics board cover you printed from the Ultimulti set. Once the right and left legs are installed, insert 4x M3 square nuts in to the inserts at the bottom of each leg. Use 4x M3x10 screws to mount the sliding legs that will fit the back plate you installed on the Community version base plate earlier. This is my first community share ever, so please bear with me if there is something completly wrong. I welcome all feedback.
Originally published on Printables


