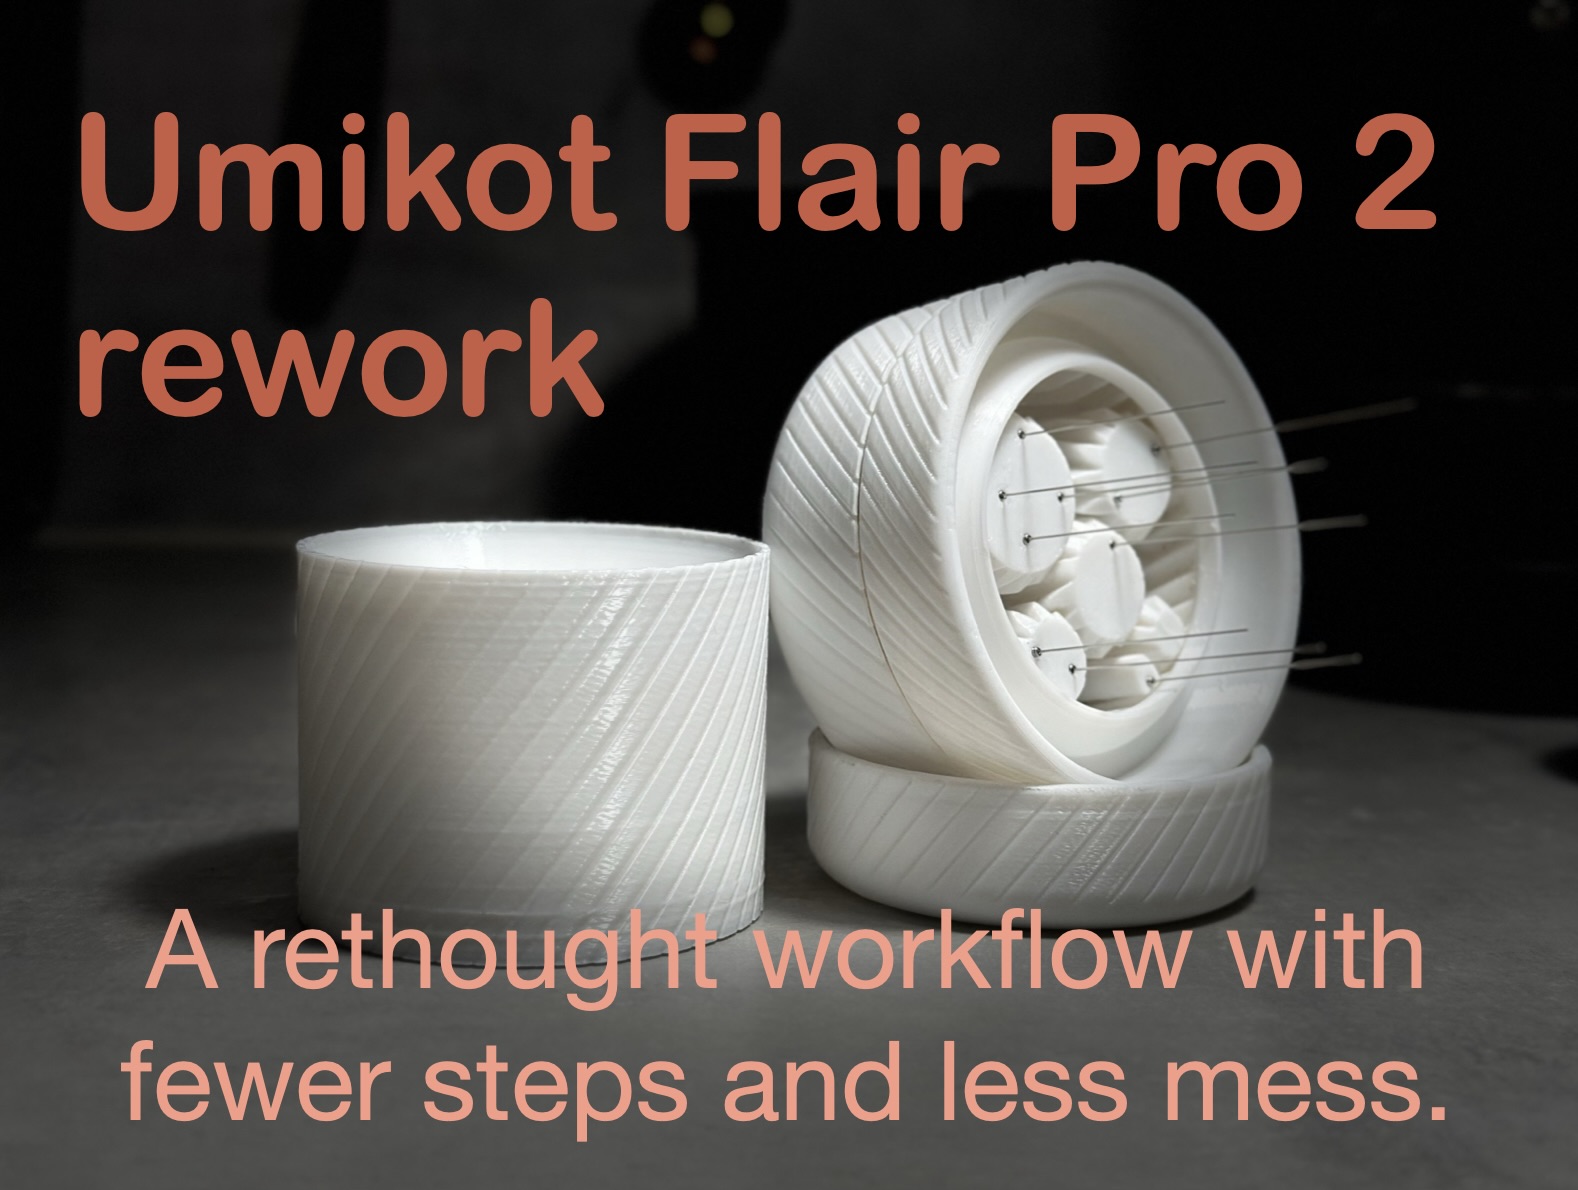
Umikot Flair Pro 2 rework (spirographic wdt tool) Umikot Flair Pro 3 rework
by 42 · via Printables
| Format | STL |
| Category | Home |
| License | CC BY-NC-SA |
| Triangles | 307.0k |
| Uploaded | Jan 17, 2026 |
⬇ 496 downloads
❤ 78 likes
👁 5.1k views
Description
This is a remix of the great Umikot by @redfoxdude https://www.printables.com/de/model/481587-umikot-58mm-version-planetary-gear-spirograph-espr (more remix information at the end). How to use: Use the printed funnel (base) and pour the coffee grounds into the portafilter, then give it a slight tap. Put the Umikot Flair Pro 2 rework on it and spin. Remove the Umikot Flair Pro 2 rework and give the portafilter with the funnel a slight tap if necessary. Remove the funnel and you're good to go Quick demonstration: What you need: (To get a better idea of what you need, watch the beginning of the assembling video) Filament: PETG ( or PLA, I recommend using PETG ) 5pcs: M3 x 12 NoCountersunk ( M3-0.5 x 12mm flat round head screws ) 10pcs: 0.35mm * 60mm acumpuncture needles with 20mm handles (I used 0.35 * 75 mm acupuncture needles from amazon, also called “Sterile Disposable Needle Beauty Massage Sterilization Needle for Pain Relief” and cut them ) with 35mm handles and cut them.) ASMR shot: How to print: I recommend printing all parts with (food safe) PETG, but at least the base (funnel), as it is more heat-resistant and PETG materials are easier to clean (otherwise you can use (food safe) PLA). Umikot Flair Pro 2 rework Funnel (Base): 0.12mm layers or finest layers you can print in good quality ( important for a smooth funnel experience and cleaning) 4 top/bottom layers (consider more if you have sticking and bending problems while printing) 2 walls (consider more if you have sticking and bending problems while printing) 11% gyroid minimum (consider higher for more heft!) No supports If you have sticking and bending problems slower your print speed and use the optimized brim Version (Umikot Flair Pro 2 rework Funnel (Base) - optimized brim) instead of the auto generated. Umikot Flair Pro 2 rework Spin Ring: 0.16mm layers Concentric top pattern 4 top/bottom layers (consider more if you have sticking and bending problems while printing) 2 walls (consider more if you have sticking and bending problems while printing) 11% gyroid minimum (consider higher for more heft!) No supports If you have sticking and bending problems slower your print speed and use the optimized brim Version (Umikot Flair Pro 2 rework Spin Ring - optimized brim) instead of the auto generated. Umikot Flair Pro 2 rework Mech: 0.16mm layers (turns much smoother than with 0.2mm layers) Concentric bottom pattern Random seam (for smoother turns) 4 top/bottom layers (consider more if you have sticking and bending problems while printing) 2 walls (consider more if you have sticking and bending problems while printing) 11% gyroid minimum (consider higher for more heft!) No supports Problems turning?: Simply turn a few times in all directions, this can help quite a bit. A few drops of neutral cooking oil can also help. (If all settings have been adopted, a calibration of the printer could also help - my mech came directly out of the printer (A1 mini) as shown in the video.) Other Parts (Handle, Stand): You can use a print profile which works fine on your printer but use 0.16mm layers to match the other parts. 0.16mm layers 4 top/bottom layers (consider more if you have sticking and bending problems while printing) 2 walls (consider more if you have sticking and bending problems while printing) 11% gyroid minimum (consider higher for more heft!) No supports If needed, use an auto generated brim for the Handle How to assemble: Watch the assembling guide video (How to assemble Umikot Flair Pro 2 rework) here: This video also shows typical problems that can occur during installation (I used a not optimal test print for that). 📷 Image redacted — claim this model to add your own media I sometimes experiment with a different number of needles, because with the small size of the basket, less may be more. Have fun and a nice cup of coffee! 📷 Image redacted — claim this model to add your own media This is a remix, the Original Model is “Umikot (58mm Version) - Planetary Gear Spirograph Espresso WDT Tool” by @redfoxdude and firstly adopted to the Flair Pro 2 by @Vert (Umikot for Flair Pro 2). This model is using parts of the mech and the spin ring. Umikot (58mm Version) @redfoxdude: https://www.printables.com/de/model/481587-umikot-58mm-version-planetary-gear-spirograph-espr Umikot for Flair Pro 2 @Vert: https://www.printables.com/de/model/588066-umikot-for-flair-pro-2 Umikot Flair Pro 2 Version 2 (my old version) @dubios: https://www.printables.com/de/model/640066-umikot-flair-pro-2-version-2-old-model
AI Analysis: This object is a reworked version of a spirographic tool designed for precision work, featuring a planetary gear mechanism. It is intended for use in crafting or engineering tasks where precise rotational movements are required. The design includes a cylindrical structure with internal components that facilitate smooth operation and reduced mess.
Originally published on Printables


