Voxel Brick Generator (Lego Style)
by my0ps · via Printables
| Format | STL |
| Category | Art |
| License | CC BY |
| Triangles | 141.2k |
| Uploaded | Jan 31, 2026 |
⬇ 7 downloads
❤ 1 likes
👁 50 views
Description
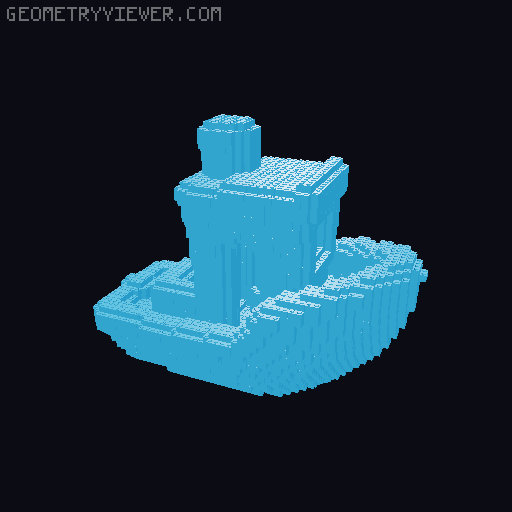
# 🧱 FreeCAD Voxelizer Script – Turn any STL into Bricks! (Deutsche Beschreibung unten / German description below) --- ## 🇬🇧 English Description This Python script for FreeCAD allows you to convert any STL file into a pixelated Voxel-Art sculpture or a realistic "Building Block" (Lego-style) model. Unlike standard voxelizers, this script uses a custom binary STL streaming approach . This means it bypasses FreeCAD's internal memory limits, allowing you to generate massive models (100k+ bricks) even on laptops with 8GB RAM without crashing. ### ✨ Key Features * High Performance: Writes binary STL data directly to your disk. Zero RAM bottlenecks. * Watertight Geometry: Generates fully closed geometry (merged bricks + solid studs) that makes slicers happy (0 open edges). * Greedy Meshing: Intelligent algorithm merges individual voxels into larger bricks (e.g., combining four 1x1 blocks into a 1x4 brick) for faster printing and better stability. * Hollow Shell: Only voxelizes the surface of your model to save filament. * Brick Mode: Automatically places studs (knobs) on top of exposed bricks. ### 🚀 How to use (Workflow) 1. Download the .py script provided in the files section. 2. Open FreeCAD (Version 0.20 or newer recommended). 3. Import your STL file into FreeCAD File -> Import... ). 4. Open the Macro Manager: Macro -> Macros... . 5. Click Create , paste the script code, and save it (e.g., as "LegoVoxelizer"). * Alternatively: Copy the downloaded .py file into your FreeCAD Macros folder directly. 6. Select the macro in the list and click Execute . 7. Done! The result WatertightLego_...stl will be saved in a new Output folder located in the same directory where the macro file is saved . ### ⚙ Configuration (Tuning) At the very top of the script, you can edit the CONFIG dictionary to change the look of your model: * target_voxel_count : Target number of bricks. Lower (e.g., 5000) = blockier/abstract look. Higher (e.g., 50000) = high detail. * min_voxel_size_mm : Minimum size of a single block edge in mm. * lego_mode_enabled : Set to True for studs, False for smooth cubes (Minecraft style). * merge_bricks : Set to True to combine small blocks into long bricks (highly recommended!). * gap_size_mm : The gap between bricks (e.g., 0.08mm). Set to 0 for a solid wall. ### ⚠ Tips for Printing * Scale: If you want "Real Life" Lego size bricks (8mm), you must scale up your STL model by factor 3-5x before running the script, otherwise you will only get a few blocks. * Infill: 10-15% is usually enough. * Supports: Not needed for most models due to the blocky nature (overhangs are usually 90°, which printers handle well). --- ## 🇩🇪 Deutsche Beschreibung Dieses Python-Script für FreeCAD verwandelt jede beliebige STL-Datei in eine Voxel-Skulptur oder ein Modell aus Klemmbausteinen. Im Gegensatz zu normalen Voxelizern nutzt dieses Script einen direkten binären STL-Stream . Das umgeht die Speicherlimits von FreeCAD komplett und erlaubt das Erstellen riesiger Modelle (über 100.000 Steine), selbst auf Laptops mit wenig Arbeitsspeicher, ohne abzustürzen. ### ✨ Hauptfunktionen * High Performance: Schreibt die Daten direkt auf die Festplatte. Kein RAM-Limit. * Watertight (Wasserdicht): Erzeugt geschlossene Geometrie (Boden, Deckel, Noppen), sodass Slicer keine "Open Edges" melden. * Greedy Meshing: Ein intelligenter Algorithmus fasst einzelne Voxel zu großen Steinen zusammen (z.B. werden vier 1x1 zu einem 1x4 Stein). Das spart Druckzeit und sieht realistischer aus. * Hohle Schale: Voxelisiert nur die Oberfläche ("Shell"), um Filament zu sparen. * Lego-Modus: Platziert automatisch Noppen auf freiliegenden Oberseiten. ### 🚀 Anleitung (Workflow) 1. Lade das .py Script aus den Dateien herunter. 2. Öffne FreeCAD (Version 0.20 oder neuer empfohlen). 3. Importiere deine STL-Datei in FreeCAD Datei -> Importieren... ). 4. Öffne den Makro-Manager: Makro -> Makros... . 5. Klicke auf Erstellen , füge den Code ein und speichere ihn (z.B. als "LegoVoxelizer"). * Alternativ: Kopiere die heruntergeladene .py Datei direkt in deinen FreeCAD Makro-Ordner. 6. Wähle das Makro in der Liste aus und klicke auf Ausführen . 7. Fertig! Das Ergebnis findest du in einem neuen Ordner Output , der im gleichen Verzeichnis liegt, in dem die Makro-Datei gespeichert wurde . ### ⚙ Einstellungen (Config) Ganz oben im Script findest du den CONFIG Bereich, um das Ergebnis anzupassen: * target_voxel_count : Anzahl der Steine. Weniger (z.B. 5000) = klotziger Look. Mehr (z.B. 50000) = feine Details. * min_voxel_size_mm : Mindestgröße eines Steins in mm. * lego_mode_enabled : True für Noppen, False für glatte Würfel (Minecraft-Stil). * merge_bricks : True aktiviert das Zusammenfassen von Steinen (empfohlen!). * gap_size_mm : Die Fuge zwischen den Steinen (z.B. 0.08mm). ### ⚠ Druck-Tipps * Skalierung: Wenn du echte Lego-Größe (8mm Steine) willst, musst du dein STL-Modell vor dem Ausführen des Skripts um den Faktor 3-5 vergrößern. * Infill: 10-15% reicht meistens völlig aus. * Supports: Aufgrund der Würfelform meistens nicht nötig (Brücken funktionieren gut). --- Credits: Developed with the help of an AI Co-Pilot to solve memory constraint issues in FreeCAD.
Originally published on Printables


