Yeeeeethammer (High Power Nerf Yeethammer)
by Astropulse · via Printables
| Format | STL |
| Category | Other |
| License | CC BY-NC-SA |
| Triangles | 112.0k |
| Uploaded | Jul 18, 2025 |
⬇ 329 downloads
❤ 311 likes
👁 6.0k views
Description
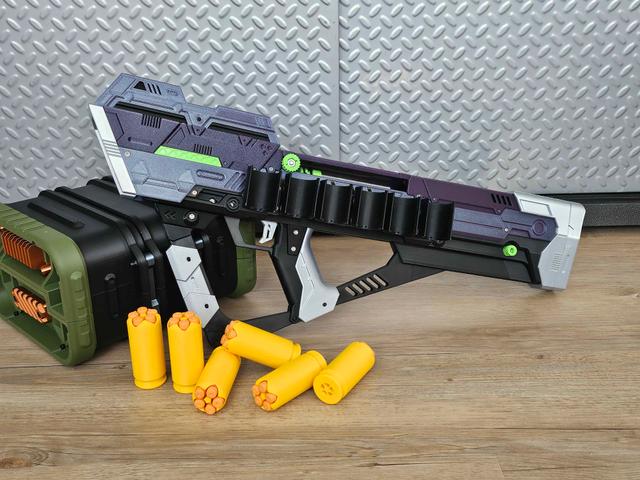
I absolutely love the Yeethammer. It was the first large 3D printed nerf project I assembled, and it almost single-handedly got me into the hobby. As I've built more things I decided to give this incredible silly shell launching machine an upgrade. 📷 Image redacted — claim this model to add your own media The Yeeeeethammer Let me show you its features Loooong (3.8" longer stock). Nearly 1.5x more air volume. Fits twice as long of a spring (full length K25). Trigger locked when the bolt is pulled back. Yeethammer, but more yeet, and more hammer. Yeeter-hammerer. Performance numbers on different shells at the bottom of the page! This thing packs a hell of a punch, and can forcefully launch every kind of silly shell I've put in it, including 8x half darts and 10x half darts. Honestly I don't think a silly shell exists that would be a challenge for this to fire at high speed. Someone please make one. Even better, assembling it from an already built Yeethammer is simple. While it's not “quick”, you don't need to disassemble any of the more complex mechanisms, as all of the modified parts essentially get dropped into the middle of the blaster, and don't require changes to the breach or the catch mechanism. It even only adds three parts to the previous design, splitting the printed bars in half, and adding a trigger lock to help prevent misfires. This thing runs awesome with long 3x elite shells that fit 12x half darts: https://www.printables.com/model/1216270-long-3x-elite-silly-shells-up-to-12-half-darts Hardware These are the only additional parts you'll need to build a Yeeeeethammer if you already have a Yeethammer kit: Caliburn / PBR Bow Plunger Tube: 1.5"-OD 1.375"-ID 7.31"-L K25 (or SF25) Compression Spring: Full size 11" (Recommended), or 7.5" (Low power, use short plunger guide) Besides that, this requires the same hardware as the original Yeethammer , though if you are upgrading an existing build you might need more of these (they are hard/impossible to remove from already built kits): 7x Round Rare Earth Magnets: 6mm-Dia 3mm-H 3x M3x25mm Cylinder Head Bolts 5x M3 Nuts 1x Dash 123 O-Ring It is highly recommended to also print the bolt-reinforced cam track and the bolt-reinforced breach lifter . They will need: 2x M3x6 Cylinder Head Bolts 2x M3x8 Cylinder Head Bolts If you decide to use the side shell holder, per-side you will need: 2x M3x16 Cylinder Head Bolts For every silly shell clip you will need: +2x M3x16 Cylinder Head Bolts +2x M3 Nuts P.S. In the pics I'm using the awesome Yeethammer Sights by Bruce Leedlee installed backwards because I like them that way. Printing Keep in mind, with the additional spring load your Yeeeeethammer will be experiencing forces the original parts were not designed for. I recommend printing everything a bit tougher than the regular Yeethammer specs, and sticking to materials like PLA, PLA+, and PETG, or stronger. Print settings for all the parts here are the same as the original counterparts. 4 walls, 20% infill for everything except: 5 walls 100% infill for printed bars, plunger rod, and cam tracks. No parts should need supports if you printer can do okay overhangs. Assembly For the most part, assembly is exactly the same as the parts on the regular Yeethammer, just with loooong parts. I recommend following this guide: https://docs.google.com/document/d/1cByxfHnM810epkkswrh-Hbg4_-HBgRoE5JIWfnH7JF8/edit?tab=t.0 The bars are printed in two parts, since they are too long to fit on most printers now. Take the two halves (fore and aft) and some superglue. 📷 Image redacted — claim this model to add your own media Glue like this, and line up the ends: 📷 Image redacted — claim this model to add your own media The pin and hole connection will be loose, this is intentional. The glue is the attachment infrastructure here, not the pins. Press the two halves of the bar together as tightly as you can while gluing. 📷 Image redacted — claim this model to add your own media There is one other difference, this version comes with a trigger lock when the bolt is in the back position. This is important, because this version also easily has enough spring power to explode itself if you accidentally fire it with the breach open. The trigger lock doesn't make it idiot proof, but you are significantly less likely to fire it on accident. Just press the “trigger-lock” into the “body-pt-guide-fore-reinforced-trigger-lock” like this: 📷 Image redacted — claim this model to add your own media You may need to shave the sides of the lock or sand it depending on print tolerances, it should be a press fit. It will take a little bit of force to push this assembly over the lump at the end of the “trigger-aft-lock”, but it does fit so just give it a nice firm press and it will clear. Performance If you build one of these, and you've got a chrono, send some numbers with different shells! I'd love to know how this stacks up against other silly shells that I didn't test. Shell typeHalf dart FPSFull dart FPSMXL (Rifled)71 Mega (Rifled)94 Sniper shell (10" long 0.509" ID alu)246253 (Elite darts are thick)Bottlenose (8" rifled)2072002x Elite85963x Elite80894x Elite7183 5x Elite 5862 6x Elite (Stacked) 83 (That's 12 darts)97
Originally published on Printables


